6 dip switch settings, 7 multiplexer configuration, Caution – Inter-M HDCC-400 User Manual
Page 13
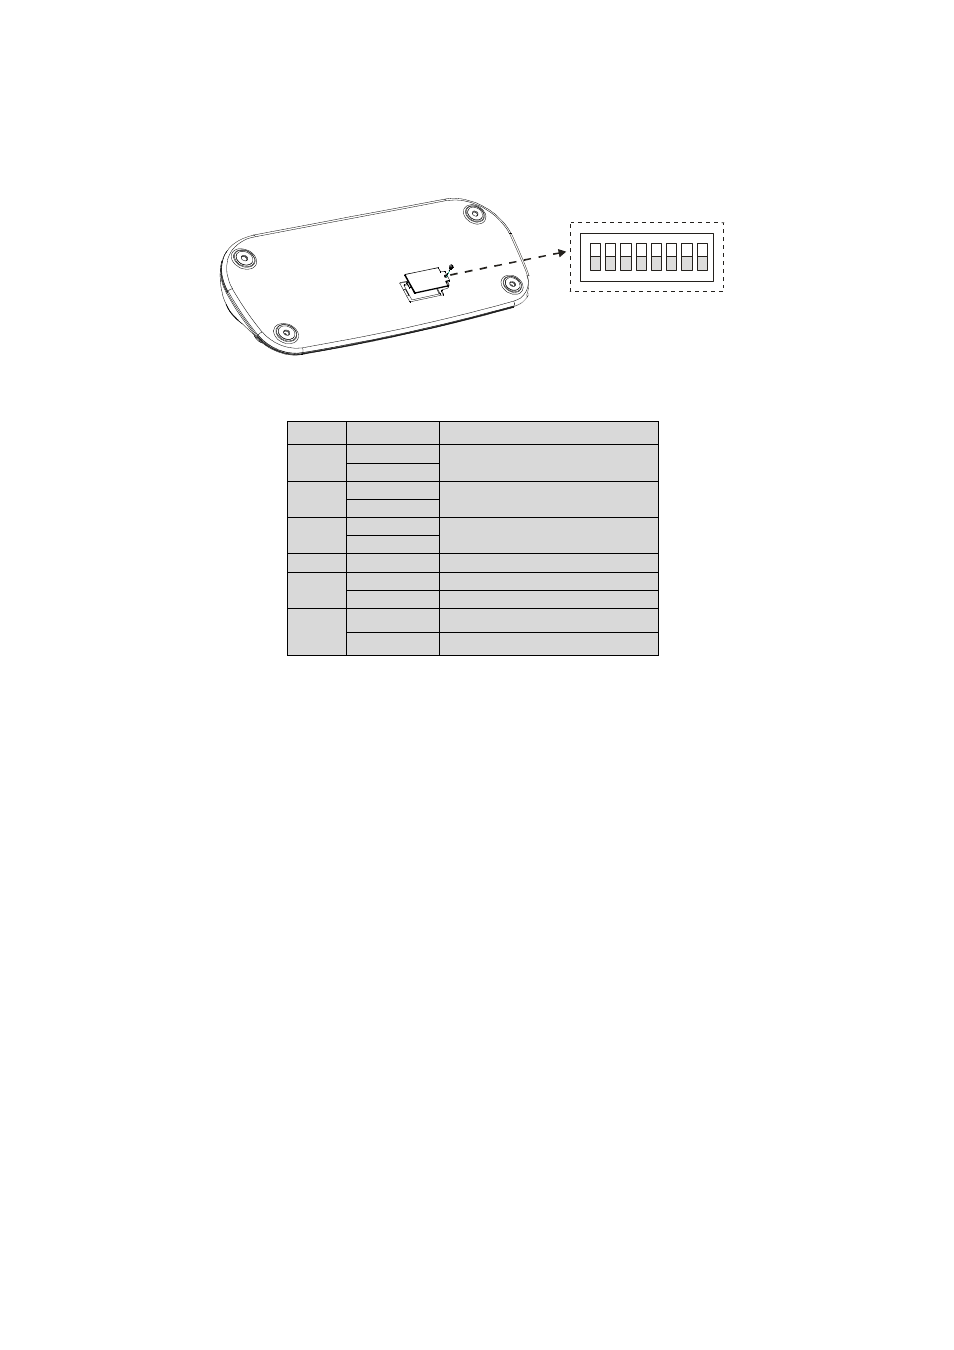
2.6 Dip Switch Settings.
Termination and Master/Slave: Set the switches according to your configuration.
ON
9J
S1
1
2
3
4
5
6
7
8
Figure 7 – Keyboard DIP Switches
NO
SETTING
DESCRIPTION
1
ON
DOME1 Termination
OFF
2
ON
DOME2 Termination
OFF
3
ON
J-BOX Data2 Termination
OFF
4~6
OFF
Reserved
7
ON
DOWNLOAD ON
OFF
DOWNLOAD OFF
8
ON
SLAVE
OFF
MASTER
Table 1 - S1 Switch Setting
2.7 Multiplexer Configuration
Duplex setup:
NOTE:
Multiplexers to be controlled by the keyboard controller require a new ROM version. The new
multiplexer ROM accepts control instructions from the keyboard controller. If your multiplexer’s serial number
is M104xxxx or higher, then it is ready to accept control instructions. Alternately, you can check the status of
your multiplexer by pressing the Menu key of the multiplexer and then selecting item 9. If you see the “**
Protocol” option line in the Communication Setup menu, your multiplexer has the new ROM, and you do not
need to replace the ROM. If your multiplexer has the old ROM version, contact your distributor on how to get
new a ROM.
CAUTION:
Before opening the multiplexer, make certain you are working on an antistatic work surface
and that you are wearing a grounding wrist strap. Also, be very careful to orient the ROM
chip correctly and not bend any of the pins.
NOTE: Replace the multiplexer firmware with the new multiplexer ROM (U45) as follows;
Remove the top cover of the multiplexer, and locate the ROM (U45). Before removing the ROM,
note the orientation of the ROM. After removing the old ROM from the socket, insert the new ROM.
Be careful to orient the new ROM the same as the old ROM.
(Refer to the Multiplexer instruction manual.)