HTP CG300N65 User Manual
Page 16
16
LP-436 REV. 3.21.14
damaged when received, immediately call HTP, Inc. customer service. If instructed to replace any of the original wiring, use only 18
AWG type or greater wire approved for 221
o
F (105
o
C).
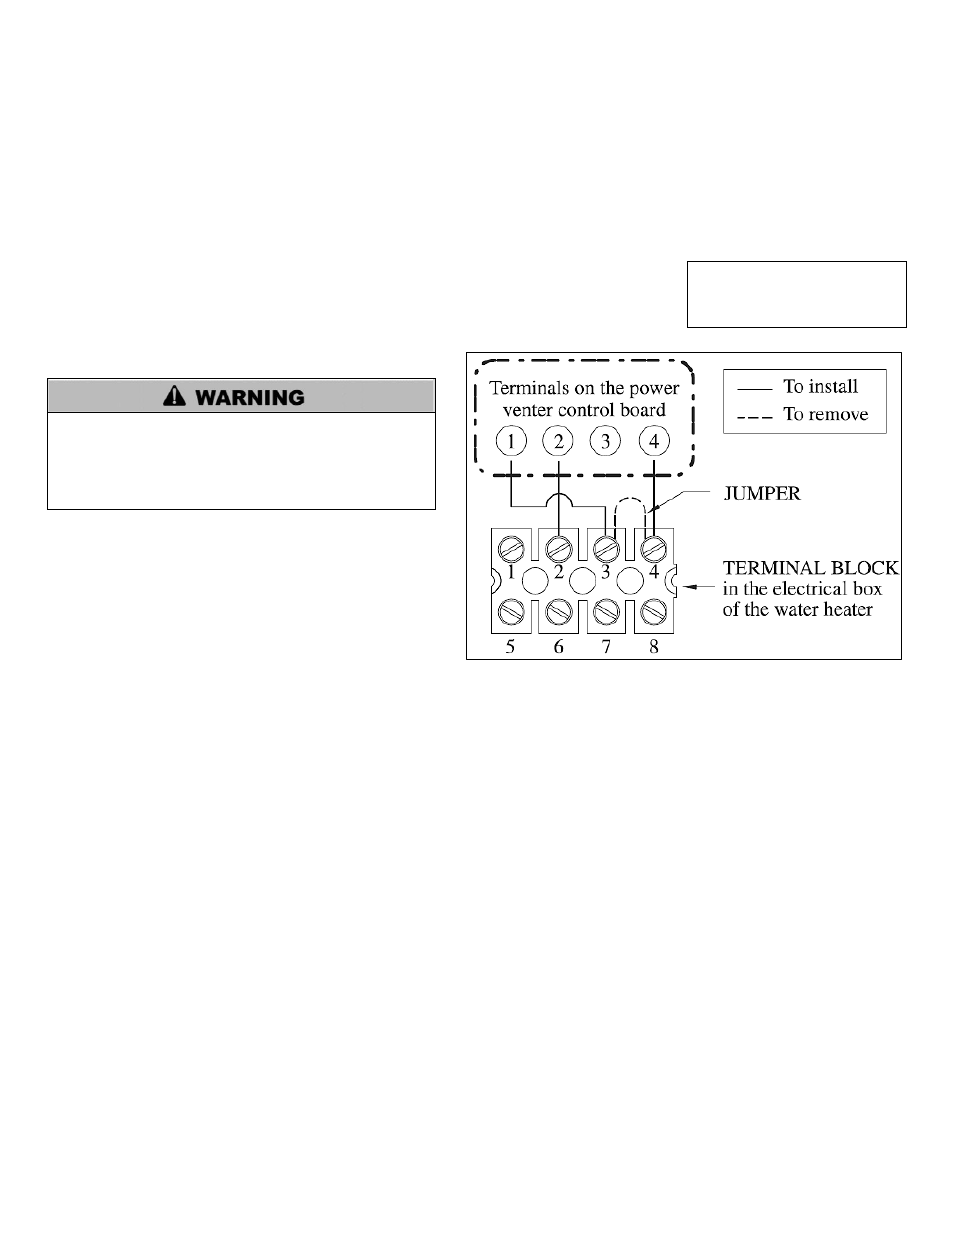
If you are installing a side wall power vent kit, use the following instructions to connect the power venter to the water heater. See
Figures 11 and 12.
1. In the electrical box of the water heater, remove the jumper between positions 3 and 4 on the terminal block.
2. Install the wires from the power venter control board to the positions on the terminal block in the electrical box of the water
heater.
If the power venter has been bought through a wholesaler, some settings need to be changed on the control board before putting the
water heater into operation. The voltage needs to be set at 24 Volts. This can be done by moving the red voltage jumper on the 24V
prongs. For detailed instructions on how to adjust the power vent settings, consult the Owner’s
Manual that comes with the Tjernlund Power Venter.
If the power venter has been bought directly from HTP, the settings have been factory adjusted to
match the specifications of the water heater. A label will be affixed on the box stating that it was
factory adjusted to HTP commercial gas water heater specifications.
If the water heater requires servicing, label all wires prior to
disconnecting. Verify all wiring connections before
relighting the water heater. Wiring errors can result in
property damage, personal injury, or death. Damages to
this product due to improper wiring ARE NOT covered
under warranty.
Settings on Power Venter
Voltage: 24 Volts
Pre-purge: 0 sec.
Post-Purge: 2 min.
Figure 11
– Wiring Power Vent Kit Detail