Harrington Hoists and Cranes (N)ER Load Limiter - ((N)ER2) User Manual
Page 22
22
4.3
Adjust the Load Limiter
4.3.1
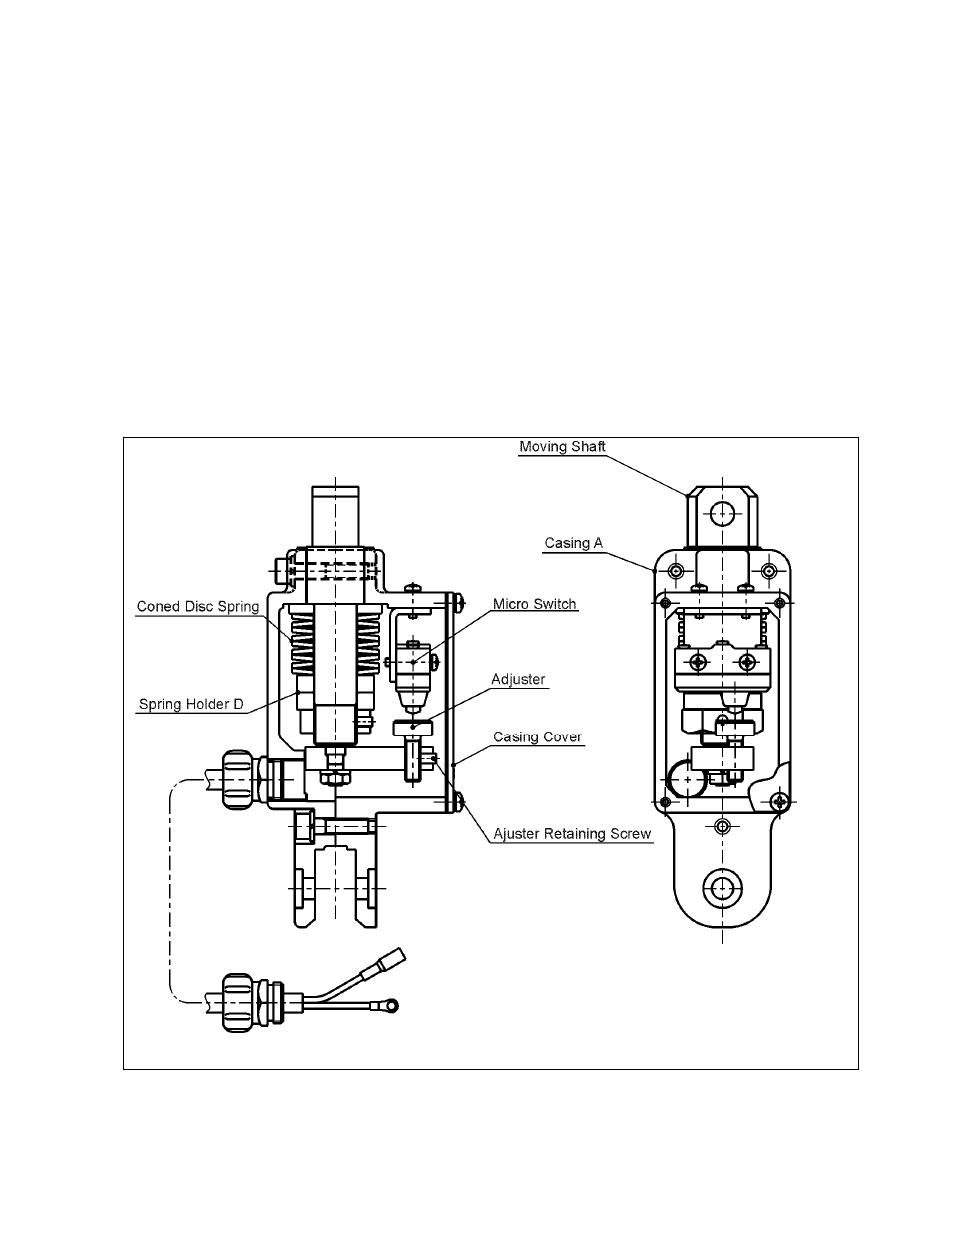
Refer to Figure 4-1.
4.3.2
Remove the LL’s case cover.
4.3.3
Loosen the setscrew with a hex wrench and Rotate the adjuster clockwise to obtain a sufficient gap
between the adjuster and the electrical switch plunger.
4.3.4
Apply the Static Set Load determined in section 4.2 above.
4.3.5
Rotate the adjuster counter clockwise until the electrical switch is activated or clicks to make contact. A
circuit tester may be used to verify the making of contact.
4.3.6
Tighten the setscrew to lock the adjuster to the plunger arm.
4.3.7
Test the LL setting. Place a test load equivalent to the Set Point Load (RC X SP) on the floor directly
beneath the hoist. Connect the load to the hoist’s bottom hook such that there is no slackness in the hoist’s
load chain. Operate the hoist in the up direction to verify that the Load Limiter actuates and prevents the
hoist from lifting the load. Readjust if necessary.
4.3.8
Replace the casing cover.
Figure 4-1 LL Parts Overview