Quick start guide for harmoni g3 – Sonnet Technologies HARMONi G3 Processor Upgrade Card User Manual
Page 8
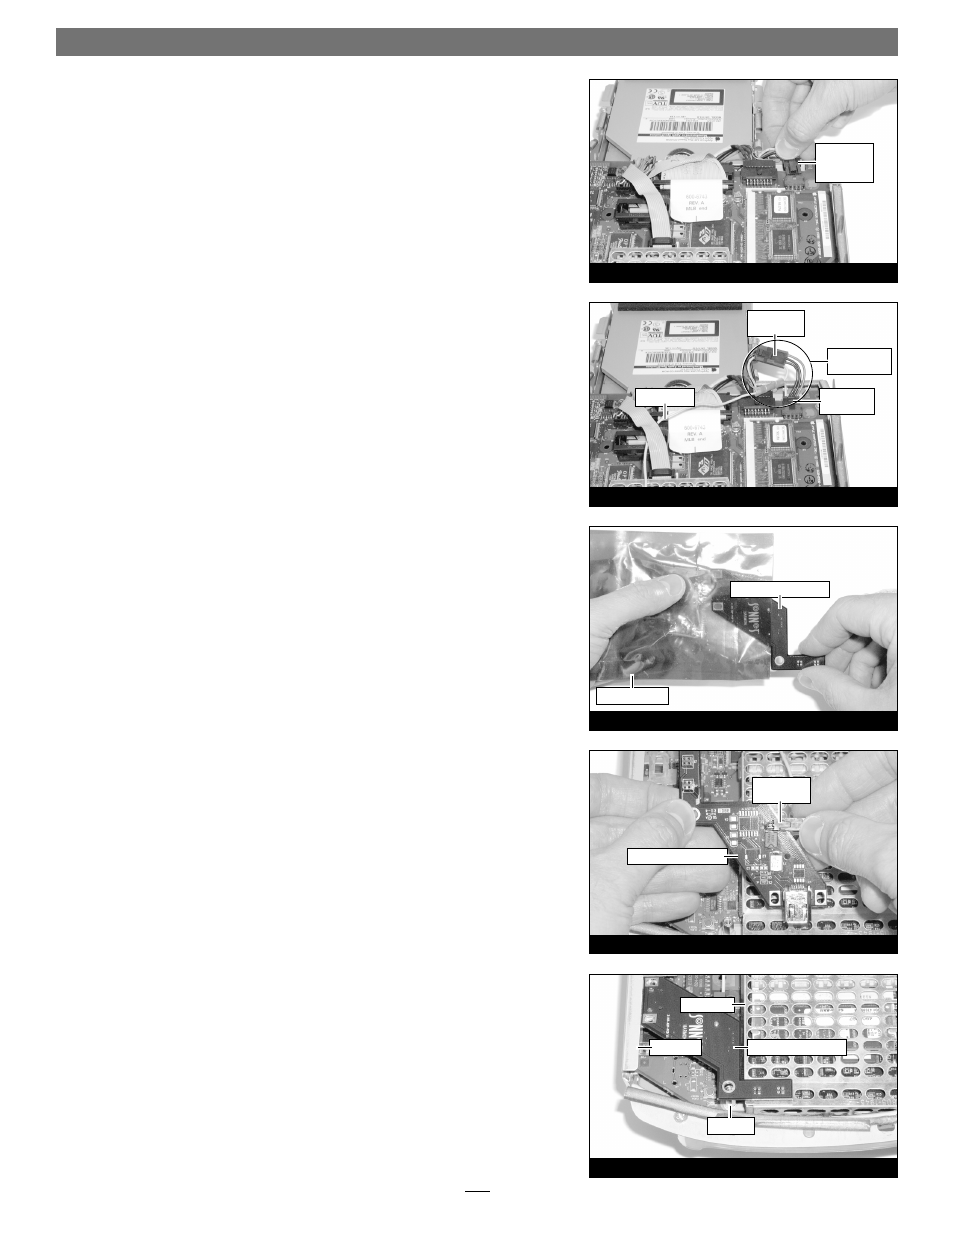
5. Locate the 4-pin connector at the upper right corner of the logic board
(Figure 26). Press in its locking tab, and disconnect the connector by pulling
it straight out.
6. Plug in the included adapter card power cable’s 4-pin connectors between
the logic board and the loose 4-pin connector (Figure 27). Verify the con-
nectors are plugged in securely.
7. Tuck the 4-pin connectors beneath the logic board. If your iMac has a cable
running across the logic board, route the yellow wire beneath it (Figure 27).
8. Remove the HARMONi FireWire adapter card from its anti-static package,
making sure to handle the card by its edges (Figure 28).
9. Plug in the 2-pin connector at the end of the yellow wire to the adapter
card’s 2-pin connector (Figure 29). Verify the connector is plugged in
securely.
10. Using the screw holes to align it, set the adapter card on top of the side
plate’s brackets and the support standoff (Figure 30); the small connectors
on the bottom of the adapter card should fit through the slots on the proces-
sor card shield.
Quick Start Guide for HARMONi G3
8
Figure 30
Figure 29
Figure 27
Figure 28
Figure 26
4-pin
connector
(press tab)
4-pin
connectors
2-pin
connectors
yellow wire
anti-static bag
standoff
FireWire adapter card
FireWire adapter card
FireWire adapter card
top shield
side plate
4-pin
connector
adapter card
power cable