Quick start guide for harmoni g3, Install the harmoni processor card – Sonnet Technologies HARMONi G3 Processor Upgrade Card User Manual
Page 6
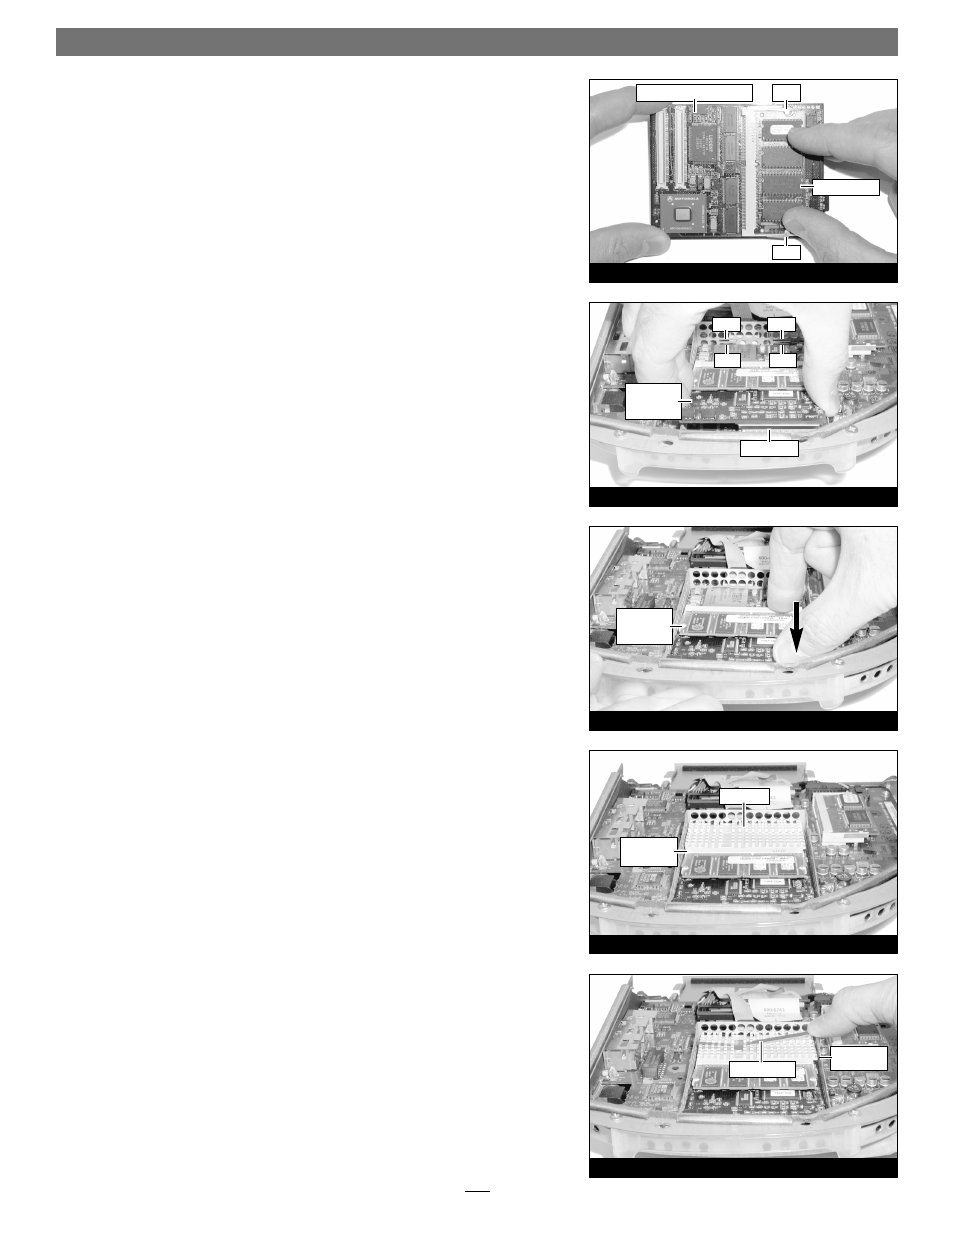
4. Gently push down on the RAM module until the retainer clips snap into
place (Figure 16).
5. If there is a second RAM module installed on the reverse side of the processor
card, remove it, then install it on the HARMONi processor card following the
same procedure as for the first RAM module.
6. Place the original processor card in the HARMONi processor card’s anti-static
bag, and store it in a safe place.
Install the HARMONi Processor Card
1. Turn the HARMONi processor card so that the small 4-pin connectors are
face up, and the tabs on the edge of the card are facing away from you
(Figure 17). Grasping the card by its edges, carefully insert its tabs into the
slots in the processor card shield, then gently move the card around until the
connectors on the bottom of the card engage with the corresponding con-
nectors on the logic board (Figure 17).
2. Firmly press on the bottom right portion of the HARMONi processor card
until the connectors are completely coupled (Figure 18).
3. With the two small sections of fins on the left, place and center the heatsink
on top of the HARMONi processor card, above the DIMM slot connector
(Figure 19).
4. Insert the short side of the heat sink clip into the slot in the processor card
shield, lay the clip across the heat sink, then push the clip down on the right
side to latch onto the processor card shield (Figure 20).
Quick Start Guide for HARMONi G3
6
Figure 20
Figure 19
Figure 17
Figure 18
Figure 16
RAM module
DIMM slot
connector
connectors
clip
clip
tab
tab
slot
slot
HARMONi processor card
HARMONi
processor
card
HARMONi
processor
card
heat sink
processor
card shield
heat sink clip