Quick start guide for tempo sata x4i – Sonnet Technologies Tempo SATA X4i Serial ATA Host Adapter Card User Manual
Page 6
Quick Start Guide for Tempo SATA X4i
Drive Formatting—RAID Sets (continued)
3. Select one of the drives you want to format in a RAID set by clicking the
drive symbol or the “name” of the drive. At the bottom of the window,
drive capacity, connection type, and connection ID information are listed.
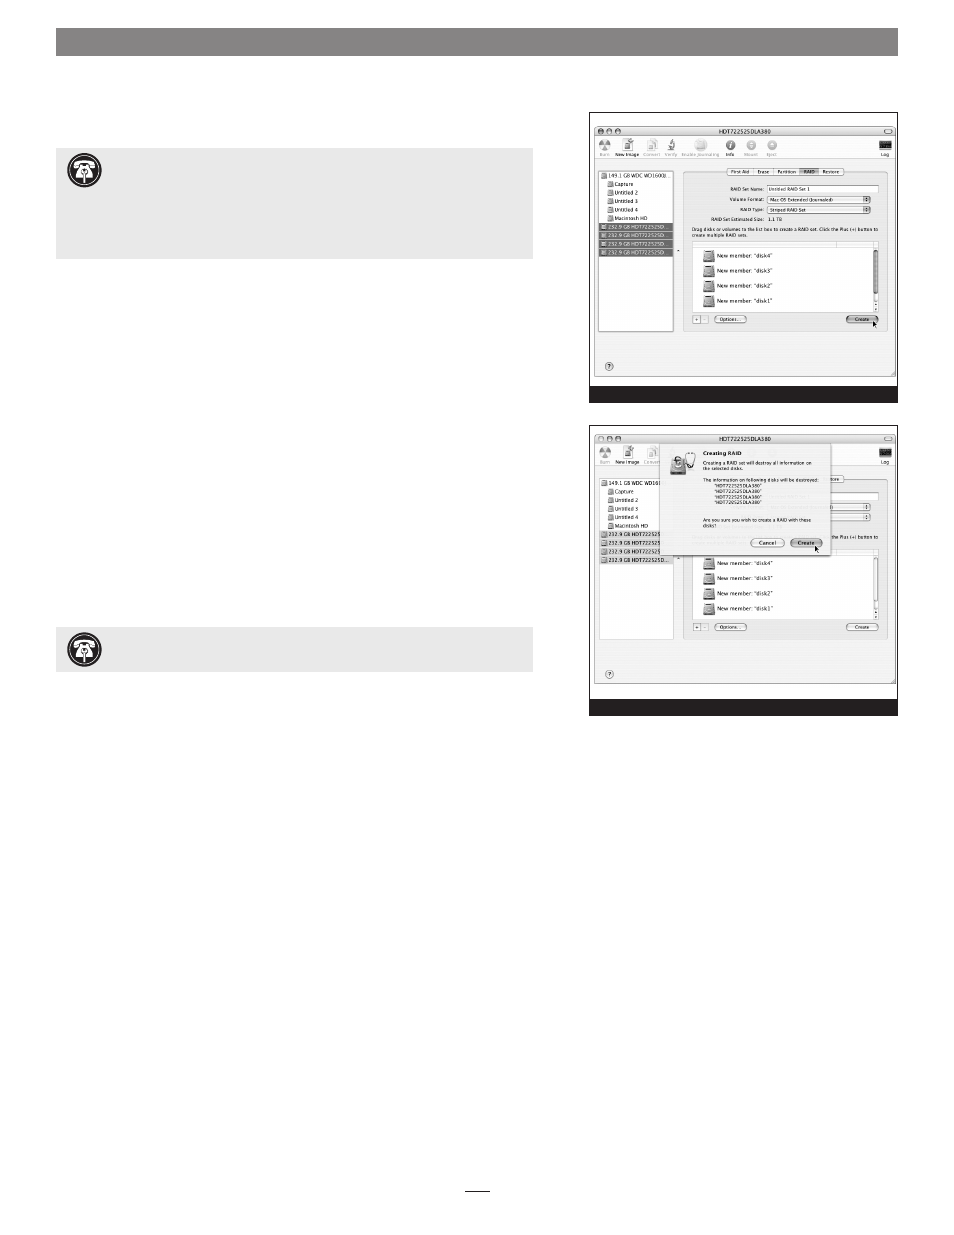
4. Click the RAID tab in the Disk Utility window, select all the drives you
will use to create your striped RAID set, and drag them into the disk field
(Figure 10). Be careful NOT to accidentally drag in a drive you don’t
want included in the RAID.
5. From the drop-down menus, select the volume format and the RAID
scheme (Striped RAID Set), and then type in the name for your RAID set
(Figure 10). Click the Create button.
6. When the Creating RAID window appears, click the Create button; all of
the selected drives will be formatted and the RAID set created
(Figure 11).
Close Disk Utility; your drives are now ready for use and your installation
is complete.
Figure 10
Figure 11
Support Notes:
The remaining steps in this section describe the creation
of a RAID 0 (striped) set. If you intend to create a RAID 1 (mirrored) or
RAID 10 (striped/mirrored) set, the procedure is similar to the remaining steps.
Please refer to Disk Utility help for further information.
All hard drives connected to the Tempo card will be described by Disk Utility as
having an internal connection.
Support Note:
See page 7 for port identification and information on
Tempo SATA X4i’s status LEDs.