Quick start guide for tempo sata x4i – Sonnet Technologies Tempo SATA X4i Serial ATA Host Adapter Card User Manual
Page 4
4
Mac OS X Drive Formatting—Individual Drives (Not in a RAID Set)
This section describes the process of formatting (initializing) individual hard
drives connected to the Tempo SATA X4i using Disk Utility under Mac OS X
Version 10.4. If you intend to create a RAID set with the drives attached to the
Tempo card, skip to “Mac OS X Drive Formatting—RAID Sets” on the next page.
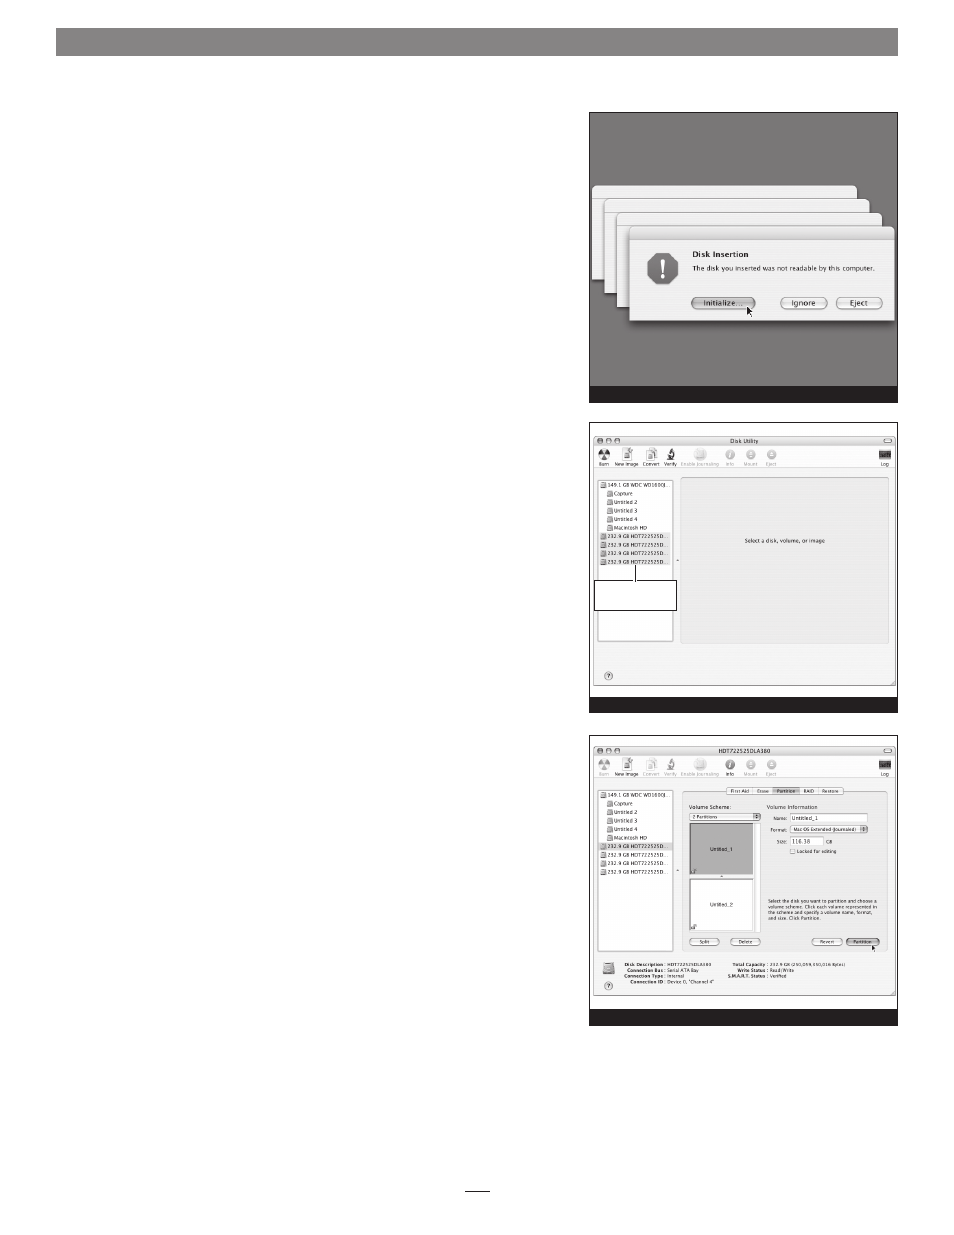
1. Turn on your computer. During startup, your computer will display one or
more messages referring to an unreadable disk; click Initialize… to launch
Disk Utility
(Figure 4). After Disk Utility launches, click the Initialize but-
ton in each remaining message window.
2. If it is not already open, launch Disk Utility (Figure 5). Note that all
attached drives appear in the information window, regardless of being for-
matted or not.
3. Select a drive you want to format by clicking the drive symbol or the
“name” of the drive
(Figure 6). At the bottom of the window, drive capac-
ity, connection type, and connection ID information are listed.
4. Click on the Partition button (Figure 6). Click on the drop down menu
beneath “Volume Scheme:” and select a number of partitions for the vol-
ume; you may optionally choose to partition each drive to create two or
more smaller “virtual” drives.
5. Click to highlight a partition, and then type a name in the Name field;
repeat for each partition
(Figure 6). After formatting, each partition will
appear in the Finder window as a drive*.
6. Click Partition (Figure 6).
* If you changed the Finder preferences setting to not show hard drives on the desktop,
newly-formatted drives won’t appear on the desktop after you’ve formatted them.
Figure 4
Figure 5
Quick Start Guide for Tempo SATA X4i
Figure 6
drives connected
to Tempo card