Quick start guide for tempo sata x4i, Installation preparation, Hardware installation steps – Sonnet Technologies Tempo SATA X4i Serial ATA Host Adapter Card User Manual
Page 2
Quick Start Guide for Tempo SATA X4i
Installation Preparation
Prior to installing the Tempo SATA X4i into your system and connecting any
hard drives, you should familiarize yourself with the parts to be installed. We
also strongly recommend that you read the sections in your computer’s user
manual that address hard drive and PCI card installation.
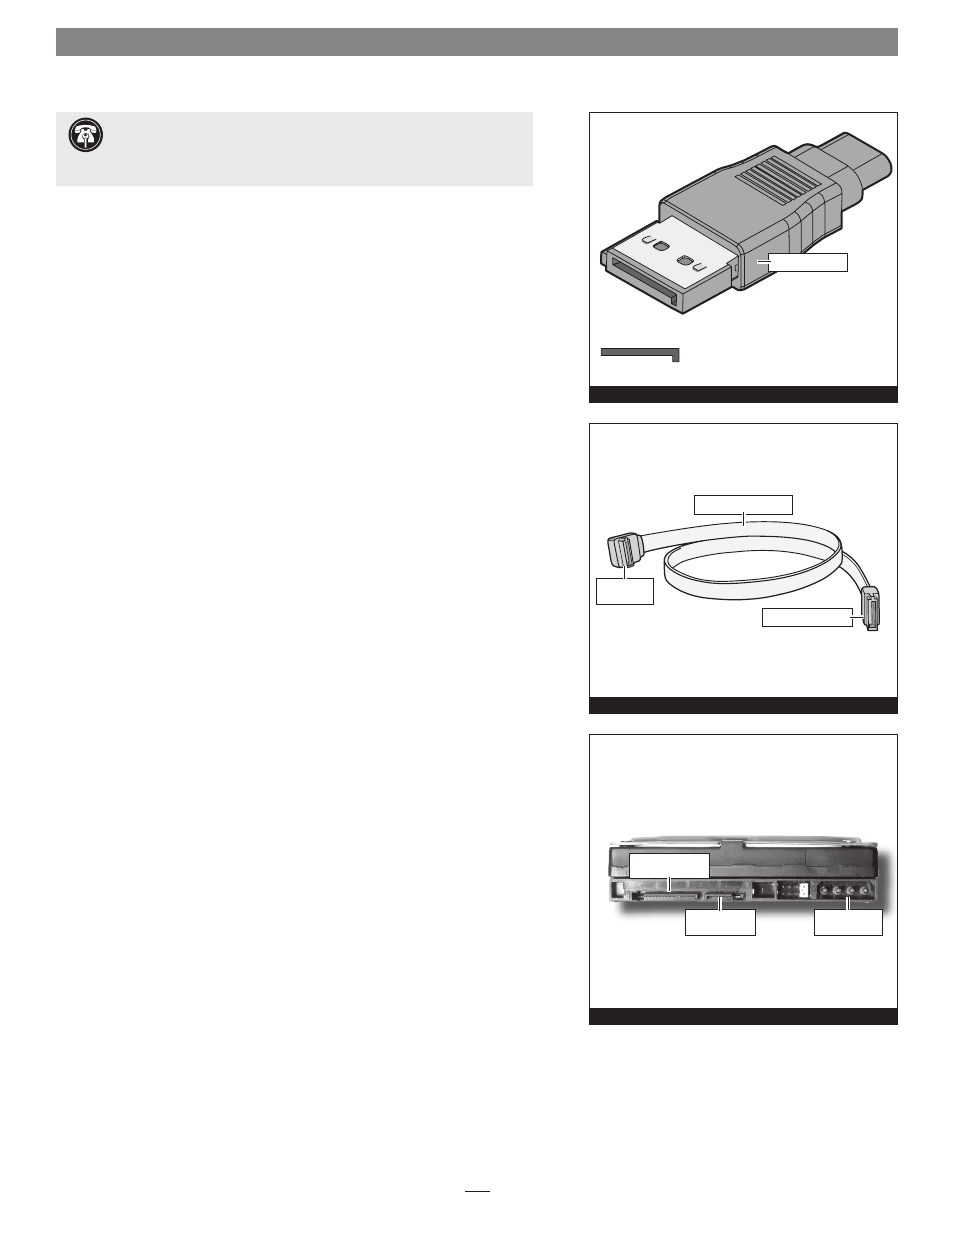
1. The Tempo SATA X4i card uses internal Serial ATA (SATA) data cable con-
nectors. The internal connectors have an L-shaped “key” in the center
(Figure 1).
2. Figure 2 illustrates the internal Serial ATA data cable included with the
Tempo card; plug the straight connector into the Tempo card.
3. Locate the connector block on your drive. Many Serial ATA drives are
equipped with both a legacy 4-pin power connector and a Serial ATA 15-
pin power connector
(Figure 3). Depending on your computer, you may
need to use 4-pin to 15-pin power adapter cables.
Hardware Installation Steps
This section covers the installation of the Tempo SATA X4i into your system
and connection of one or more hard drives.
1. Shut down the computer.
2. Open your computer to access its expansion card area (PCI-X or PCI slots);
refer to your computer’s user manual for specific information.
3. Install your hard drives now. (Depending on your computer model, drive
mounting hardware may be required to secure your hard drives. Refer to
your computer’s user manual.)
4. Plug the SATA data cables’ right angle connectors into your drives; verify
the connectors are plugged in securely. (If you are connecting more
than one drive, you will need additional SATA data cables.)
Figure 1
Support Note:
Technical knowledge may be required to gain access to
the computer’s expansion bays in certain computers. We recommend
you first consult your computer’s user manual. If you feel you are unable to
install the computer hardware, contact a qualified technician.
Figure 2
Serial ATA data cable
right angle
connector
straight connector
Figure 3
Serial ATA power
connector
Serial ATA data
connector
legacy power
connector
SATA connector