Acer P1166 User Manual
Page 79
Confidential
4-13
P1166 / P1266 / P1266i / P1166P / P1266P
4-12 LAN and Wireless Function
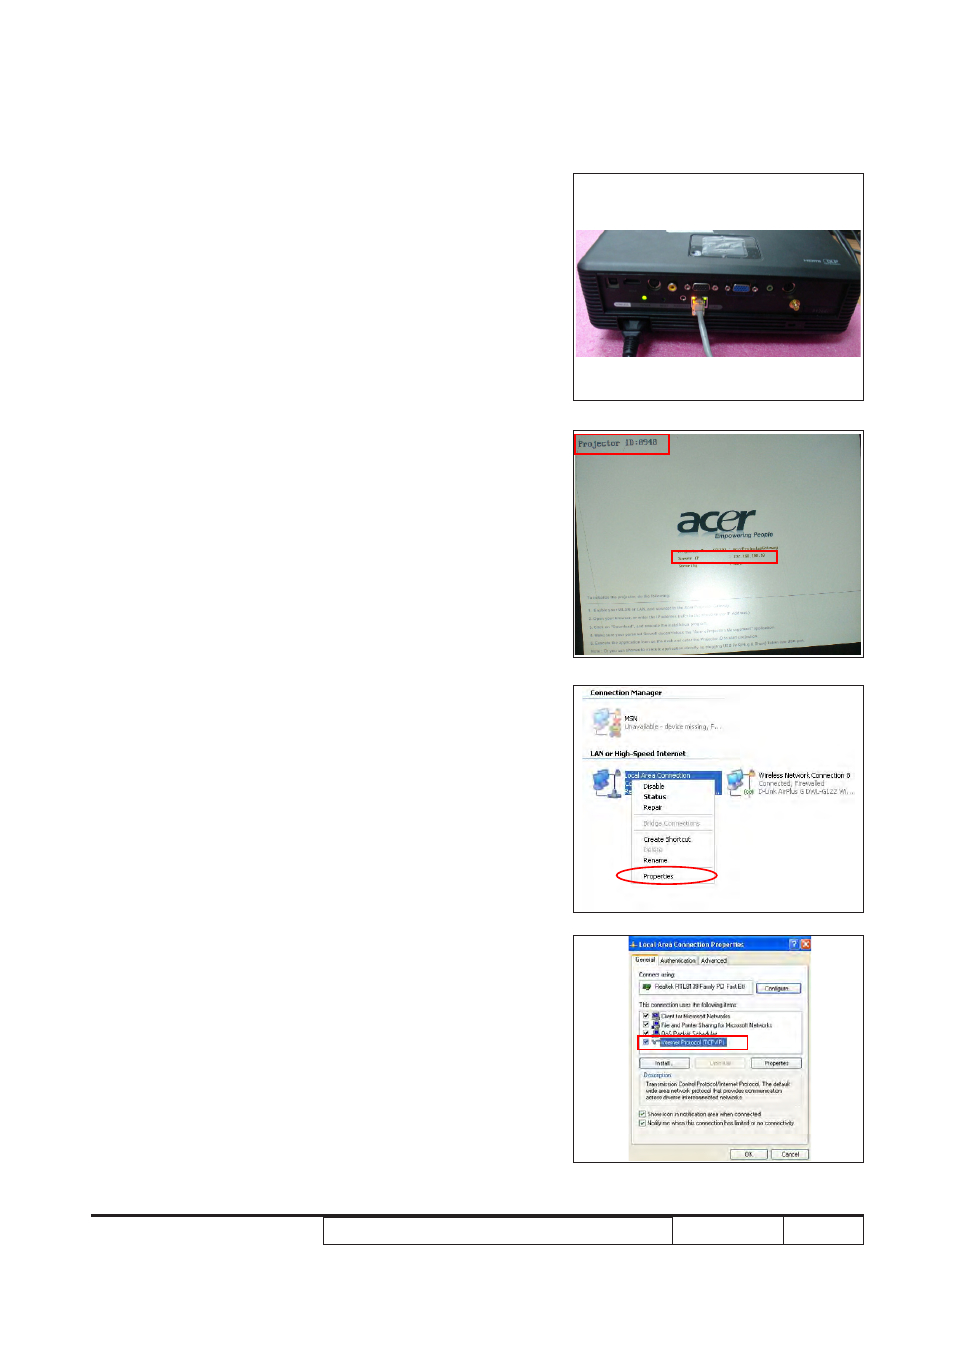
Test (only for P1266i)
1. Write down Projector ID and Server IP
- Plug in power cord to the projector and
connect PC with projector by RJ45 cable.
- Turn on the projector.
- Write down the Projector ID: "8948" and Server IP
address: 192.168.100.10
2. Local Area Setting
Local Area Setting
- Right click the "Local area connection", then
choose "Properties".
- Double click "Internet protocol(TCP/IP)".