Ransburg, Mcv color changer - maintenance – Ransburg MCV Series Module Color Changer 78011-XX User Manual
Page 22
>
NEVER wrap the equipment in plastic to
keep it clean. A surface charge may build-up
on the plastic surface and discharge to the
nearest grounded object. Efficiency of the
equipment will also be reduced and damage
or failure of the equipment’s components
may occur.
WRAPPING THE EQUIPMENT
in plastic will void warranty.
W A R N I N G
!
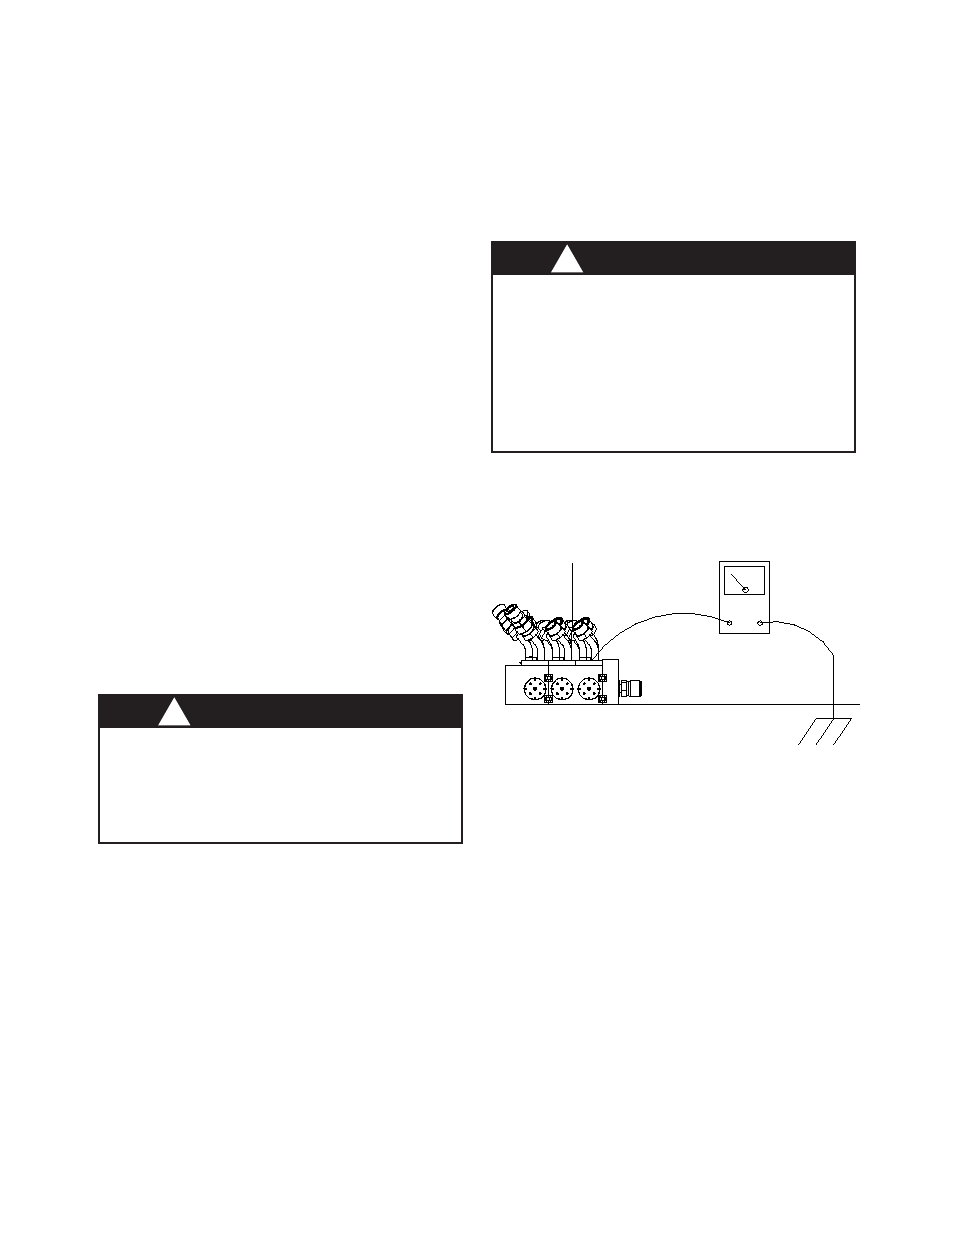
Figure 12: Ground Test
8. Acquire a container of water and fill it with about
4” (10.6cm) of WATER.
Position the hose in the container filled with water.
9. There should be no more than 6 bubbles per
minute coming from the outlet of the hose that is
submerged.
10. If there are more than 6 bubbles per minute,
remove the color valve assemby, replace the
valve seat (77367-00), and reinstall color valve
assembly. If the new seat does not correct the
problem, either the manifold block or color valve
assembly is defective.
11. Proceed to the next color valve and repeat
Steps 2 thru 11.
12. When all the color valves are checked out,
then check the purge valve assembly, repeating
Steps 2 thru 11.
13. Once all valves are operational, deactivate
the 3-way valve, and then disconnect the air lines
used for testing from the color changer.
14. With an ohm meter, check for conductivity
between the top plate of the purge valve and
the output plate on the color changer. There
should be 10 ohms or less between the two points.
(Reference Figure 12)
>
ALWAYS test color changer for con-
ductivity after assembly or repair. Proper
conductivity is required to assure entire
color changer can be properly grounded
when installed.
W A R N I N G
!
EARTH GROUND
(TRUE)
OHMS
0
10
PURGE ASS'Y.
TOP PLATE
MCV Color Changer - Maintenance
CS-01-01.8
19
Ransburg