Ransburg, Regulator disassembly procedure, Regulator reassembly procedure – Ransburg MCV Series Module Color Changer 78011-XX User Manual
Page 20
REGULATOR DISASSEMBLY
PROCEDURE
NOTE
> The seat and stem are matched sets
of parts, each having a serial number
engraved on them. Care must be taken
not to mix non-matching seats and stems
or the regulator will not perform properly.
1. Remove eight (8) screws [11] using a 5/32”
Allen wrench.
2. Pull cap [7], upper diaphragm [6], and plate
[3] from the assembly.
3. Pull diaphragm assembly [2] from the assem-
bly.
4. Using a 3/16” Allen wrench, remove the regu-
lator insert. By removing the insert, the seat wil
be removed. To remove the carbide seat from the
insert, blow compressed air in the hex end of the
insert and the carbide seat will come out.
REGULATOR REASSEMBLY
PROCEDURE
1. Install all removed o-rings on the insert and
the seat. Push the seat into the insert straight in,
using an arbor press if possible.
2. Insert spring [5], seat [6], and one o-ring [4]
into the regulator body [1].
3. Using a 3/16’ Allen wrench, tighten the insert
down until it bottoms out.
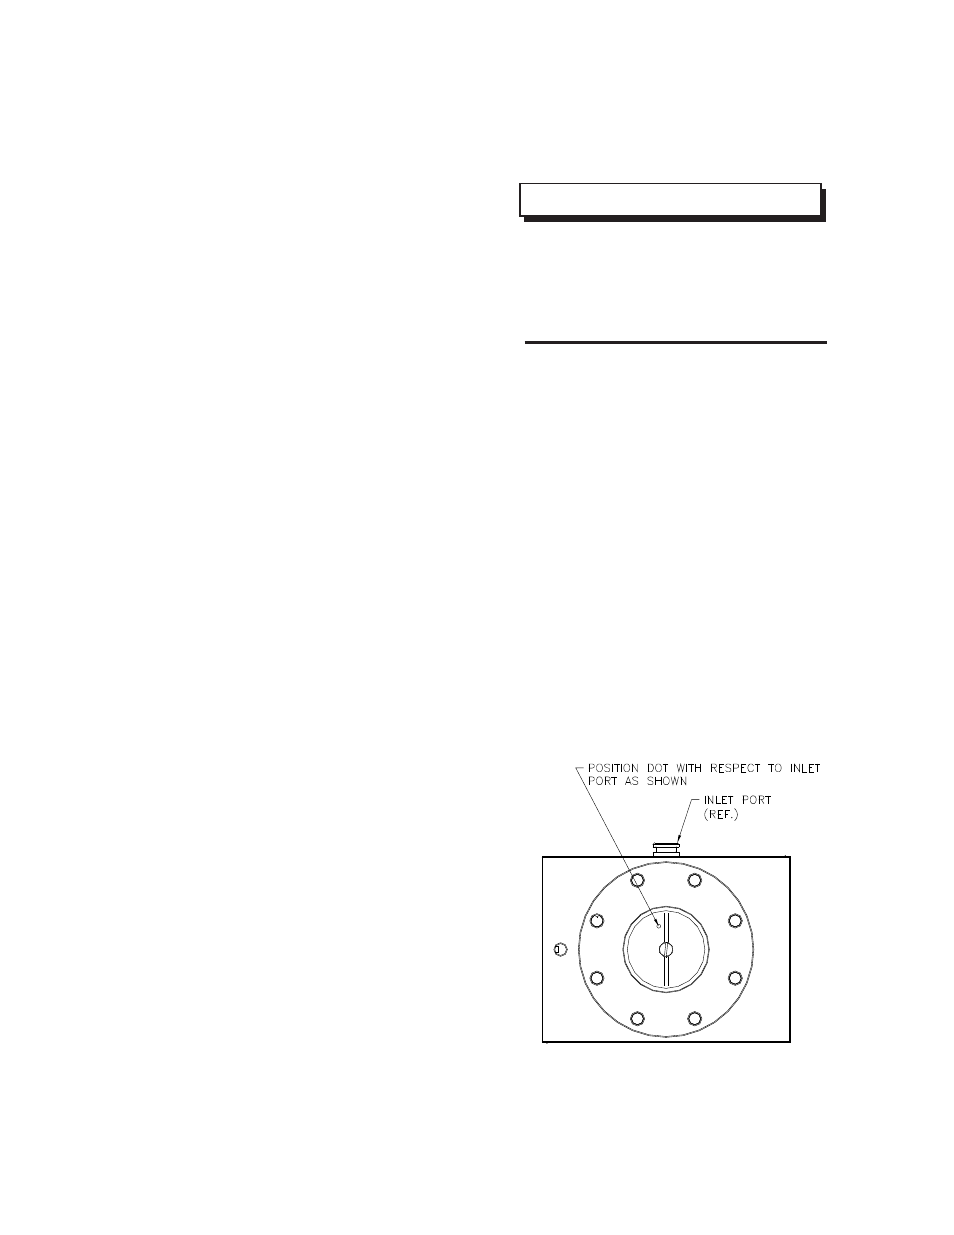
4. Locate the dot on the diaphram assembly [2]
and place it so it is 180° from the outlet hole of
the body.
5. Add plate [3], upper diaphragm [6], and cap
[7]. Tighten the eight (8) screws [11] in a cross
pattern to 10 lbs•in. Then follow by tightening
each screw in a circular pattern to 20 lbs•in.
Figure 11: Diaphragm Assembly Position
MCV Color Changer - Maintenance
CS-01-01.8
17
Ransburg