Kasco Marine 4400HJF User Manual
Page 9
9
12. (optional - weight not included)
Thread one rope through one weighted tube rope Weight
and position it approximately 6’ from the float. Next,
thread the end of the rope back through the opening fac-
ing the float (as shown). Repeat with the second rope and
weight. If ready to install in the pond, go to Installation
instructions. Light Kits can also be installed at this time, go
to Light kit instructions.
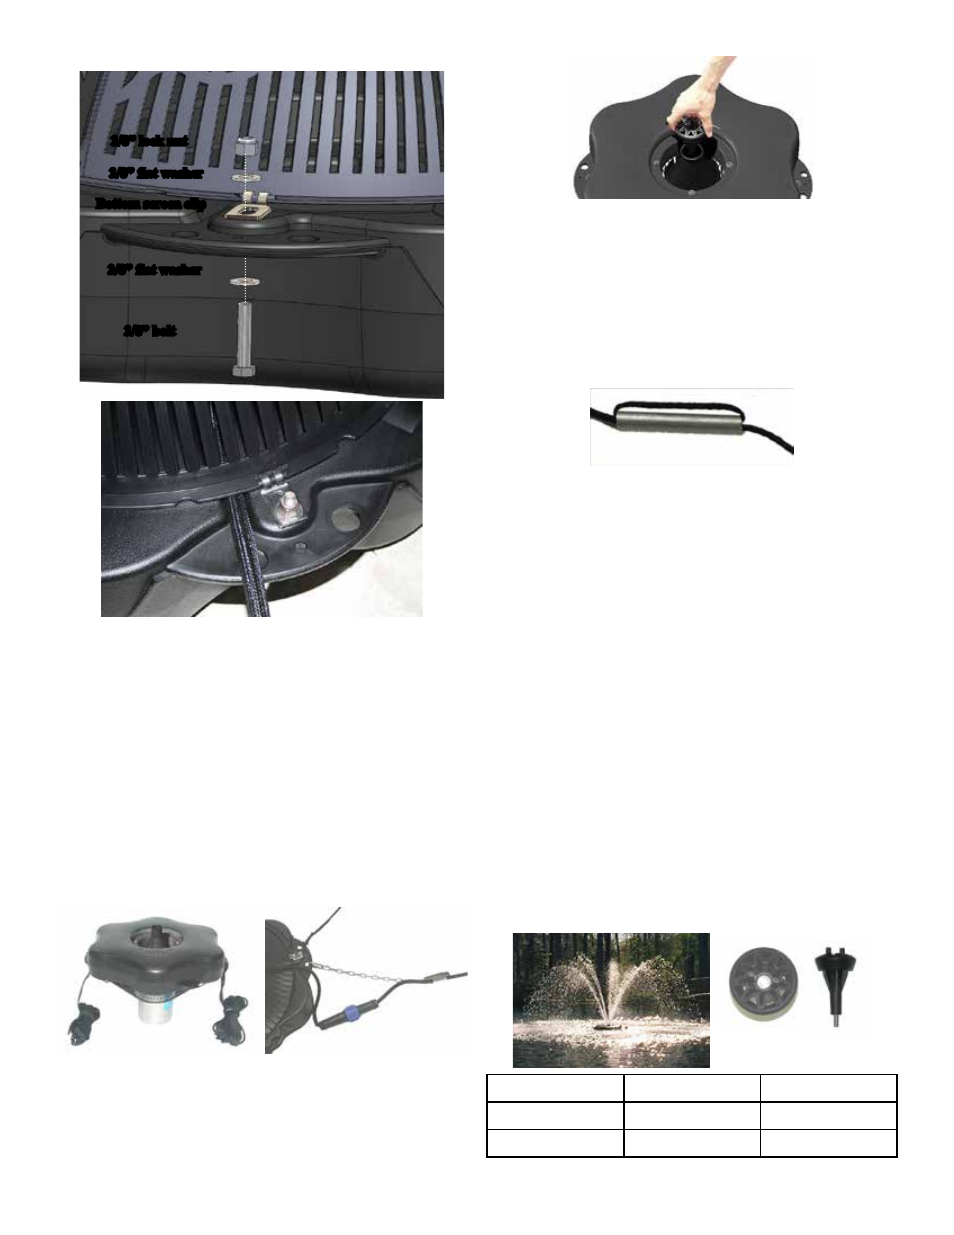
Nozzle Options
NOTE: Pattern sizes listed are approximate. Varia-
tions in voltage caused by regional electrical differenc-
es or voltage drop due to long power cords may result
in reduced pattern sizes.
• The Cypress is the only nozzle that uses the sepa-
rate collar labeled C2.
• The Cypress, Linden, Willow, and Juniper nozzles
use the 3/8” x 4” bolt.
• The Sequoia nozzle uses the shorter 3/8” x 2.25”
bolt.
To install, simply drop the bolt through the nozzle and
thread into the top of the cone on the fountain.
Cypress Display:
The Cypress nozzle (marked C1 on fin) makes use of
the collar (marked C2 on the top rim) and the 3/8” x
4” bolt.
Model
Height
Width
3400JF/HJF
6’
16’
4400JF/HJF
7.5’
25’
clip.
3/8” lock nut
3/8” flat washer
Bottom screen clip
3/8” flat washer
3/8” bolt
10. Turn the assembly upright again. At this time, if the
cord contains a metal strain relief, you can use the chain
connector and attach it in one of the opening at the rope
placement. The chain connector will easily fit if installed
from the bottom or top side of the opening. It will not fit
if installed from side of opening. Use the Nylon Cable Tie
included to secure the power cord to a molded hole in the
float to prevent cord damage if there is no strain relief on
the cord. If a Strain Relief is present on the cord, you may
disregard the Nylon Tie. On cords with a Quick Discon-
nect, the disconnect should be tightened properly to avoid
leaking. If installing a new Quick Disconnect, refer to
Quick Disconnect Instructions.
11. Select a nozzle (See JF Nozzle Options). Insert the
Shaft Bolt into the Nozzle Head so it fits snugly into the
molded socket. Install the Nozzle by threading it into the
inner cone of the pump. Make sure to tighten the Nozzle
all the way down.