Kasco Marine 4400HJF User Manual
Page 8
8
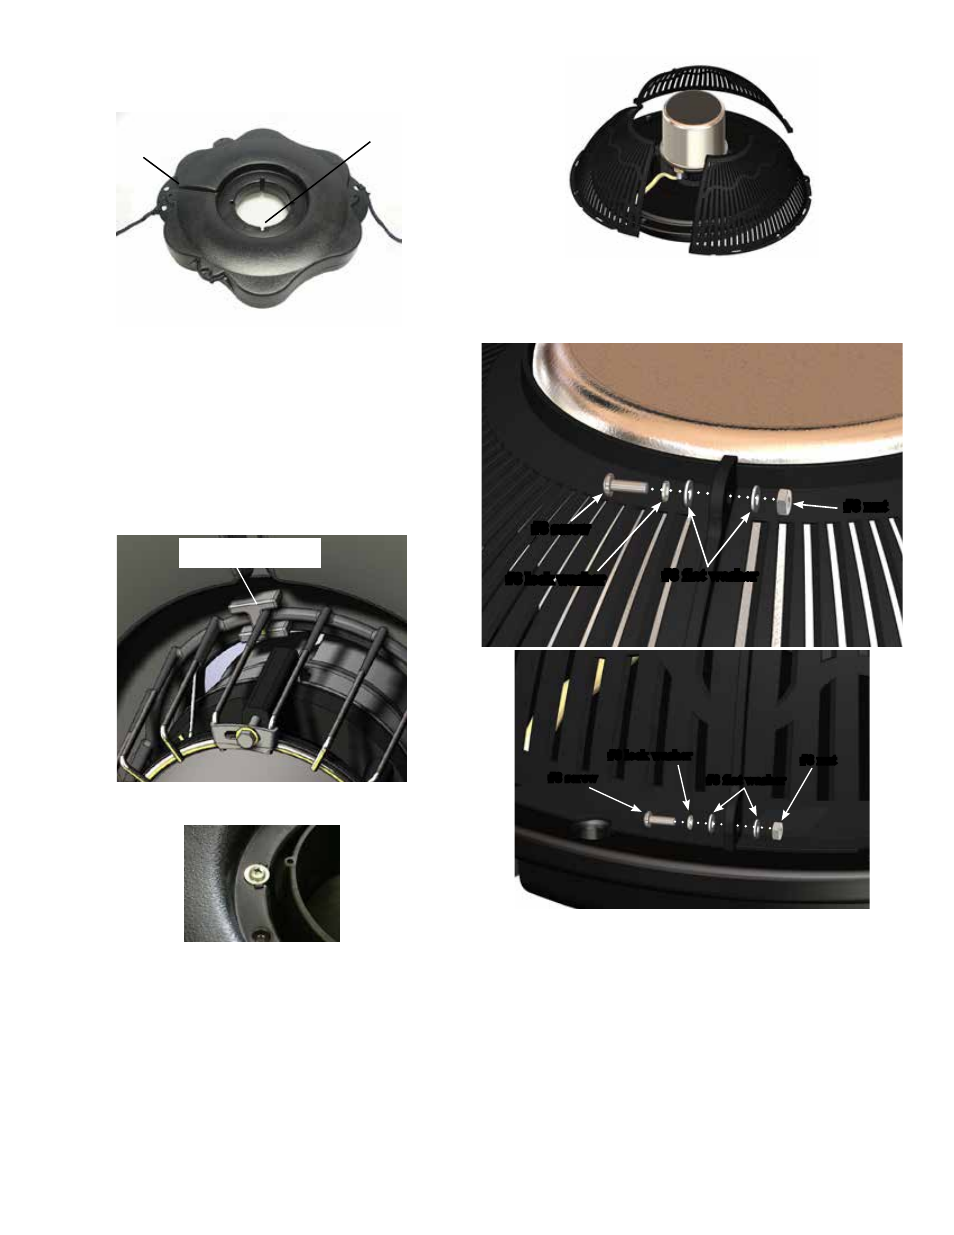
7. Secure the 3 sections of the screen together in 6 places
using #8 screw (Part 15), #8 lock washer (part 14), two
#8 flat washers (part 13), and #8 nut (part 12). Do not
overtighten.
#8 screw
#8 lock washer
#8 flat washer
#8 nut
#8 screw
#8 lock washer
#8 flat washer
#8 nut
8. Make sure the cord is coming out of the power cord
guide in the float before attaching the screen to the float.
9. Use a stainless steel Bottom Screen Clip, 3/8”-16 x
1-3/8” Bolt, two 3/8” Flat Washer, and 3/8”-16 Nylon Lock
Nut to secure the screen to the float. Align a clip so the two
prongs overlap the rim of the screen as seen in the picture.
Insert bolt with washer so the top of the bolt is facing the
top of float (now in down position). Place the second
washer and the locking nut with nylon insert on the end of
the bolt and tighten using the 9/16” (14mm) Socket and
Ratchet on the nut end and the 9/16” (14mm) Wrench on
the bolt end. Tighten until snug and repeat with remaining
3. Ensure correct alignment by twisting the float gently
around the motor housing until the power cord guide lines
up with the cord. See diagram of bottom side of float.
Bolt holes
power cord
guide
4. Use one of the 1/4”-20 x 3-1/2” Phillips Pan Head
Screws (Part 3), one 1/4” split washer (Part 4), and a 1/4”
Flat Washer (Part 5) to secure the float. Make sure the split
washer goes between the bolt head and the flat washer.
Insert screw with washer through bolt hole in float
Use one float retaining clip (Part 8) under the top ring of
the cage. There is a U-shaped indent in the clip that will fit
snug against the top ring of the cage. The 1/4”-20 x 3-1/2”
will then thread into the retaining clip.
float retain
ing clip
5. Tighten until snug with a Phillips Head screw driver and
repeat for 3 remaining screws.
6. Turn secured assembly upside down so the top of the
float (logo side) is face down on the flat surface. Bring the
3 bottom screen sections (part 9) together.