General Tools and Instruments RCV100 User Manual
Page 10
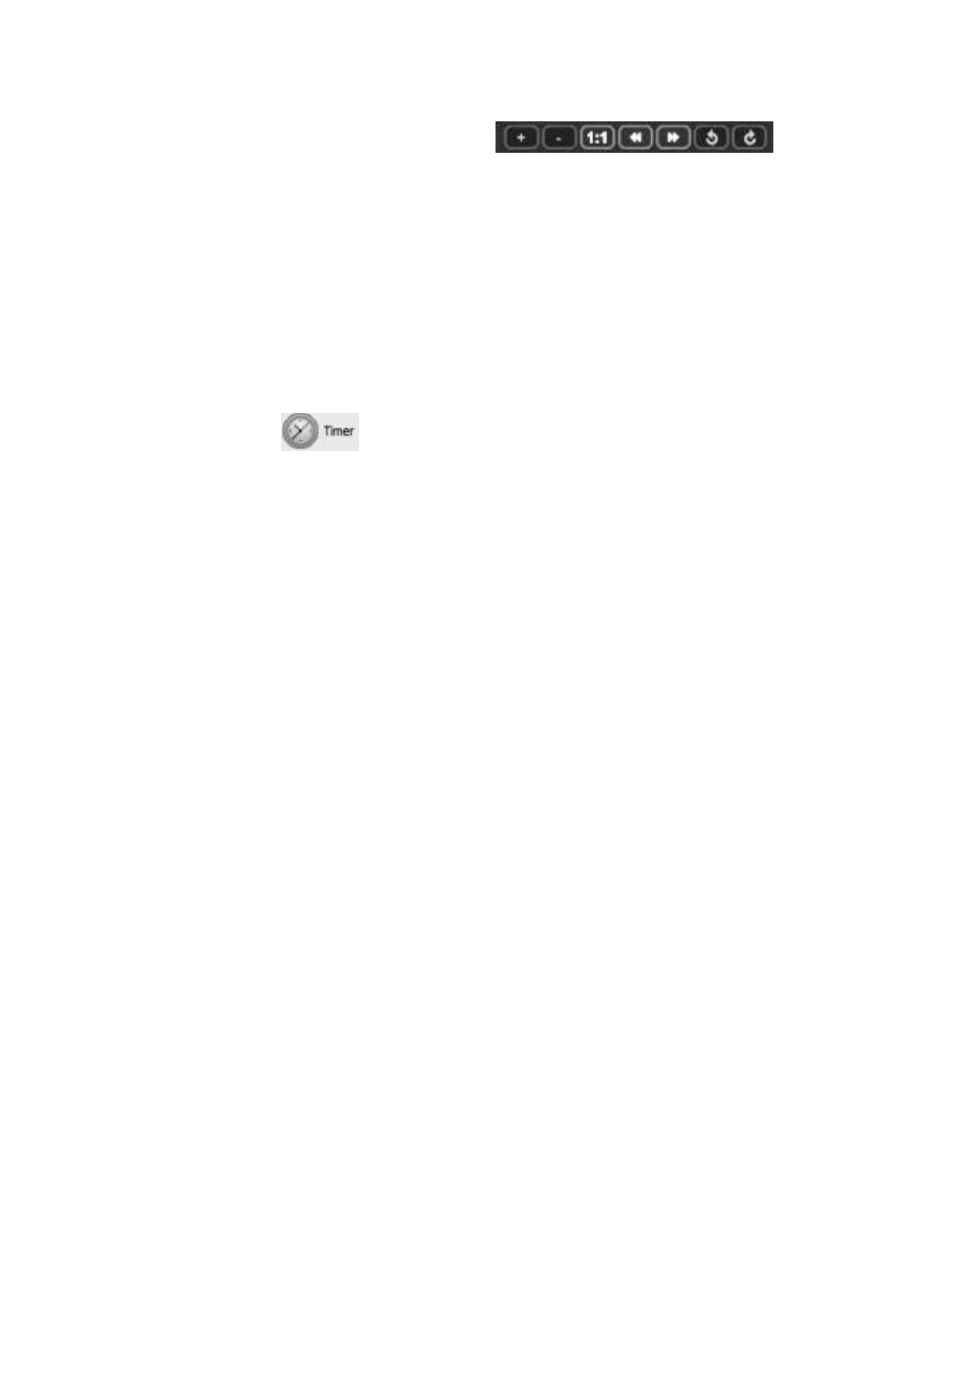
To view a captured photo in the main window, double-click its icon
in the Preview Pane. Note that when a picture is displayed in the
main window, the Photo Control bar
also appears below it. Use the controls on the bar to zoom in or out
on the picture or rotate it 90 degrees in either direction. To view
the next or previous photo, either click the right or left arrows on the
control bar or click the yellow directional arrows that appear within the
main window to the right and left of the displayed image.
To configure the RCV100 and its connected Seeker 100 or 400 or
DCS1100 to automatically capture videos and/or photos on a regular
schedule, click the tab on the toolbar. You can choose a daily,
weekly or monthly schedule, or specify a date and time or a duration
(for a video).
To disconnect the RCV100 from your computer, first close the
ScopeView application. Then click the Safely Remove Hardware and
Eject Media icon on your computer’s system tray and click on “Eject
USB Composite Device.”
Wired option
If the video that appears on your computer is “noisy” (has streaks or
flickering lines running through it), the probable cause is an electrically
noisy environment. With so many electrical and electronic devices in
use everywhere today, many environments in which the RCV100 will
commonly be used have enough electromagnetic interference to
negatively affect wireless signals.
To remedy the problem, you can override wireless operation by
“hard-wiring” the RCV100 to your Seeker 100 or 400. To do so, use
the provided cable with standard mini-RCA plugs at both ends. Both
the RCV100 and your Seeker 100 or 400 are equipped with video ports
for that purpose. In the case of the Seeker 100, the video out port is on
the bottom of the pistol grip, opposite the DC power input jack. In the
case of the Seeker 400, the video out jack is on the side of the
instrument’s detachable display unit.
10