General Tools and Instruments DPS16 User Manual
Page 15
15
By default, the AUTO POWER OFF function of the H16 is disabled. To enable it, and to choose
how quickly to power off the instrument following a period of inactivity, navigate to one of the
four options (5, 10, 15 or 30 minutes) and press the OK button. To re-disable the function later,
enter Menu mode, scroll down to the AUTO POWER OFF line, press the OK button, select
DISABLE and press the OK button again to save the setting.
OPERATING INSTRUCTIONS - P16PIP
Before inspecting a pipe, determine its inner diameter. Then determine whether that diameter
matches the diameter of any of the three included probe-centering accessories: 2, 4 or 6 inches.
If your pipe is one of these three sizes, attaching the correct accessory will keep the camera
head in the center of the pipe as you push the probe forward. A centered probe will be easier to
push forward and produce higher-quality videos and photos as well.
If the inner diameter of your pipe is not 2, 4 or 6 in., you can still use the probe to good effect
without the benefit of a probe-centering accessory. You may have to exert a bit more effort to
keep the camera head from getting hung up on the pipe’s sidewalls as you push the probe
forward. That is more likely if you use the probe to inspect large pipes or rectangular ducts. In
such situations, friction will often cause the camera head to “tuck under” the probe as you push
it forward, producing a rear-facing dynamic view of the pipe’s interior. When you begin to reel in
the probe, however, the metal coil spring sleeve (see Fig. 3) will free the camera head and point it
forward. Videos and photos captured during this “return” trip can be just as valuable as forward-
facing evidence.
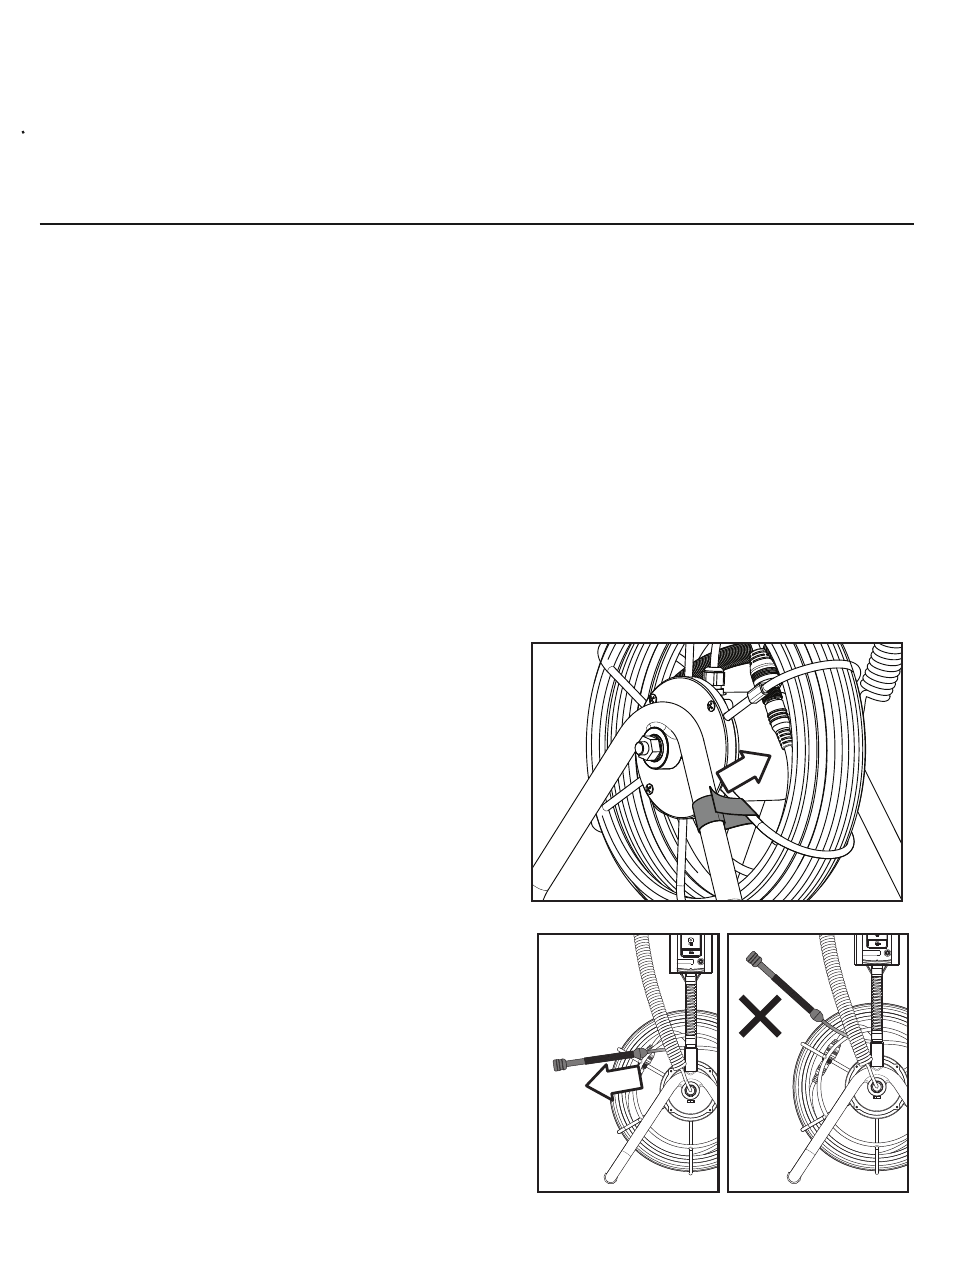
ATTACHING AN ACCESSORY
Before attaching any of the three probe-centering
accessories to the probe, “play out” a few feet of the
probe from the reel. To do so, first “unlock” the reel
by separating (opening) the Velcro closure called the
Reel stopper (see Fig. 2 and upper figure at right).
Once the reel is free to move, grab the probe below
the camera head and begin pulling it horizontally,
rather than vertically, as shown at lower right.
Extract just enough probe for the Joint ball to pass the
Probe guide/camera head stopper (see Fig. 2). Then—
if this is the first use of the P16PIP or its first use in
months—pull and push the end of the probe back
and forth a few times (see left figure at the top of the
next page) to reduce any friction binding the reel’s
stationary and moving parts.
✓