SPP Pumps Instream User Manual
Page 10
Manual No/Rev
W23-001E / 8
Operators Instructions for
Instream Centrifugal Pumps
Our policy is one of continuous improvement and we reserve the right to alter specifications at any time
Page 10 of 16
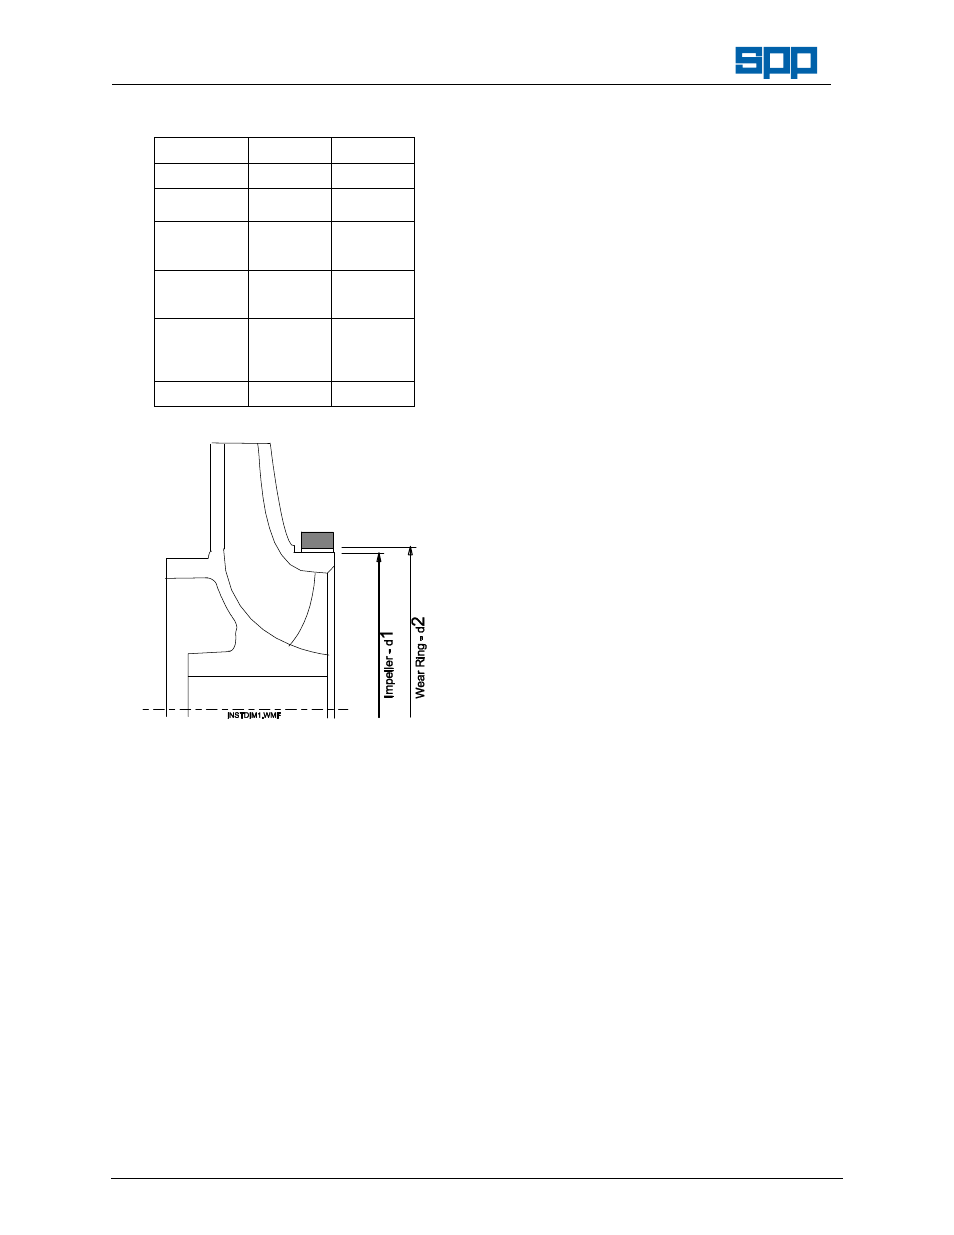
2.
Wear Ring Diameters.
Pump Size
Dia. 1
Dia. 2
Tolerance
- 0.1mm
F8
40/13
40/16
69.7
70
50/13
50/16
50/20
79.7
80
65/13
65/16
65/20
94.7
75
80/13
80/16
80/20
80/26
114.7
115
100/16
129.6
130
6.3.4 Reassembly
1.
Ensure that all parts to be fitted are clean and
free from burrs, with screw threads and
abutting faces clear and free from damage.
2.
Lubricate the outer surface of the stationery
element of the mechanical seal (43.3) with
soapy water or silicone grease (not oil),
ensure that it is square to its housing in the
casing cover (16.1) and push home by hand,
taking care not to apply excessive force or to
damage the sealing surface. Check that it has
been seated fully and that the sealing surface
is clean and undamaged.
3.
Refit the casing cover (16.1) to the support
frame (34.4). for bolted covers only, fit the
retaining
nuts
(92.02), tightening them
uniformly and in diagonally opposed pairs
sequence.
4.
Fit the rotating element of the mechanical seal
(43.3) thus:
Lubricate the inner and outer surfaces of the
sleeve lightly with silicone grease. Locate
spring and spring holder of mechanical seal
over shaft sleeve (52.3).
Slide seal face assembly along sleeve (52.3)
up to the spring.
Slide shaft sleeve (52.3) over shaft (21.1),
larger bore first, ensuring that mechanical seal
faces are clean, free from damage and square
and that gasket (40.01) is correctly seated.
Ensure that the rotating seal face is floating
against the spring before re-fitting the impeller.
5.
Locate impeller key (94.01) into shaft key way.
Relocate impeller (23.0) on shaft (21.1). Refit
impeller lockwasher (93.0) and screw on
impeller nut (92.2) and carefully tighten.
6.
Ensure impeller rotates freely by hand. If not
investigate and rectify. Relocate casing cover
(16.1) into casing (10.2), using casing studs
(90.2), ensuring that gasket (40.0) is seated
correctly.
Fit nuts (92.0) and tighten uniformly in
diagonally opposed pairs sequence.
Fit and tighten the motor mounting bolts.
Reconnect supply, ensuring correct pump
rotation