Wps push button setup, Step 1, Step 2 step 3 – PROLiNK PIC1007WP Quick Installation Guide User Manual
Page 9: English
English
1
2
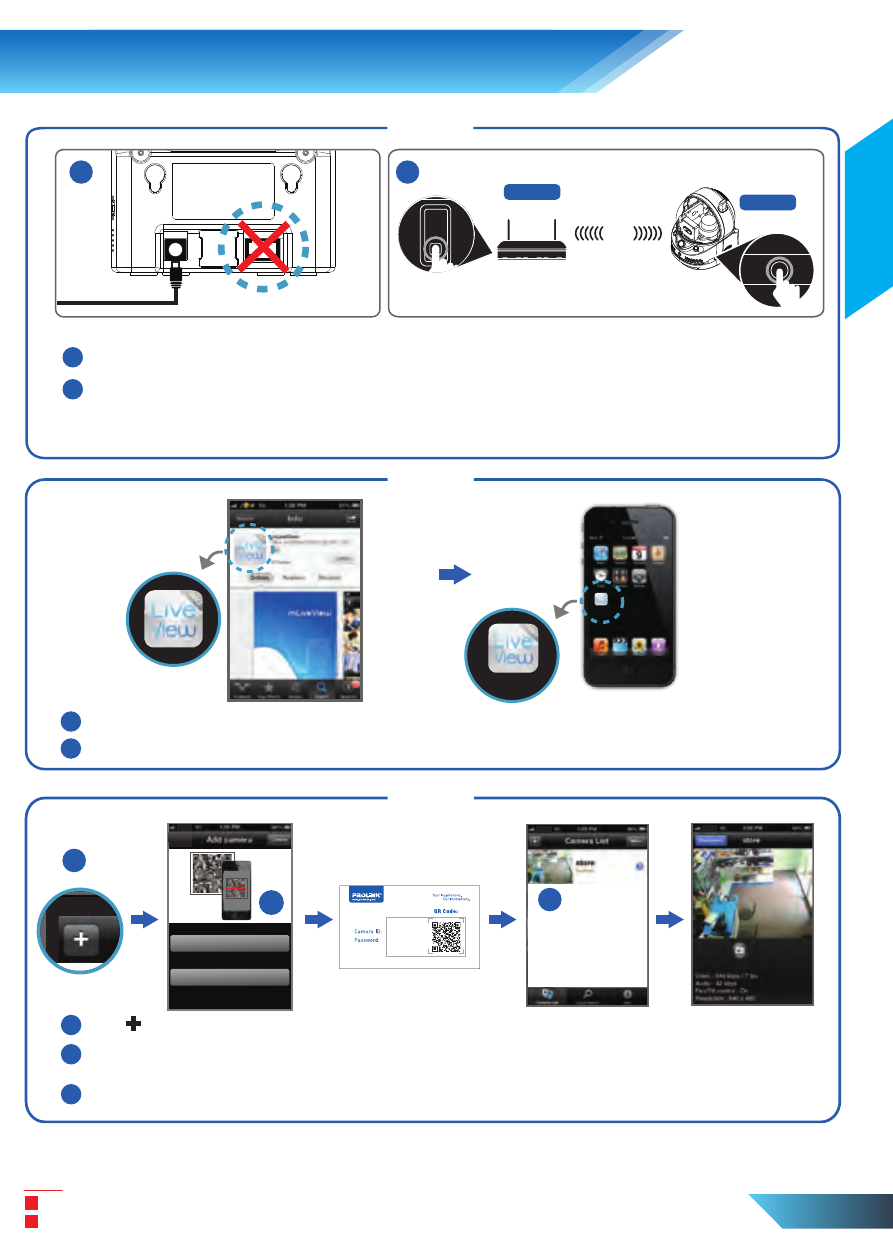
Power on the camera. Do not connect the Ethernet cable to the camera
Push the WPS button on both the router and the camera. The LEDs on the camera will start
to flash in running order. Wait for the LEDs to flash simultaneously for 3 times indicating the
wireless connection is established
Note:
If your router is not configured for WPS, please refer to your device manufacturer for assistance.
If you router does not support WPS, please use Manual Wireless Setup or Smart WiFi setup instead.
(Wireless)
WPS
PIC1007WP
NAT/Router
WPS
WPS
EN 7
7. WPS Push Button Setup
Step 1
1
2
Download and install mLiveView app.
Open mLiveView app from your mobile homescreen
1
2
3
Tap
+
to add a camera
Select Scan QR code and align your mobile's camera to the ID/Password card. The camera
will be automatically added to the camera list
Click on the Camera ID you have just created to connect to the camera
Step 2
Step 3
1
2
1
2
mLiveView
mLiveView
Pro
1
Scan QR code
Manual input
or
2
3
xxxxxx
xxxxxx