PASCO OS-9171 Laser with the OS-9172 Alignment Bench User Manual
Page 2
scientific
2
012-01562B
5.
By adjusting all five leveling screws (one on the laser
alignment bench, two on the optics bench, and two on
the bench couplers), align the two benches so they are in
a straight line. Use a meter stick or a long straight edge
on top of the benches to check vertical alignment, and
on the side of the bench to check horizontal alignment.
6.
When the benches are aligned, tighten the lock-nuts on
all the leveling screws, and also tighten the four hex-
head screws. After tightening the screws, recheck the
alignment.
To Align the Laser (so the laser beam is coincident
with the optical axis of the bench):
1.
Place a piece of masking tape or tape a piece of paper
over the square hole on the front of a component holder,
as in Figure 2. Make a small dot on the tape or paper, in
the center of the square hole (1-inch from the top of the
component shelf, and 1.5-inch from the edge of the
component holder).
2.
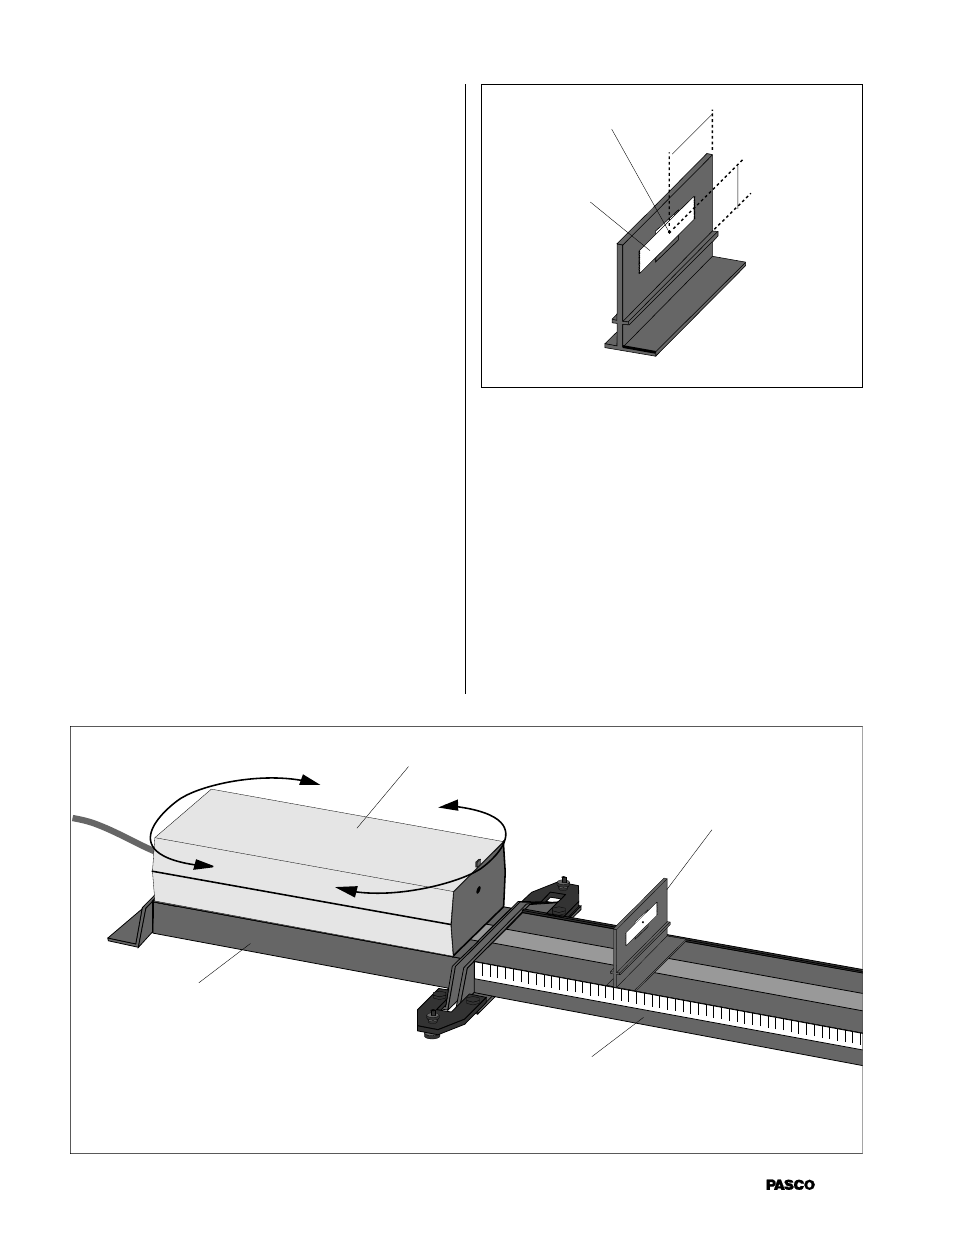
Place the laser on the alignment bench, as in Figure 3.
Center the laser on the bench, and make sure it is
reasonably parallel with the bench.
3.
Place the component holder on the optics bench, about
10 cm from the laser aperture. Make sure that the
component holder is flush against the alignment rail of
the bench. The dot on the tape now marks the optical
axis of the bench.
4.
Turn on the laser, and move the aperture end of the laser
sideways, as needed, so that the laser beam falls on the
dot.
1.5"
Figure 2 Locating the Optical Axis
5.
Move the component holder about 90 cm away from the
laser aperture. Again, be sure the edge of the compo-
nent holder is flush against the alignment rail of the
bench.
6.
Without moving the aperture end of the laser, move the
rear end of the laser as needed to recenter the laser beam
on the dot. (You may also need to adjust the leveling
screws on the laser alignment bench in order to center
the laser beam vertically on the dot.)
7.
Repeat steps 3 through 6 until the laser beam is aligned
with the dot for both positions of the component holder.
Alignment bench
Figure 3 Aligning the Laser
Tape
or
paper
Laser
Dot
1"
Component
holder with
alignment dot
Optics bench