PASCO ME-9481 Bernoulli Cart Accessory User Manual
Page 2
012-05214A
2
Demonstration Preparation
➀ Mount the Bernoulli Cart Accessory to the cart with
the 2 metric M5X0.8 nylon screws. The base of the
accessory fits into the mass tray on the cart.
(➤NOTE: When not in use, the two screws can be
stored on the base of the accessory.) Remove the two
screws from their storage holes and put them through
the two holes in the base that line up with the screw
holes in the cart.
➁ Tie a knot in one end of the physics string. This will
help hold the string in the notch while winding the
string onto the pulley.
➂ Place the cart on the track and level it carefully to
make sure the cart will not roll in any preferred direc-
tion. Gently push the cart in each direction to see if it
rolls to a stop at approximately the same distance in
either direction.
➃ Plug in the fan and place it on the table, directing the
air flow perpendicular to the track at the location of
the cart.
➤ NOTE: Most fans work better if they are not
too close to the track: A large fan should be further
than 50 cm from the track. Check your fan to see if
the air is pushed forward from the fan blades rather
than radially outward from the fan blades. Fans
that push the air radially outward have a “dead”
spot in the center and will not work for this
demonstration.
Demonstration Procedure
➀ Begin the demonstration with the fan off.
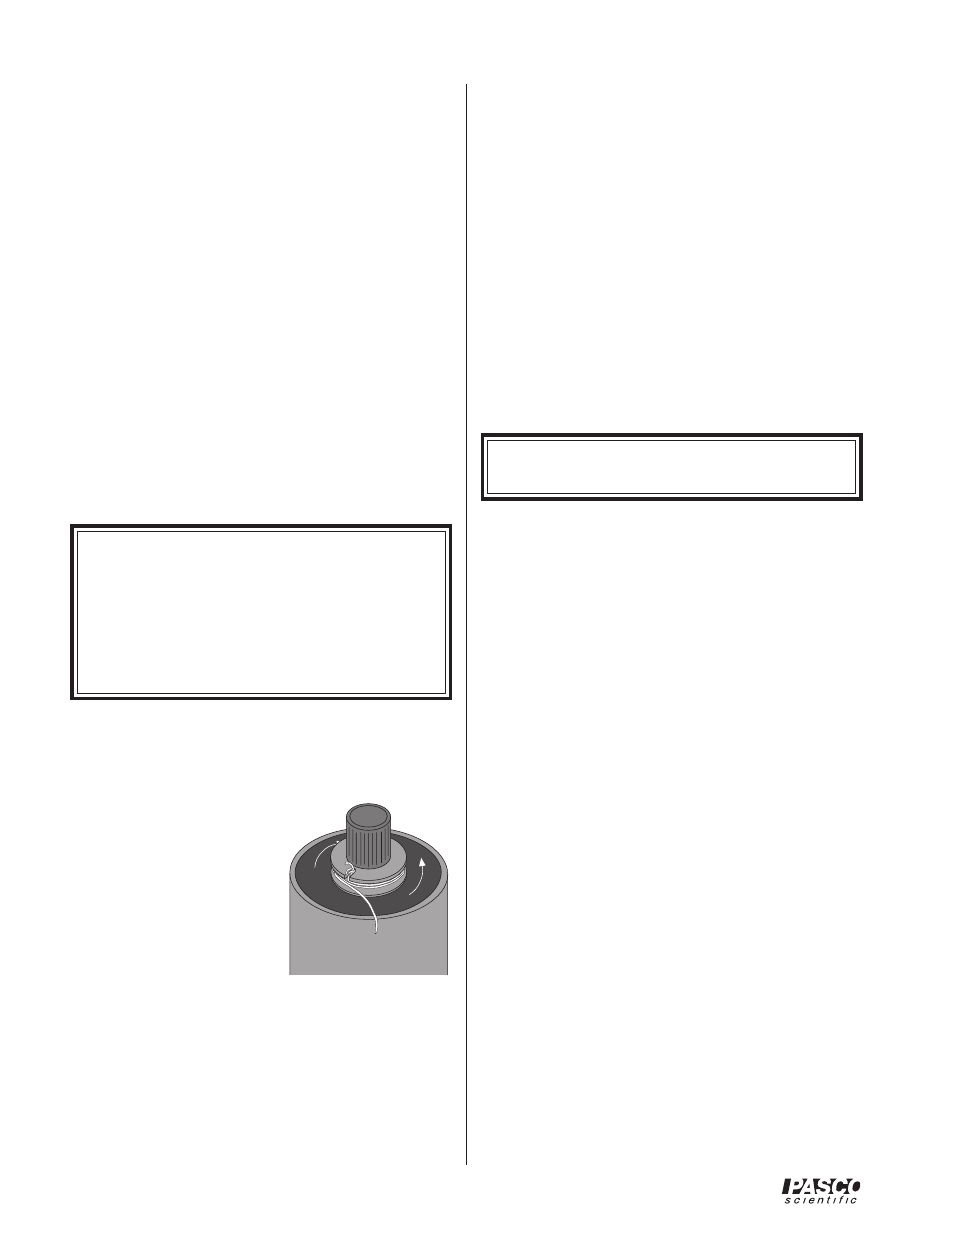
➁ Place the knotted end of
the string in the notch in
the pulley at the top of the
cylinder as shown in Fig-
ure 2. When the string is
pulled, the string is sup-
posed to detach from the
pulley, allowing the pul-
ley to continue spinning
freely, without the string
attached.
➂ Wind the string onto the
pulley by holding the
string with one hand and spinning the cylinder with
the other hand. Notice that the label on top of the cyl-
inder shows which way the cylinder will rotate when
you pull on the string. Note which way you wound
the string so you can wind it the opposite direction
when you spin it for the second time.
➃ While holding the top knob with one hand, pull the
string firmly and quickly with the other hand. The
string should come off the pulley. The cart will re-
main stationary because the fan is not on.
➄ Turn the fan on. The cart will accelerate along the
track until it is out of the air flow. You may move the
cart back into the air flow and it will again move
along the track in the same direction as before. You
may also show that the cart stops moving when the
air stops by placing a large card between the fan and
the cart to block the air.
➅ Stop the cylinder with your hand and turn the fan off.
Wind the string onto the pulley opposite the original
direction.
➆ Pull the string and turn on the fan. The cart will now
move in the opposite direction.
➤ NOTE: If the cart seems to move better in one
direction than the other, the track is not level.
Storage
Remove the two screws that hold the accessory to the
cart and screw them into the two storage holes on the
base. Wind the string around the pulley. The Bernoulli
Accessory can be stored upright with the base resting
flat on a shelf.
Limited Warranty
PASCO scientific warrants this product to be free from
defects in materials and workmanship for a period of one
year from the date of shipment to the customer. PASCO
will repair or replace, at its option, any part of the
product which is deemed to be defective in material or
workmanship. This warranty does not cover damage to
the product caused by abuse or improper use. Determina-
tion of whether a product failure is the result of a
manufacturing defect or improper use by the customer
shall be made solely by PASCO scientific. Responsibil-
ity for the return of equipment for warranty repair
belongs to the customer. Equipment must be properly
packed to prevent damage and shipped postage or freight
prepaid. (Damage caused by improper packing of the
equipment for return shipment will not be covered by the
warranty.) Shipping costs for returning the equipment,
after repair, will be paid by PASCO scientific.
Figure 2:
Placement of string
in pulley