Datastudio setup – PASCO CI-6462 Relay User Manual
Page 2
®
R e l a y
D a t a S t u d i o S e t u p
2
ered PASPORT interface for manual activation.) Whenever it is activated, the green
LED on the Relay turns on.
DataStudio Setup
Note: Follow these steps if you are using any PASPORT interface connected to a computer. Go to
page 3 for instructions on setting up an Xplorer GLX without a computer.
1.
Connect the Relay’s ¼ inch phone plug to Channel 1 of a Digital Adapter.
2.
Connect the Digital Adapter to the PASPORT interface.
3.
Connect the interface to your computer.
4.
Connect at least one sensor (such as a temperature sensor) to the same or a sepa-
rate PASPORT interface. This sensor will provide the input used to control the
Relay.
Tip: The above steps can be performed in any order. For instructions on connecting your inter-
face, refer to the documentation that came with it.
5.
Start DataStudio (if it does not start automatically).
Note: If you see the “Welcome to DataStudio” window, select Create Experiment.
6.
DataStudio automatically detects a device connected to the Digital Adapter and
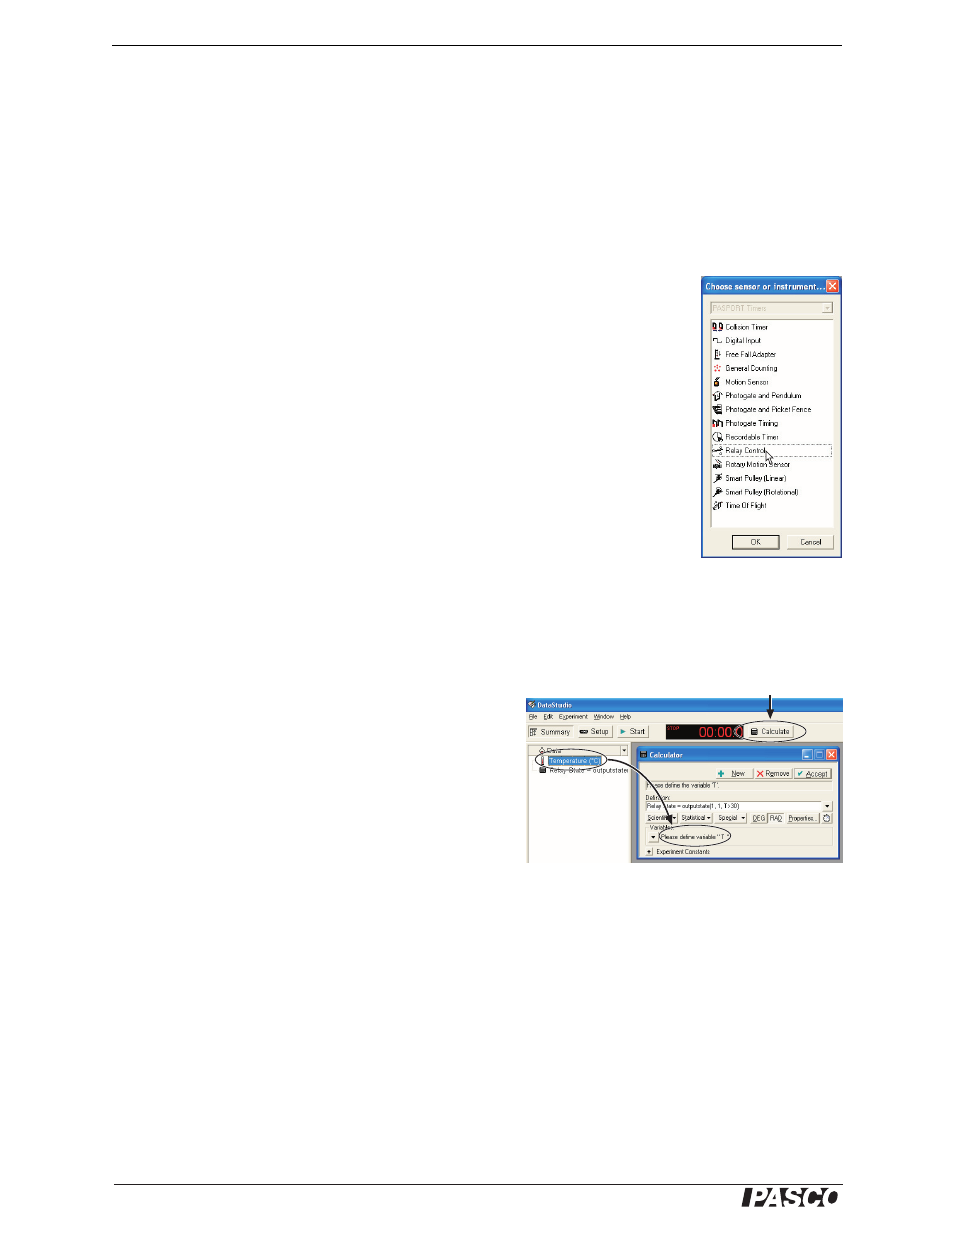
opens the “timers” list. Select Relay Control.
Next, you will define the behavior of the Relay in DataStudio’s Calculator window.
Follow steps 7–13 for one simple example of how to do this. This example assumes
that you have connected a temperature sensor, but another sensor can be substituted.
7.
Click the Calculate button to open the Calculator win-
dow.
8.
In the definition field, type the following (overwriting
the default “y = x” definition):
Relay State = outputstate(1, 1, T >30)
9.
Click the Accept button.
10. Drag Temperature (°C) from the Data List and drop it
onto Please define the variable “T” in the Calculator.
11. Click the Start button to start data collection.
12. Hold the temperature sensor in your hand. When the measured temperature
increases above 30 °C, the Relay activates: the LED on the Relay lights, and you
may hear the Relay click. Allow the temperature sensor to cool; at less than
30 °C, the Relay deactivates.
Note: The LED on the Digital Adapter is always in the opposite state to the LED on the Relay. The
adapter’s LED is off when the Relay is activated.
13. Click the Stop button to stop data collection.
Note: Go to page 4 for more information on the output-control functions used in DataStudio.
Select Relay Control
Drag Temperature to the Calculator
Click to open Calculator