PASCO ME-9812 Roller Coaster User Manual
Page 8
Model No. ME-9812
Roller Coaster
7
®
Track Configurations are shown in the Suggested Activities section.
If desired, shorter sections of track can be spliced together using a
track coupler, which is a metal strip that slides into the slot on the
underside of the track. Slide the coupler halfway into the end of each
track section to join the two sections together.
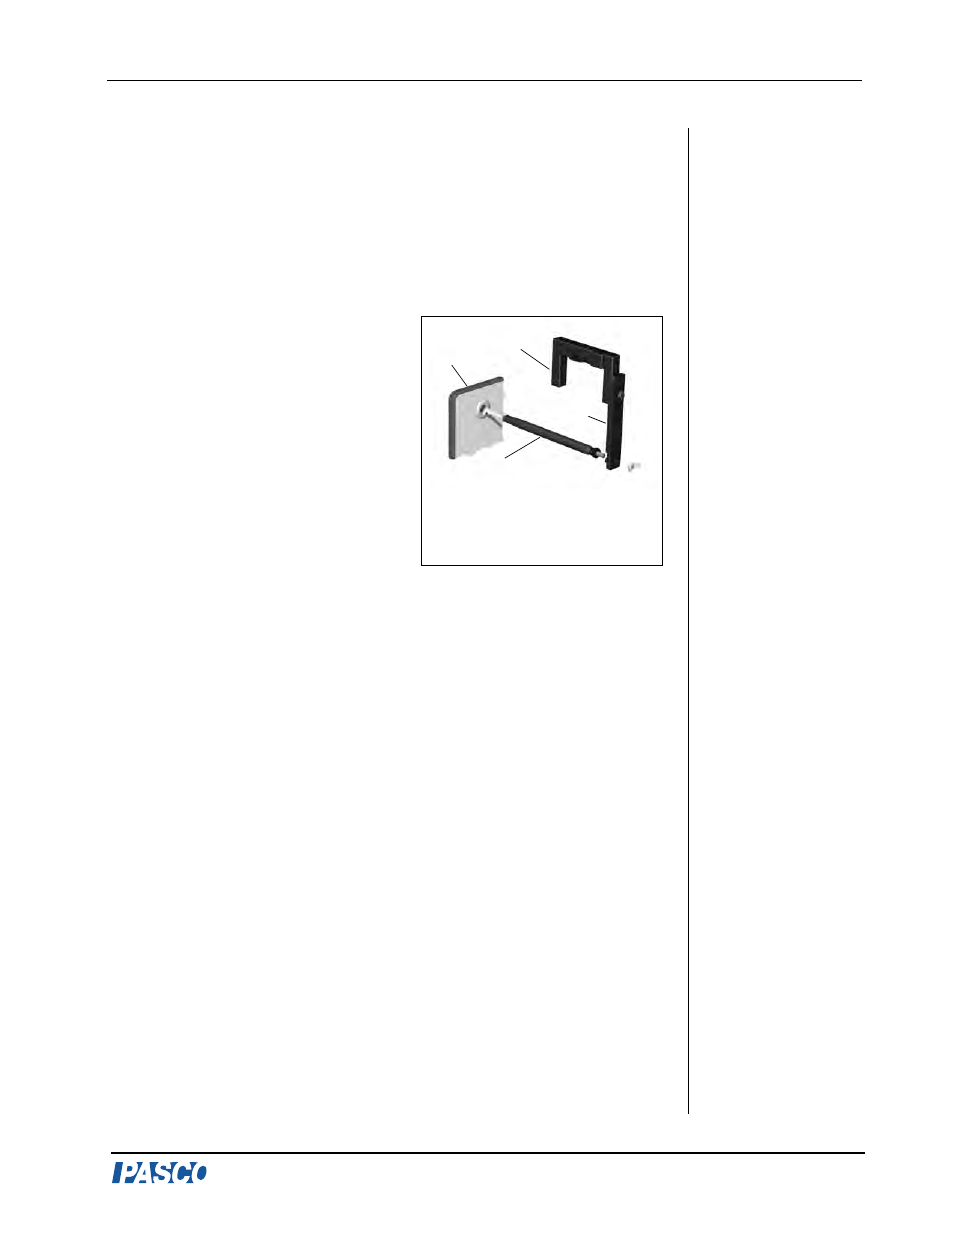
4. Attaching Photogates to the Track
There are special pegs with threaded
rods on one end that are used to
mount photogates.
a) Wherever a photogate is needed
along the track, replace the peg with
the special photogate peg. Be sure
to align the pin on the photogate peg
with the notch in the board insert.
b) Attach the photogate head to the
photogate bracket.
c) Remove the wing nut from the
threaded peg and slide the photogate
bracket onto the threaded peg (See Figure 4).
d) Use the thumb nut on the threaded peg to change the distance of the
photogate from the board.
e) Secure the photogate in place with the wing nut.
The track position can be adjusted to be closer or further from the
board to make certain the car flag passes through the photogate.
5. Attaching the Catcher to the Track
The catcher has multiple uses:
• It can be positioned anywhere on the track to catch the car and prevent
it from rolling back down an incline.
•
It can be used as an elastic bumper so the car bounces back and returns
down the track.
•
It serves as a mounting place for the Super Pulley with Clamp (ME-
9448A) for attaching a string to a hanging mass over a pulley.
•
It can be used with the Projectile Mini-Catcher bracket (ME-6814) or
Projectile Catcher Accessory bracket (ME-6815) to form a ballistic
pendulum: The car goes off the end of the track, into the catcher, and
the catcher swings as a pendulum.
Figure 4: Mounting the
Photogate to the Support
Panel
photogate peg
photogate
board
photogate
mount