Measurement procedure – PASCO PS-2179 Water Quality Colorimeter User Manual
Page 2
®
W a t e r Q u a l i t y C o l o r i m e t e r
P S - 2 1 7 9
2
Measurement Procedure
With the Xplorer GLX (Standalone Mode)
Follow these steps to use the colorimeter connected to a GLX
without a computer. The colorimeter should be horizontal when it
makes a measurement. If you connect it directly to the GLX with-
out a cable, keep the GLX horizontal.
1. Connect the colorimeter to the GLX (may require Extension
Cable 514-07281). The GLX detects the colorimeter and
opens the Digits screen.
2. Press
to highlight the data source field.
3. Press
again to
open the data source
menu (right).
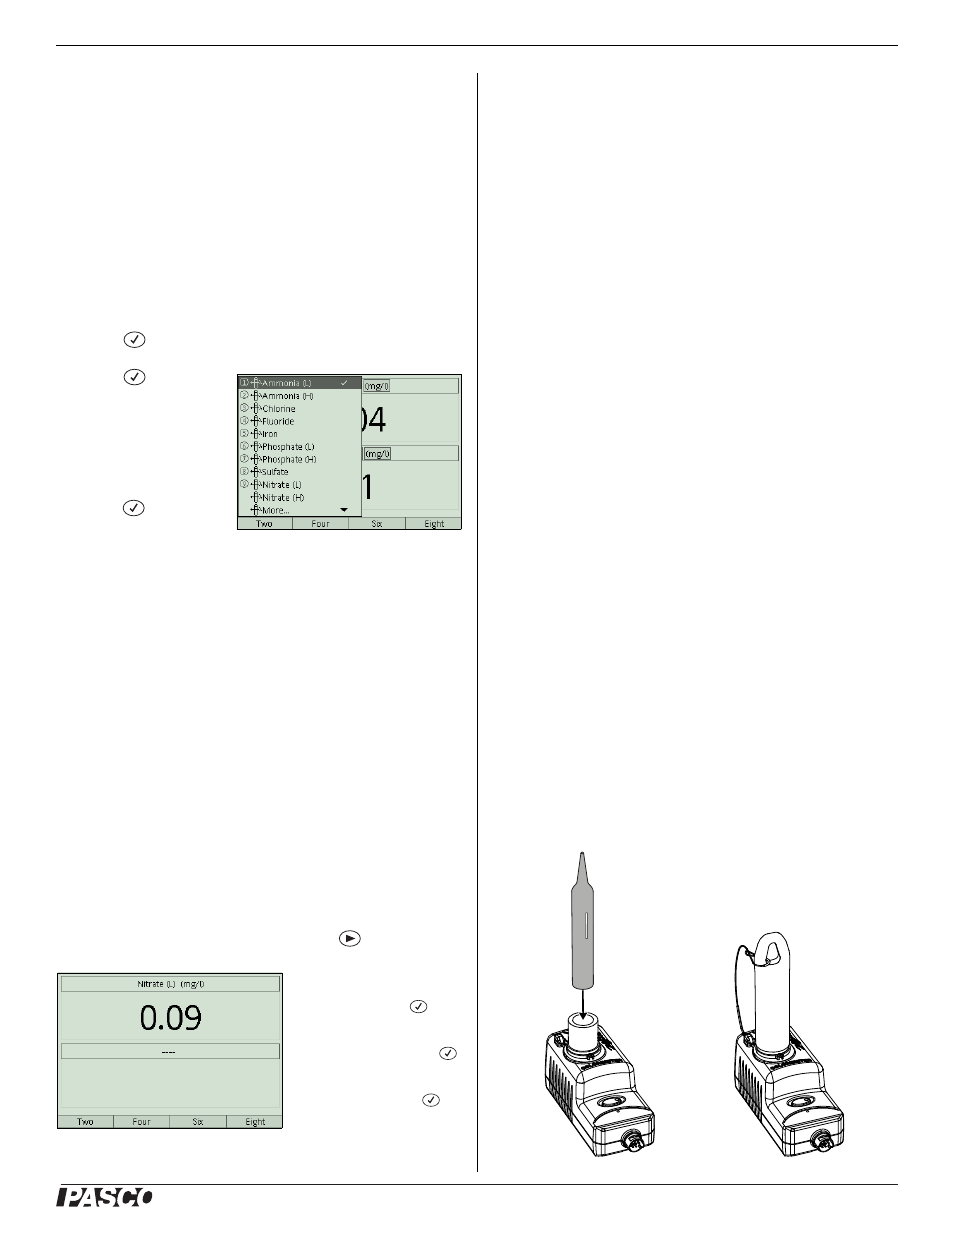
4. Use the arrow keys to
highlight the desired
measurement and
press .
(Select
the
measurement corre-
sponding to the test kit that you will use.)
5. (Optional) Perform the calibration procedure (see “Calibra-
6. Follow the instructions provided with your ezSample Snap
Vial kit to mix your water sample with the reagent in the
ampoule.
7. Handling the ampoule by the tip, wipe the glass clean using a
non-abrasive cleaning tissue. Avoid touching the glass after
it is clean.
8. Align the mark on the ampoule as illustrated and insert the
ampoule into the colorimeter.
9. Place the cap over the ampoule.
The GLX automatically monitors and displays live
measurements in the Digits screen.
10. (Optional) To start recording data, press
.
To remove the measurement
from the lower segment of the
Digits screen: Press
.
Press the down arrow to high-
light the data source field of
the lower segment. Press
again to open the menu. Use
the arrow keys to highlight
Clear Input and press
With a Computer
Follow these steps to use the colorimeter with any PASPORT
interface connected to a computer.
1. Connect your PASPORT interface to the computer and start
DataStudio.
2. Connect the colorimeter to the PASPORT interface.
DataStudio detects the colorimeter and creates a digits dis-
play showing all available measurement.
3. (Optional) Perform the calibration procedure (see “Calibra-
4. Follow the instructions provided with your ezSample Snap
Vial kit to mix your water sample with the reagent in the
ampoule.
5. Handling the ampoule by the tip, wipe the glass clean using a
non-abrasive cleaning tissue. Avoid touching the glass after
it is clean.
6. Align the mark on the ampoule as illustrated and insert the
7. Place the cap over the ampoule.
8. Click Start to start recording and displaying data. (Or open
the Experiment menu and select Monitor to display mea-
surements without recording them.)
DataStudio displays all available measurements. Read the one
corresponding to the test kit that you used. (The other live mea-
surements are not meaningful and should be ignored.)
To remove unneeded measurements from the digits display, click each
measurement and press delete.