Setup and use of the general flow sensor – PASCO PS-2222 General Flow Sensor User Manual
Page 5
®
M o d e l N o . P S - 2 2 2 2
C r i t i c a l U s e C o n s i d e r a t i o n s
5
Setup and Use of the General Flow Sensor
Connect the Sensor
Connect tubes from either the Venturi Tube (ME-2220) or the Pitot Tube (ME-2221) to the General Flow Sensor.
Be sure that connections are sealed prior to the introduction of any liquids to the system.
Plug the General Flow Sensor PS-2222 into a PASPORT input port on a PASPORT-compatible interface, and
turn on the interface. (Check the PASCO web site for compatible interfaces.) If you are using a computer, make
sure that the interface is connected to the computer and turned on.
Prepare the PASCO Capstone Data Acquisition Software
•
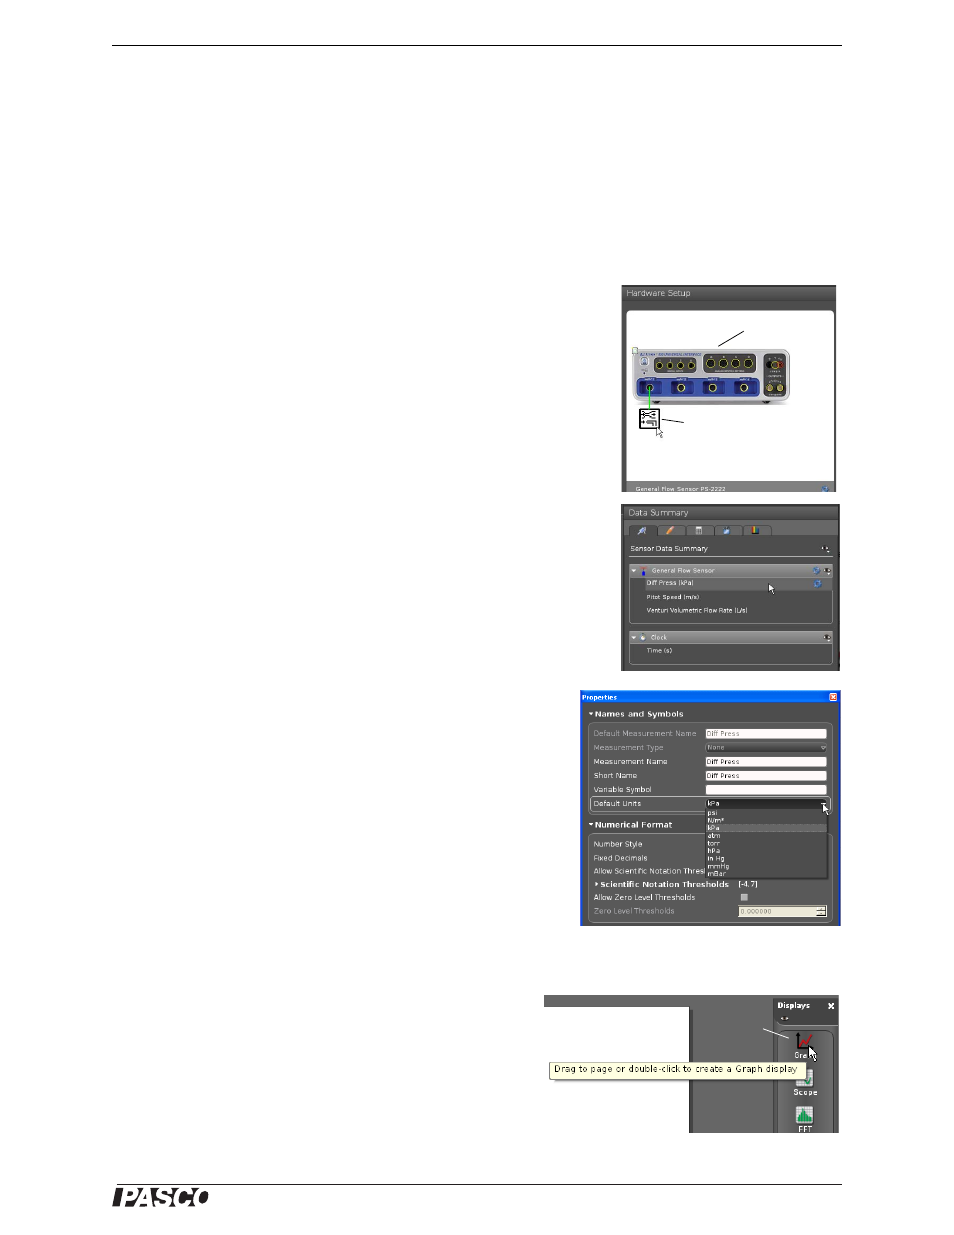
In the PASCO Capstone software, click the “Hardware Setup” icon in
the Tools palette to open the “Hardware Setup” panel. Confirm that the
General Flow Sensor icon appears with the interface’s icon.
•
Click the “Data Summary” icon in the Tools palette to open the
“Data Summary” panel. The panel lists the sensor’s measure-
ments (for example, Differential Pressure (Diff Press kPa)).
•
To select the units of measure or make other changes to the
measurement properties, select the parameter in the Sensor
Data Summary panel, and then click the “Properties” icon
(shaped like a gear) to open the Properties panel. To change
units, click “Names and Symbols”. Both metric and non-metric
units are selectable.
•
In the event that a fluid other than air or water is used, input
appropriate values for density in the user input values in the
PASCO Capstone software.
Set Up a Data Display
•
Set up a data display. For example, drag the Graph icon
from the Displays palette onto the workbook page, or dou-
ble-click the icon to create a Graph display.
General Flow Sensor
icon
Interface icon
Hardware Setup Panels
Data Summary Panel
Sensor Measurement Properties
Create a Graph display
Graph display
icon