Using the mini-rotational disk – PASCO PS-2120A Rotary Motion Sensor User Manual
Page 5
®
M o d e l N o . P S - 2 1 2 0 A
I n t r o d u c t i o n
5
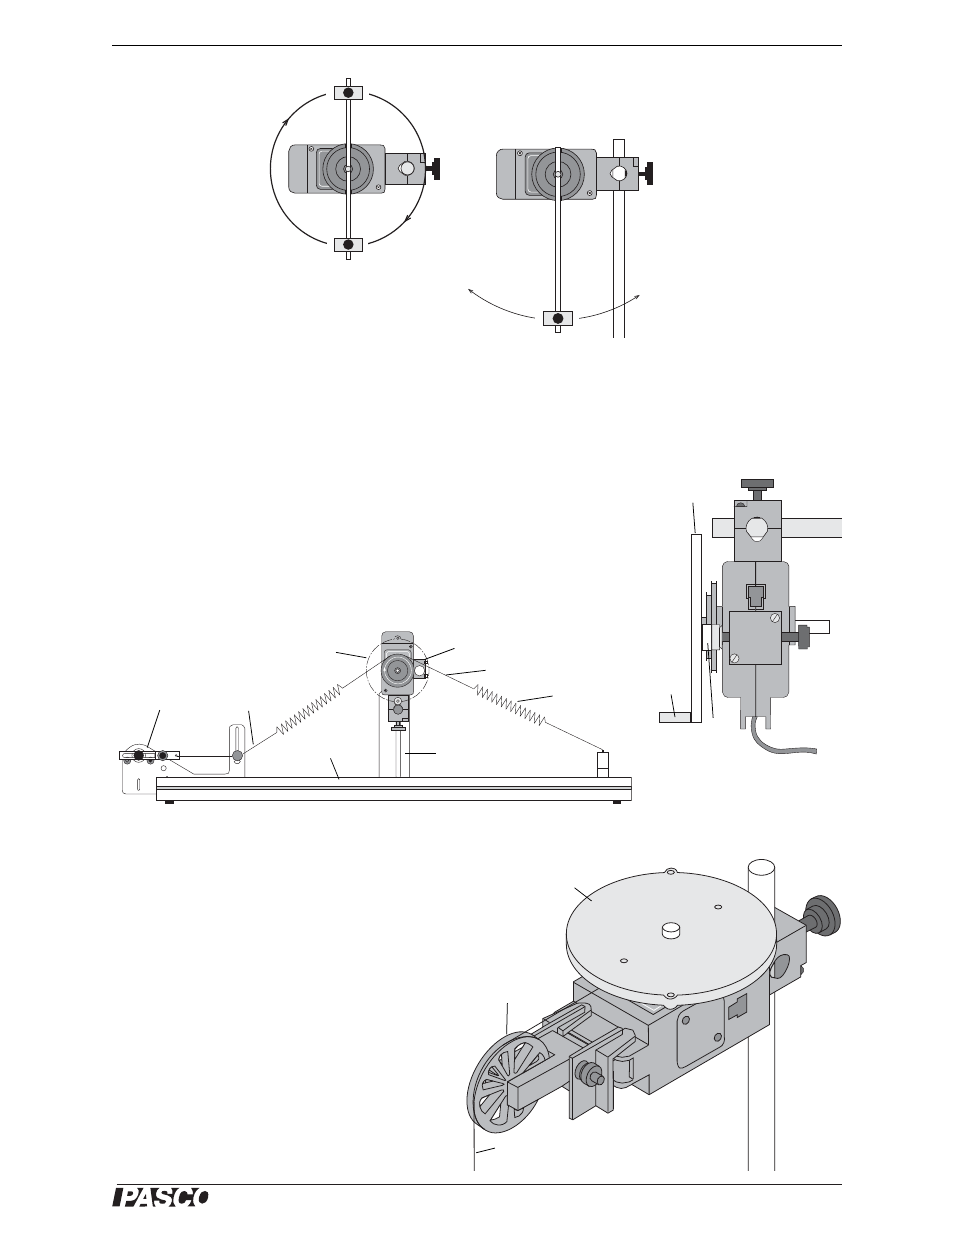
Attaching the Chaos/Harmonic Motion Accessory to the Rotary Motion Sensor
The Chaos/Harmonic Motion Accessory (CI-6689A) is a driven damped physical pendulum. Various types of
phase plots can be made as the driving frequency, driving amplitude, initial conditions, and amount of damping
are varied.
The Magnetic Damping Attachment attaches to either side of the Rotary Motion
Sensor in the same way as the rod clamp is attached. A small cylindrical mass
attaches to the threaded hole in the edge of the disk to form the physical pendu-
lum. Mount the disk with the small mass to the 3-step Pulley and shaft.
One way to drive the Chaos/Harmonic Motion Accessory is with the Mechani-
cal Oscillator/Driver (ME-8750) and a power supply. Any PASCO track can be
used to mount and align all the components.
Using the Mini-Rotational Disk
For other rotational inertia experiments, mount
the Rotary Motion Sensor with the disk horizon-
tal. Mount a Super Pulley with Clamp
(ME-9448B) on the platform at the cable end of
the sensor. To provide a known torque, wrap a
string around one of the steps of the 3-step Pul-
ley. Arrange the end of the string over the Super
Pulley and attach a hanging mass.
Perform a conservation of angular momentum
experiment by dropping the ring onto the disk as
it is rotating.
Pendulum Setup
Point Mass Setup
Disk
Mass
Magnet
Disk (phantom
image)
Magnet Damping
Attachment
String
Spring (2)
Dynamics Track
Mount Accessory
String
Mechanical
Oscillator/Driver
PASCO Track
Chaos/Harmonic Motion Accessory Setup
Super Pulley
with Table
Clamp
String to
hanging mass
Disk
Rotary Motion
Sensor with
3-step Pulley