Set-up, Data collection, Sensor configuration – PASCO PS-2103A Motion Sensor User Manual
Page 2
®
M o t i o n S e n s o r
PS - 2 1 0 3 A
2
Set-up
To Connect to a PASPORT
Interface
1.
Connect the Motion Sensor's plug to any port of your
PASPORT interface.
2.
If you are using a computer, connect the PASPORT interface
to it and start DataStudio.
DataStudio or your standalone PASPORT logging interface will
automatically prepare itself for data collection and create a graph
to display position data.
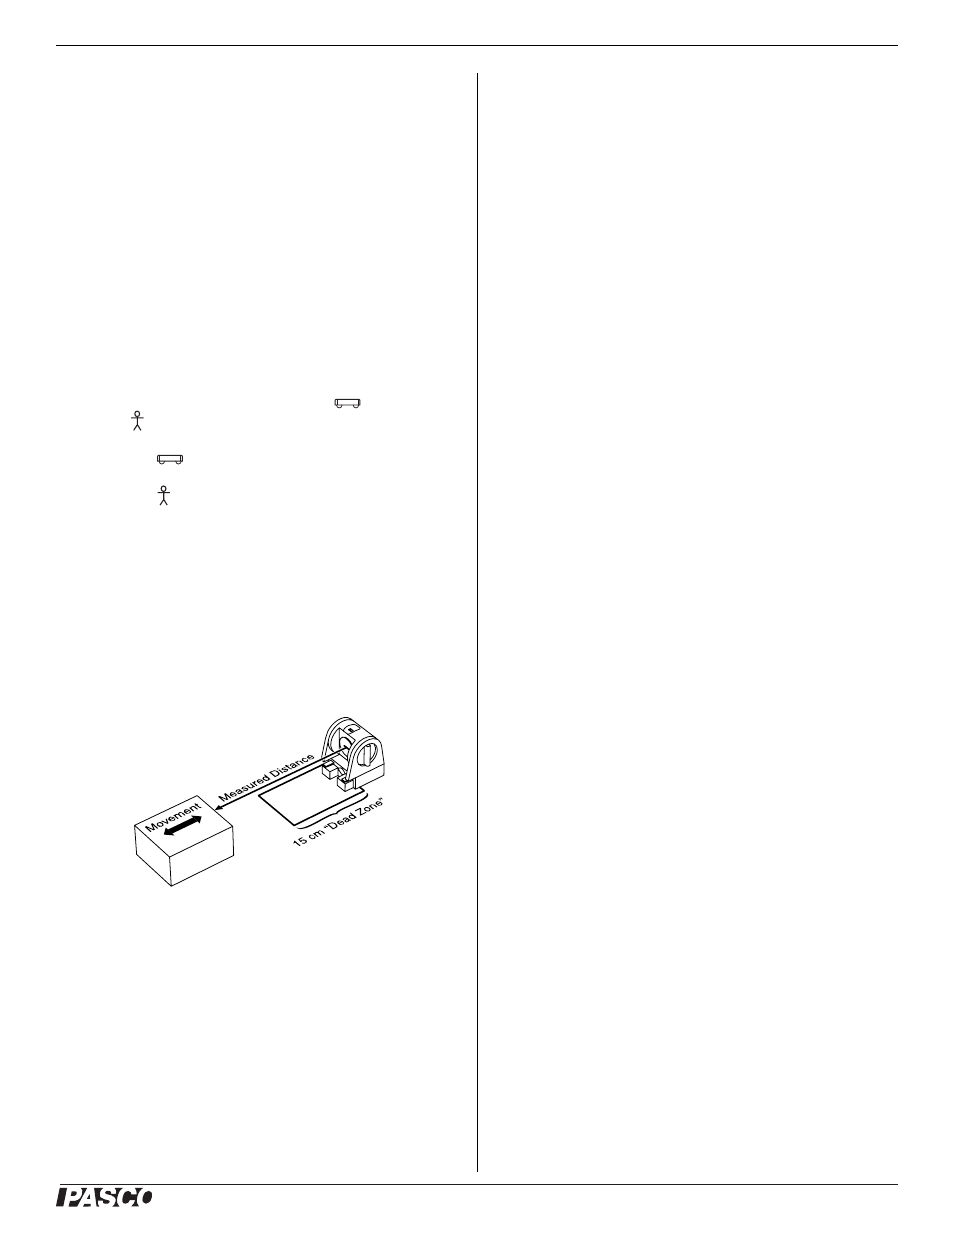
To Aim the Motion Sensor at an Object
1.
Set the range switch to the short range (
) or long
range (
) setting.
•
Select
for measuring a cart on a track.
•
Select
for measuring most other objects.
2.
Arrange the Motion Sensor and object so that the Motion
Sensor's transducer faces the object.
•
The object should be at least 15 cm from the transducer.
•
If the object will move, it should move directly toward
or away from the Motion Sensor.
•
Aim the motion sensor slightly up to avoid detecting the
tabletop.
3.
Remove objects that may interfere with the measurement.
These include objects between the sensor and target object,
either directly in front of the sensor or to the sides.
Data Collection
DataStudio
1.
Click Start.
The Motion Sensor starts clicking. If a target is in range, the
target indicator flashes with each click. DataStudio starts
collecting and displaying data.
2.
Click Stop to stop data collection.
3.
Click Start again to start recording data in a new data run.
Xplorer GLX (Standalone)
1.
Press
s.
The Motion Sensor starts clicking. If a target is in range, the
target indicator flashes with each click. The GLX starts
collecting and displaying data.
2.
Click
s to stop data collection.
3.
Click
s again to start recording data in a new data run.
Sensor Configuration
To View Velocity and Acceleration
The Position measurement appears by default. You can also
enable Velocity and Acceleration measurements.
•
In DataStudio, click Setup to open the Experiment Setup
window. Select the Velocity and Acceleration check boxes.
•
On the GLX while viewing any display screen, press
c
twice to open a data source menu. Select More to expand the
menu. Select Velocity or Acceleration.
To Change the Sample Rate
•
In DataStudio, click Setup to open the Experiment Setup
window. Click the up or down button next to the Sample
Rate setting.
•
On the GLX, press
h + I to open the Sensors screen.
Highlight the Sample Rate setting and press
+ or -.
The normal range of sampling rates is between 1 Hz and 50 Hz.
At the default rate of 10 Hz, the Motion Sensor can measure dis-
tance up to 8 m. The maximum distance decreases with increas-
ing sample rate. At very high sample rates (between 50 Hz and
250 Hz), the maximum distance is less than 2 m.