Operation – PASCO ME-9498A Photogate Head User Manual
Page 2
®
P h o t o g a t e H e a d
ME-9 49 8A
2
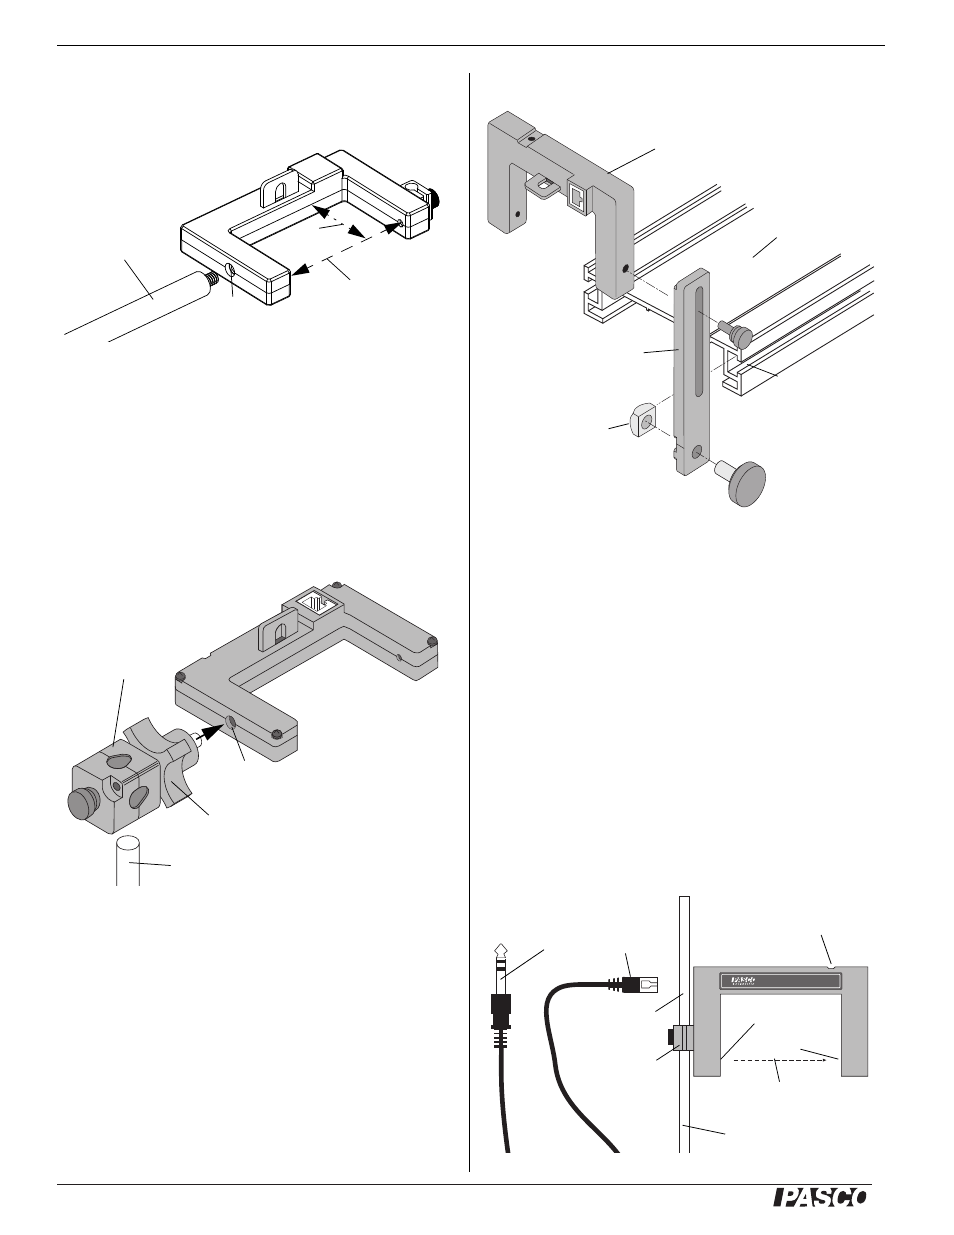
The Photogate Head can be attached to the PASCO SA-9242
Pulley Mounting Rod. This 14 cm long (6 in) by 9.5 mm (3/8 in)
diameter rod fits into the 1/4-20 threaded hole in the photogate
housing opposite the side of the small rod clamp..
The open space for the Photogate Head is 7.5 cm wide and 4.2
cm deep.
The Photogate Head can be mounted on a support rod of up to
12.7 millimeter (1/2 in) in diameter by attaching a PASCO
ME-8744 Adjustable Angle Clamp. It is necessary to remove
the “"mobile" part of the adjustable angle clamp from the clamp
assembly and secure the “fixed” part of the clamp assembly to
the 1/4-20 threaded hole in the photogate housing opposite the
side of the small rod clamp. Rotate the equipment to the correct
orientation and then secure it with the locking knob on the
clamp assembly.
The Photogate Head can also be attached to the side of a
PASCO Track with a ME-9806 Photogate Bracket (set of 2).
Slide the square nut on the Photogate Bracket into the T-slot on
the side of the PASCO Track. It is necessary to remove the small
rod clamp from the Photogate Head. (Save the clamp assembly
for later use.)
Use the short thumbscrew from the bracket assembly for attach-
ing the photogate to the mounting bracket.
Operation
1. Attach the Photogate Head to a support rod, clamp, or
mounting bracket.
2. Position the photogate so the object to be timed will pass
through the photogate, blocking the infrared beam. To min-
imize parallax error, pass the object as close to the infrared
detector as possible, with the line of travel perpendicular to
the beam. Loosen the small rod clamp thumbscrew to
change the angle or height of the photogate.
3. Plug the RJ12 phone plug from the cable assembly into the
modular phone jack on the photogate housing.
4. Plug the stereo phone plug at the other end of the cable
assembly into the timer, adapter, or interface.
5. Test the operation of the photogate by watching the LED on
the photogate as the beam is blocked.
Pulley
Mounting Rod
(SA-9242)
1/4-20
Threaded Hole
Width = 7.5 cm
Depth =
4.2 cm
Adjustable Angle Clamp
(ME-8744)
Support Rod (up to 12.7 mm diameter)
1/4-20
Threaded Hole
Locking Knob
PASCO Track
Photogate Bracket
(ME-9806)
T-slot
Photogate Head
Square
Nut
®
PHOTOGATE HEAD
ASSEMBLY NO.003-06268
LED is on when
beam is blocked
Infrared Beam
Small Rod
Clamp
RJ12
Phone Plug
Stereo
Phone Plug
Photogate Stand
(ME-9805)
6.2 mm (1/4 in)
diameter rod
Source
Detector