Diamond Products CC7074 User Manual
Page 32
29
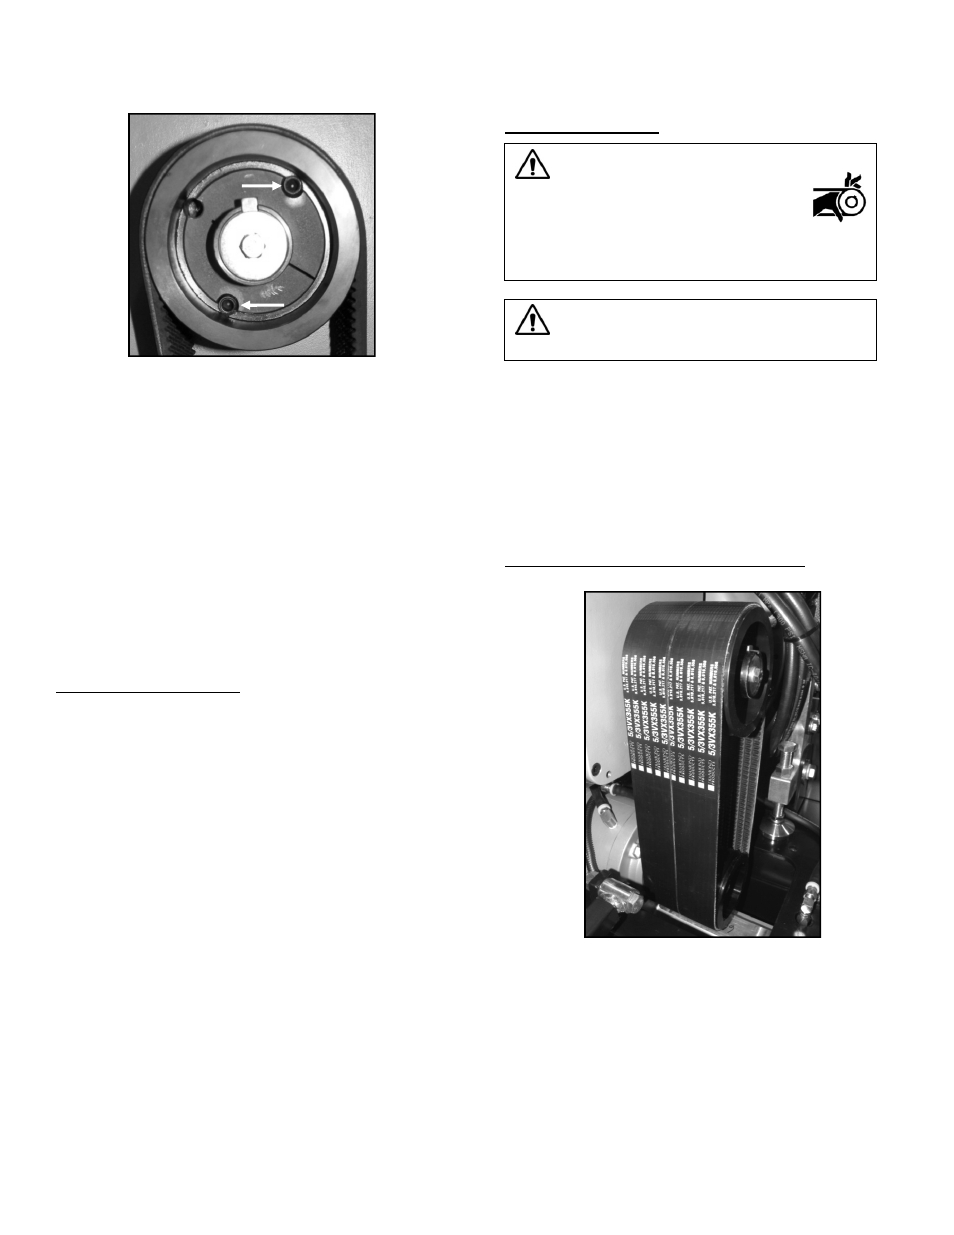
Figure 34: Sheave Setscrews
6. Place one of the removed setscrews into the third
setscrew hole (in line with slot) on the bushing.
Using a 1/2” impact wrench, tighten the setscrew
into the hole to separate the sheave from the
bushing. If the sheave and bushing will not separate,
wedge a flat-head screwdriver into the slot on the
bushing and tap the other end of the screwdriver
with a rubber mallet to separate the sheave and
bushing.
7. Remove the sheave from the bushing.
8. Repeat steps 5–7 to remove the three remaining
sheaves.
9. Remove the setscrew used to separate the sheave
and bushing from all four bushings.
Installing the Belt Sheaves
1. Fit the appropriate size sheave onto each bushing.
2. On one side of the saw, place a straightedge against
the edge of the upper or lower sheave. Adjust either
sheave to align the outside edge of both sheaves.
3. Place two setscrews into the setscrew holes (in line
with each other) on both sheaves and retighten the
setscrews to secure. Note: Make sure both sheaves
are properly aligned prior to securing.
4. Repeat steps 2–3 for the second set of sheaves.
5. Turn both blade drive belt tension bolts (large
threaded bolt on engine foot) clockwise equally to
tighten the belts. Test the belt tension and readjust
the bolts as necessary. Refer to Appendix C for
additional information on belt tension settings. DO
NOT exceed the manufacturer’s tension settings.
6. Tighten the nut on both blade drive belt tension bolts
down to the engine foot.
7. Retighten the two engine cradle screws.
Blade Drive Belts
WARNING
Turn off the engine prior to servicing
the belts.
Use extreme caution when working
with belts and rotating machine parts to avoid
entanglement.
CAUTION
Let the belts cool down prior to servicing them.
Inspect all belts daily for fraying, stress cracks, and/or
breakage and replace immediately when damaged.
Always re-tension new belts after the first four hours of
use. DO NOT exceed the manufacturer’s recommended
belt tension settings when tensioning belts. Note: Over-
tensioning belts may reduce the life of the gearbox
bearings. Under-tensioning belts may cause slippage,
shorter belt life, and/or poor saw performance. Squealing
belts indicate looseness.
Tensioning/Replacing the Blade Drive Belts
Figure 35: Blade Drive Belts
1. Test the belt tension. Refer to Appendix C for
additional information on belt tension settings.
2. Loosen the two engine cradle screws. If tensioning
the belts, proceed with steps 7–9. If replacing the
belts, continue with steps 3–9.
3. Loosen the nut away from the engine foot on both
blade drive belt tension bolts.