Diamond Products CC7074 User Manual
Page 15
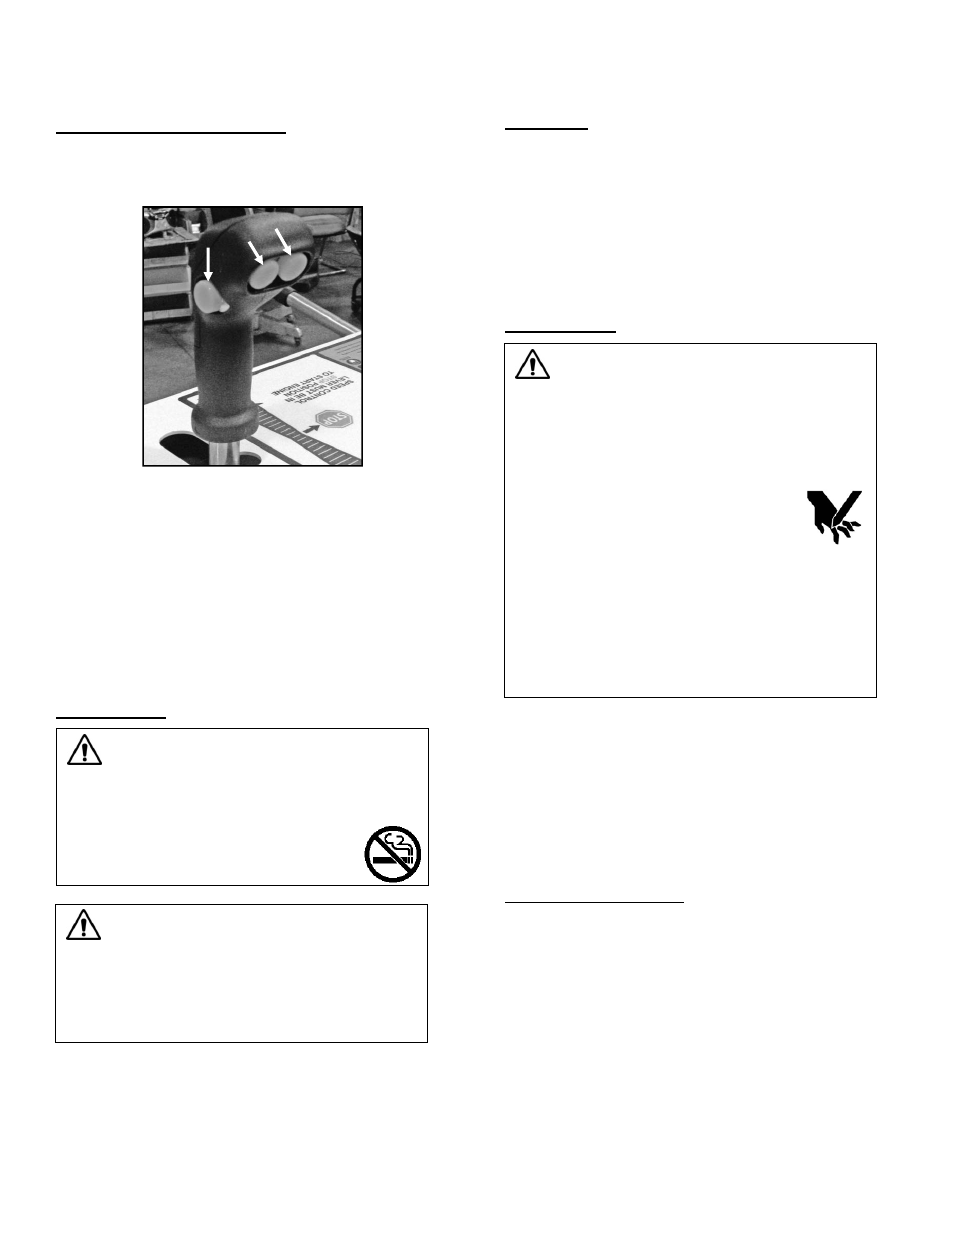
12
Control Grip Pushbuttons
The control grip pushbuttons only work with the ignition
key at Run or with the engine running.
Figure 5: Control Grip
Pushbuttons
1. Press
the
Raise (left) pushbutton to raise the saw
and blade, and release to stop. Note: Always raise
the blade when maneuvering the saw to provide
proper clearance between the blade and the ground.
2. Press
the
Lower (right) pushbutton to lower the saw
and blade, and release to stop.
3. Press
the
Tilt Handlebar pushbutton and move the
handlebar up or down to adjust the angle.
Fuel System
WARNING
Always use caution when refueling.
DO NOT operate the saw with a fuel leak.
DO NOT fuel the saw with the engine running.
DO NOT smoke or expose fuel to
open flames when filling the fuel
tank or working with fuel.
CAUTION
Clean up any spilled fuel prior to starting the
engine.
Fuel may seep out from the fuel cap vent
(applicable models) when raising the saw if the
fuel tank is overfilled.
Adding Fuel
1. Lower the saw to level the frame.
2. Turn off the engine and let the saw cool down.
3. Remove the fuel tank cap.
4. Fill the fuel tank with low sulfur or ultra-low sulfur
diesel fuel. DO NOT overfill the tank for expansion
purposes. Refer to the engine manual for
information on appropriate diesel fuels in normal and
cold weather temperatures.
5. Replace the fuel tank cap and secure.
Blade Guard
WARNING
DO NOT operate the saw with the blade guard
raised or removed.
DO NOT remove the blade guard with the
engine running.
Blade exposure should not exceed 180° while
cutting.
Always pivot the front of the blade
guard 180° (fully upward) so the
guard does not swing down
unexpectedly, which may cause serious
injuries.
Always secure the pivoted section of the blade
guard using the detent pin (guards 26” and
up).
When pivoting the front of the blade guard,
raise/lower it cautiously and slowly to avoid
serious injuries.
The blade guard shields the blade and must always be
in place when operating the saw. Blade guards generally
stay in place at all times, except for when changing to
another guard size or when using the guard on the
opposite side of the saw. Regularly inspect the blade
guard and water tubes. Clean, repair, or replace dirty or
damaged components immediately. Note: Always use a
guard size that matches the blade size. Refer to the
parts list for additional information.
Installing the Blade Guard
Always install the blade guard with the blade off the saw.
1. Holding the blade guard handle, face the front of the
blade guard forward and fit the tapered mount on the
side of the guard onto the tapered mount on the
frame.