Minuteman European KS 40 User Manual
Page 7
7
6. FILTER.BAG
7.FILTER SHAKING WASHERS
PIC.G REPLACEMENT OF FUSES
1.NUT
2 ELECTRICAL BOX COVER.
3.FUSE 8A (SERVICES)
4.FUSE-BOX (SERVICES)
5.RIBBON FUSE 30A (BRUSHES AND VACUUM).
6.RIBBON FUSE-BOX.
7.RIBBON FUSE-BOX.
8.RIBBON FUSE 30A (FORWARD)
PIC.H RECHARGE OF BATTERIES
1.MOBILE CONNECTOR.
2.FIXED CONNECTOR LINKED TO BATTERIES.
3.SAFETY LOCKING FOR HOOD
KS40
STARTING OF MOTOR AND BRUSHES SWITCH
(PIC. a)
⇒Turn the key (n°4 pic.A) to the “1” position.
DEACTIVATION OF MOTOR AND BRUSHES (pic. a)
⇒Turn the key (n°4 pic.A) to the “0” position
CLEANING OF FILTERS (pic. f)
The EFFICIENCY the sweeping machine depends MAINLY
UPON THE FILTER CONDITION.REGULAR FILTER
CLEANING IS RECOMMENDED ESPECIALLY IN DUSTY
ENVIROMENTS.
To carry out the cleaning of filters:
⇒Turn the vacuum off by the handle (n°1 Pic.C).
⇒Come down from the machine.
⇒Move the lever up (n°1 Pic.F) and let it drop
⇒Repeat this operation a few times.
VACUUM CUT-OFF (PIC. c)
If you must overstep a wet floor or go across an area with
puddles, you have to cut the vacuum off using the handle
(n°1 Pic. C), in order to keep filters in good condition.
BATTERY CHARGE INDICATOR (n° 1 pic. a)
⇒It monitors the level of charge of the battery . While the
green led is on , you can sweep . When the yellow led
comes on , you must put machine on charge. When the
red led comes on , you must immediately switch off the
machine , this prevents irreversible battery damage. .
HOW TO CHARGE BATTERIES (PIC. h)
⇒Turn off the machine using the key(n°4 Pic.A).
⇒Lift the hood up.
⇒Unplug the connector (n°1 Pic. H) and plug into the
connector of the battery charger.
⇒Charge the batteries to a level not above 1/20
th
of their
capacity.
⇒Check level of electrolyte and top it up, if necessary,
with distilled water.
⇒Insert the connector (n°1 Pic. H) to the fixed connector
(n°2 Pic. H).
WARNING!
⇒Batteries must be charged in a ventilated area.The gas
generated during charging operations can cause an
explosion.
⇒The battery acid must not come in contact with eyes,
skin, clothes, painted or zinc coated surfaces.
⇒Should this happen, wash off the acid with water.
⇒Do not place metallic objects over the batteries.
⇒Remove all caps from the various battery cells before
charging the battery.
⇒Do not top up with sulphuric acid.
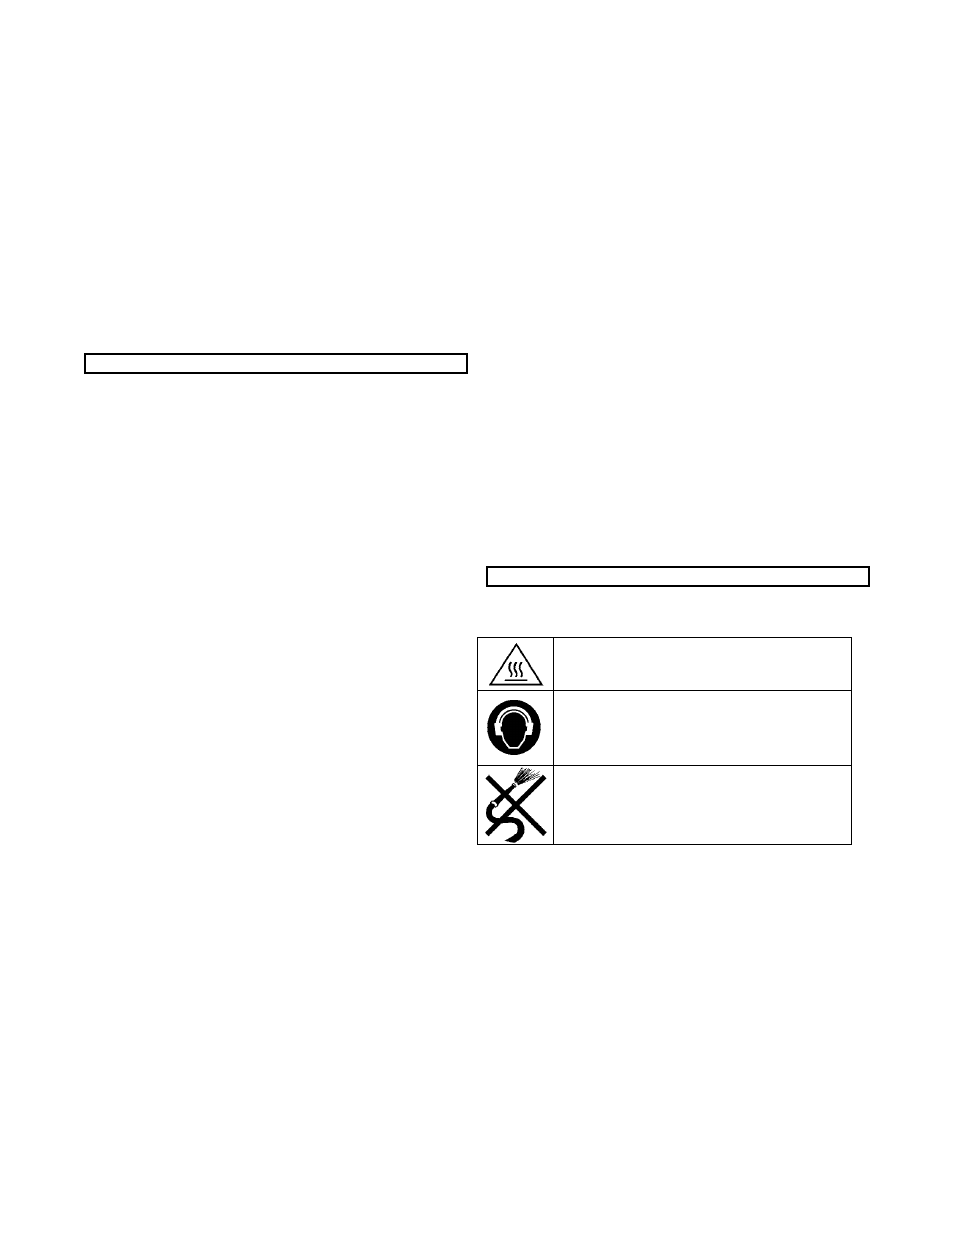
DANGER AND OBLIGATION SYMBOLS.
DANGER SYMBOL.
WARNING: very hot surfaces
OBLIGATION SYMBOL.
WARNING : Use adequate acoustic protection.
In a number of working environments, sweepers
might generate an acoustic danger which can be
eliminated with adequate acoustic protection .
PROHIBITION SYMBOL.
ATTENTION: DO NOT GET WET
Devices (normally they are electrical components)
having this indication must be kept dry.
EMERGENCY SITUATIONS
Please follow these dispositions rigorously:
⇒In the event of fire, use only powder fire extinguishers.
⇒In the event of unusual failures (engines or motor
overheating, etc.) turn off immediately.
In case of emergency, if it becames necessary to deactivate
the machine, turn the safety red switch (n°2 Pic. C). through
90 degrees in an anti clockwise direction.
HOW TO USE THE MACHINE
FORWARD SPEED (Pig. B)
The operator must be seated.
⇒Turn the key to position 1 (N.4 Pic. A).
⇒Confirm that the safety switch (N.2 Pic. C) is in the correct
position.
⇒Confirm that the parking brake is notengaged (n°2 Pic.
B).
⇒Verify that the button for forward and reverse speed (n°3
Pic. B) is in forward position.
⇒By turning the handle anti clockwise (n°4 pic. b) you will
have forward motion.
REVERSE SPEED (PIC. B)
⇒Move the button (n°3 Pic. B) for reverse speed.
⇒By turning THE HANDLE anticlockwise (n°4 Pic. B) you
can go IN REVERSE
FLAP LEVER (PIC. c)
⇒Raise the flap USING the lever to collect light and bulky
debris (n°3 Pic. C).
MAIN BRUSH (pic. c)
⇒The main brush can be raised and lowered by mean of a
lever (n°4 Pic. C).
SERVICE BRAKE (PIC. b)
⇒The service brake is activated by releasing the traction
lever (n°4 Pic. B).
EMERGENCY BRAKE (PIC. b)
⇒In case of emergency, pull the lever in order to stop the
machine (n°1 Pic. B).
PARKING BRAKE (PIC. b)
⇒When you finish, pull the lever (n°1 Pic. B).
⇒Press the button for locking (n°2 Pic. B) at the point
shown by the arrow in Picture B.