Minuteman E Ride 21 User Manual
E ride 21, User and maintenance manual
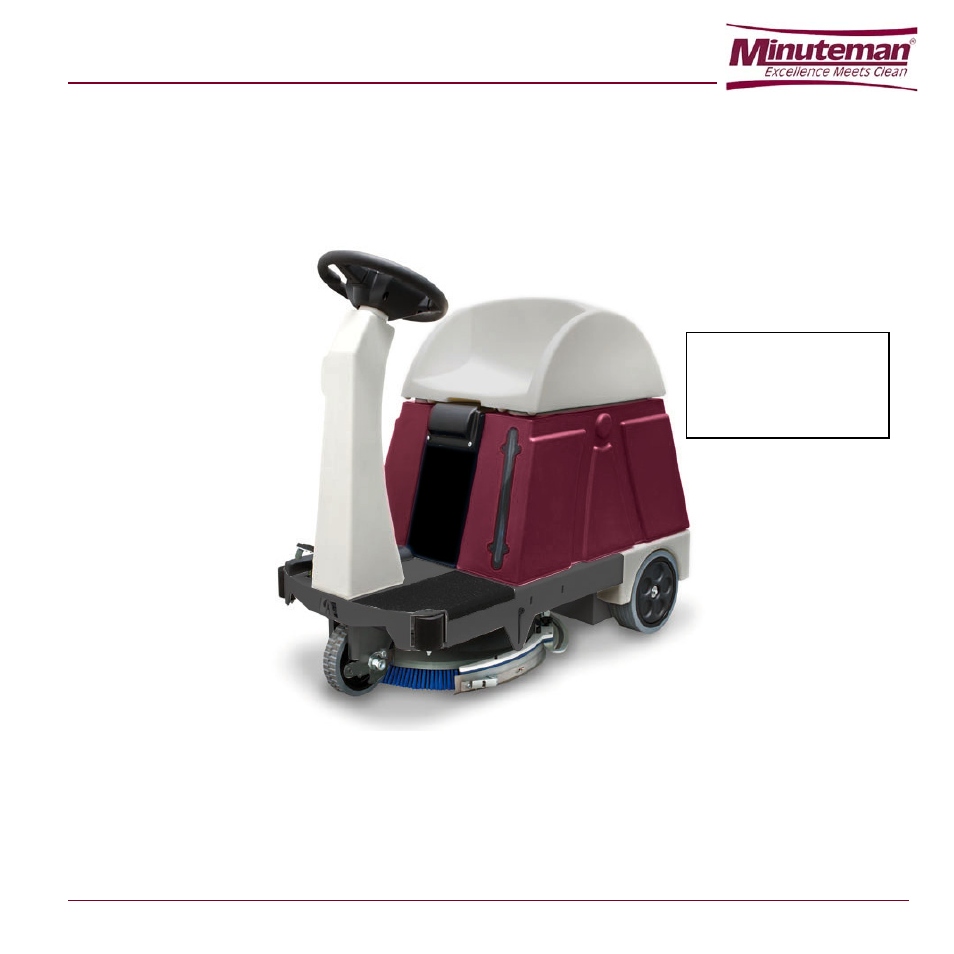
Table of contents
Document Outline
- USER AND MAINTENANCE MANUAL
- Clever S01
- Clever S01 CIL
- Minuteman Excellence Meets Clean
- 14N845 U.S. Route 20,
- Pingree Grove, IL 60140
- Phone: (847) 264-5400
- Fax: (847) 683-5207
- 1.1 PURPOSE AND CONTENT OF THE MANUAL
- 1.2 TARGET
- 1.3 HOW TO KEEP THIS MANUAL
- 1.4 IDENTIFICATION DATA
- The Machine Model and Serial Number are marked on the plate on the frame and can be read from the outside (1, Figure 1-1).
- This information is useful when requiring machine and engine replacement parts. Use the following table to write down the machine identification data for any further reference.
- MACHINE model: ............................................
- MACHINE serial number.......:..........................
- 1.5 OTHER REFERENCE MANUALS
- 1.6 SPARE PARTS AND MAINTENANCE
- 1.7 MODIFICATIONS AND IMPROVEMENTS
- 1
- Figure 1-1
- The following symbols indicate potentially dangerous situations. Always read carefully this information and take the necessary precautions to protect people and objects.
- Cooperation between the Operator and the machine is critical. No accident prevention program is effective without the total coop...
- 2.1 SYMBOLS
- 2.2 GENERAL INSTRUCTIONS
- 2.3 UNPACKING
- 3.1 SCRUBBER-DRYER OPERATION
- 3.2 AGREEMENTS
- 3.3 DESCRIPTION
- Control panel and controls
- (See Figure 3-1)
- 1. Control panel and controls
- 2. Emergency stop button
- 3. Display, indicating:
- 4. Adjustment buttons (+ and -) of the detergent solution flow (or of the water for washing) (*)
- 5. Light indication of the detergent solution flow (or water for washing)
- 6. Adjustment buttons (+ and -) of the detergent percentage according to washing water (optional) (*)
- 7. Light indication of the detergent percentage (optional).
- 8. 30-second turbo button for activating the maximum detergent solution and detergent flow (or water for washing).
- 9. 30-second light indication.
- 10. Adjustment button of the maximum wash-and-dry machine speed (*)
- 11. Wash-and-dry machine instantaneous speed light indication
- 12. Button for activating the lowering and rotation of the disc brush (or cylindrical brushes)
- 13. Activated disc brush (or cylindrical brushes) light indication; the light indication blinks during the passage from de-activated to activated and vice versa
- 14. Button for activating the lowering of the squeegee and water recovery suction.
- 15. Activated squeegee and suction light indication; the light indication blinks during passing from de- activated to activated and vice versa
- 16. Simultaneous activation button for both the squeegee and suction and the disc brush (or cylindrical brushes).
- 17. Activated squeegee, suction and disc brush (or cylindrical brushes) light indication; the light indication blinks during passing from de-activated to activated and vice versa
- 18. Button for activating the reverse motion. Speed is halved compared to the forward motion A attention sound signal is activated for the activation time of the reverse motion
- 19. Reverse motion activated light indication
- 20. Button for activating the sound attention sound signal.
- 21. Button for releasing the disc brush.
- (*): On starting the wash-and-dry machine through the key, these adjustments are set on previous values.
- 11
- Figure 3-1
- External views
- (See Figure 3-2 and Figure 3-3)
- 1. Steering-wheel
- 2. Ignition key: 0: off I: on
- 3. Pedal for starting motion and acceleration
- 4. Detergent solution (or water for washing) level indicator
- 5. Front drive and steering wheel
- 6. Rear wheels
- 7. Disc brush (for Clever S01)
- 8. Cylindrical brushes (for Clever S01 CIL)
- 9. Squeegee
- 11. Tank covers
- 12. Operator’s seat
- 13. Detergent tank with handle (optional)
- 14. Detergent tank stopper
- 15. Detergent solution (or water for washing) tank stopper
- 16. Water recovery waste pipe
- 17. Detergent solution (or water for washing) waste pipe
- 18. Battery-holder case
- 19. Blinking light (optional)
- 20. Drinks-holding container (usable only if the blinking light is not installed)
- 21. Object-holding container (usable only if the detergent tank is not installed)
- 22. Protection panel of the electric-electronic compartment
- 23. Detergent solution (or water for washing) filter
- 24. Identification plate / technical data / CE marking
- 25. Tanks cover lifting handle
- 26. Heel cushion
- 27. Rear wheel cover
- 28. Rear wheel mudguard
- 29. Emergency and parking brake
- 11
- 19
- 1
- Figure 3-4
- 3.4 TECHNICAL CHARACTERISTICS
- 3.5 ELECTRICAL DIAGRAM
- 3.6 ELECTRICAL PROTECTIONS
- 3.7 WASH-AND-DRY MACHINE EQUIPMENT
- 3.8 OPTIONAL ACCESSORIES
- 4.1 BATTERIES CONTROL / INSTALLATION ON A NEW WASH- AND-DRY MACHINE
- 4.2 BEFORE STARTING THE WASH- AND-DRY MACHINE
- General control
- Control of water recovery tank
- Water filling of the detergent solution (or water for washing) tank
- 3. (Basic version) Unscrew the stopper (4, Figure 4-1), then introduce water through its nozzle (5). Once the filling is completed, screw the stopper (4).
- 4. (Version with extractable hose) Unscrew the stopper (4, Figure 4-1), then extract the extractable hose (6) and position its o...
- 5. (Version with quick connect stopper) Connect the water pipe equipped with a proper quick connection to the stopper (9) quick ...
- Addition of detergent in the water for washing tank
- (Only for the version without automatic detergent feeding system (MCS))
- Filling of the detergent tank (Only for the version with automatic detergent feeding system (MCS))
- 7. If necessary, it is possible to remove the detergent tank from the wash-and-dry machine (10, Figure 4-1), by seizing its handle (11) and raising it.
- 8. Unscrew the stopper (12).
- 9. Introduce the washing detergent into the tank (10, Figure 4-1), then screw the stopper (12).
- 10. If removed, reinsert the tank (10, Figure 4-1) to its place in the wash-and-dry machine.
- 5
- Figure 4-1
- 4.3 START UP AND STOPPING OF MACHINE
- Start up
- 1. Prepare the machine as envisaged in the previous paragraph.
- 2. Seat up on the machine seat (7, Figure 4-2).
- 3. Turn the start up key (1, Figure 4-2) on “I”; wait a few seconds until on the display (3) appears the machine- is-ready caption (4) “READY”.
- 4. Check the state of the battery charges by observing the percent indication (5, Figure 4-2) and the graphic indication (6).
- 5. Go to the workplace, by starting up the machine with the hands on the steering wheel and by pressing the pedal (2, Figure 4-2...
- 6. If necessary, through the buttons (8, Figure 4-2) adjust the capacity of the detergent solution (or water for washing).
- 7. (Optional) If necessary, through the buttons (9, Figure 4-2) adjust the percentage of the detergent for washing.
- 8. If necessary, through the button (10, Figure 4-2) adjust the maximum speed of the machine.
- 9. To start washing the pavement, activate the disc brush (or cylindrical brushes) through the button (11, Figure 4-2).
- 10. To start drying of the pavement, activate suction through the button (12, Figure 4-2).
- 11. To start both washing and drying of the pavement, activate the button (13, Figure 4-2).
- 12. Start cleaning work by handling through the hands the steering wheel (14, Figure 4-2) and by driving forward the machine by pressing appropriately the pedal (2).
- Stopping the machine
- 13. Release the pedal (2, Figure 4-2).
- 14. Press the buttons (11, Figure 4-2) or (12) or (13,) to deactivate and lift the respective active operations. Suction stops a few seconds after activation of the related button, for sucking all the water present in the piping.
- 15. Turn the start up key (1, Figure 4-2) on “0”, and then extract it.
- 16. If necessary, proceed with emptying the tanks, operating as described in the specific paragraph.
- 17. To stop immediately the machine in the event of an emergency, press the button (15, Figure 4-2). To cut out the emergency button (15), turn it clockwise until unhooking it from the lower position.
- Start up
- 7
- Figure 4-2
- 4.4 WASH-AND-DRY MACHINE IN OPERATION
- 1. During operation, check the state of the batteries charge to avoid flat batteries in inaccessible battery recharge points.
- 2. Check also periodically the residual quantity of detergent solution (or water for washing), through its level indicator.
- 3. If the water recovery tank fills during use of the wash- and-dry machine, suction is automatically stopped. To start suction again, it is necessary to empty the water recovery tank (see related paragraph).
- 4. If necessary, at the end of the operation, proceed with emptying the tanks (see related paragraph).
- 4.5 AFTER MACHINE USE
- At the end of the work, before leaving the machine:
- Disconnect the brush in the following way:
- 1. Empty the tank of water recovery, as listed in the following paragraph.
- 2. Clean the disc brush (or cylindrical brushes) and the squeegee, as listed in the Maintenance Chapter.
- 3. If necessary, recharge the battery as listed in the Maintenance Chapter.
- 4. Leave the machine in a dry and clean place, with brush and squeegee lifted.
- 4.6 EMPTYING THE TANKS
- Emptying the tank from water recovery
- 1. Take the wash-and-dry machine to the suitable area for draining the water recovery, in full compliance of the anti-pollution regulations in force.
- 2. Disengage the hose (1, Figure 4-3) from its seat and raise it beyond the upper edge of the tank until its area (2) is water free; then, by keeping it in this position, unscrew the stopper (3).
- 3. Bend manually the hose in the area (2) until obtaining a watertight fold (17); then, by keeping it bent, lower it on the drain area.
- 4. Release gradually (in order to avoid undesired squirts) the fold (17) by letting the dirty water flow out from the tank into the drain area.
- 5. With the handle (4, Figure 4-3), raise the cover of the tanks (5) and, if necessary, wash the water recovery tank (6); wash a...
- 6. Let all the water for washing flow out of the hose (1, Figure 4-3), then screw the stopper (3) and engage the hose (1) on its seat in the wash-and-dry machine.
- Detergent solution (or water for washing) tank emptying
- 7. Take the wash-and-dry machine to the suitable area for draining the detergent solution (or water for washing), in full compliance of the anti-pollution regulations in force.
- 8. Disengage the hose (10, Figure 4-3) from its seat and raise it beyond the upper edge of the tank until its area (11) is free from water; then, by keeping it in this position, unscrew the stopper (12).
- 9. (Only for optional hose that can be pressed in the area (11)): Bend manually the hose in the area (11) until obtaining a wate...
- 10. If necessary, wash the detergent solution (or water for washing) tank after unscrewing the stopper (13).
- 11. Let all the water for washing flow out of the hose (10, Figure 4-3), then screw the stopper (12) and engage the hose (10) on its seat in the wash-and-dry machine.
- Emptying of the washing detergent tank (Optional)
- 12. Remove the detergent tank from the wash-and-dry machine (14, Figure 4-3), by seizing its handle (15) and raising it.
- 13. Unscrew the stopper (16) and let the washing detergent flow out of the tank in the suitable area for draining the washing detergent.
- 14. If necessary, wash the washing detergent tank.
- 15. Screw the stopper (16, Figure 4-3) and place the tank (14) in its seat in the wash-and-dry machine.
- Emptying the tank from water recovery
- 15
- Figure 4-3
- 4.7 WASH-AND-DRY MACHINE PUSH/ DRAWING MOVEMENT
- 4.8 LONG INACTIVITY OF THE WASH- AND-DRY MACHINE
- If it is intended not to use the wash-and-dry machine for a period longer than 30 days, it is appropriate to perform the following operations:
- 1. Carry out what is indicated in paragraph "After Use of the Wash-and-dry Machine".
- 2. Empty the detergent solution (or water for washing) tank by acting as described in the related paragraph.
- 3. Empty the washing detergent tank (optional) by acting as described in the related paragraph.
- 4. Disconnect the connector of the batteries, by acting as described further down. Remove the left pin (1, Figure 4-4), then rot...
- 5. Clean the detergent feeding system (optional), by acting as described in chapter “Maintenance”.
- If it is intended not to use the wash-and-dry machine for a period longer than 30 days, it is appropriate to perform the following operations:
- 4.9 FIRST PERIOD OF USE
- 4
- Figure 4-4
- The machine proper and safe operation is guaranteed by a careful and constant maintenance.
- The following table sums up the scheduled maintenance. The indicated periods can be subjected to variations according to working conditions. These must be defined by the person in charge for the maintenance.
- All periodic or extraordinary maintenance operations must be performed by skilled personnel, or by an authorized Service Center.
- This Manual contains the Scheduled Maintenance Table and describes only the easiest and most common maintenance procedures.
- 5.1 SCHEDULED MAINTENANCE TABLE
- 5.2 SQUEEGEE CLEANING
- 2
- Figure 5-1
- 5.3 CHECKING/SUBSTITUTION OF THE SQUEEGEE RUBBERS
- 1. Disassemble and clean the squeegee, by operating as described in the specific paragraph.
- 2. Check that the front rubber (1, Figure 5-2) and the rear rubber (2), are whole and are without cuts and tears, otherwise subs...
- 3. Refit the squeegee by operating as described in the specific paragraph.
- 4. If necessary, carry out the height Adjustment of the squeegee by operating as described in the following paragraph.
- 3
- Figure 5-2
- 5.4 HEIGHT ADJUSTMENT of SQUEEGEE
- 5.5 BRUSH CLEANING
- 1. If necessary, remove the disc brush (See procedure in the related paragraph).
- 2. Wash and clean the disc brush (1, Figure 5-4) from dirt and debris
- 3. If removed, replace the disc brush (See procedure in the related paragraph).
- 4. The disc brush must be replaced for excessive wear and tear, when in the lowered brush condition, the lateral pins (2, Figure 5-4) lean on the lower ends (3) of the slots.
- 2
- 1
- Figure 5-4
- 5.6 CYLINDRICAL BRUSH CLEANING
- 1. Remove the cylindrical brushes (See procedure in the related paragraph).
- 2. Wash and clean the cylindrical brushes from dirt and debris.
- 3. Wash and clean the cylindrical brushes cases too (1, Figure 5-5). Check that the drive hubs (2) of the cylindrical brushes are free from dirt debris or twisted objects (ropes, etc.).
- 4. Replace the cylindrical brushes (See procedure in the related paragraph).
- 5. The cylindrical brushes must be replaced for excessive wear and tear, when in the lowered brush condition, the lateral pins (1, Figure 5-5) lean on the lower ends (2) of the slots.
- 2
- 1
- Figure 5-6
- 5.7 CLEANING THE DETERGENT SOLUTION (OR WATER FOR WASHING) FILTER
- 1. Ascertain that the wash-and-dry machine cannot move autonomously.
- 2. By acting on the wash-and-dry machine controls, lower the squeegee and the disc brush (or cylindrical brushes), then rotate the ignition key on “0” and extract it (see chapter Use).
- 3. Close the water/detergent solution flow tap (1, Figure 5-7) by acting on the right side of the wash- and-dry machine.
- 4. Unscrew and remove the filter transparent cover (2).
- 5. Remove the filter (3) from the transparent cover (4).
- 6. Clean the filter (3) and the transparent cover (4).
- 7. Replace the filter (3) in its transparent cover case (4).
- 8. Screw the filter transparent cover to its seat (2).
- 9. Open the tap (1).
- 10. Rotate the ignition key on “I” and wait for the squeegee and disc brush (or cylindrical brushes) lifting, then rotate the ignition key on “0” and extract it.
- 2
- Figure 5-7
- 5.8 CLEANING THE NOZZLE AND FILTER DETERGENT SOLUTION SUPPLY TO THE DISC BRUSH (FOR CLEVER S01)
- 1. Ascertain that the wash-and-dry machine cannot move autonomously.
- 2. Remove the brush (See procedure in the related paragraph).
- 3. By acting on the coupling hub (1, Figure 5-8) of the brush, unscrew the ring nut (2) and recover the nozzle (3) and the gasket (4).
- 4. Remove the filter from its seat (5).
- 5. Clean the nozzle (3) and the filter (5).
- 6. Replace the filter correctly (5) in its case.
- 7. Place the nozzle (3) and the gasket (4) in their seat and then screw the ring nut (2).
- 8. Replace the brush (See the procedure in the related paragraph).
- 2
- Figure 5-8
- 5.9 CLEANING THE NOZZLE AND FILTER DETERGENT SOLUTION SUPPLY TO THE CYLINDRICAL BRUSHES (FOR CLEVER S01 CIL)
- 1. Ascertain that the wash-and-dry machine cannot move autonomously.
- 2. By acting on the wash-and-dry machine controls, lower the cylindrical brushes, then rotate the ignition key on “0” and extract it (see chapter Use).
- 3. By acting on the front part of the cylindrical brush- holder head, unscrew the ring nut (1, Figure 5-9) and recover the nozzle (2) and the gasket (3).
- 4. Remove the filter from its seat (4).
- 5. Clean the nozzle (2) and the filter (4).
- 6. Replace the filter correctly (4) in its case.
- 7. Place the nozzle (2) and the gasket (3) in their seat and then screw the ring nut (1).
- 8. Rotate the ignition key on “I” and wait for the lifting of the cylindrical brushes, then rotate the ignition key on “0” and extract it.
- 5.10 CLEANING THE DETERGENT FEEDING SYSTEM (OPTIONAL)
- 1. Empty and clean the washing detergent tank, by acting as described in the related paragraph.
- 2. Put about one litre of clean water into the washing detergent tank.
- 3. Use the wash-and-dry machine by simulating the washing activity, for the time necessary to clean the detergent feeding system (15-30 minutes), by adjusting the clean water and “detergent” flows to the maximum values.
- 4. Finally, remove the residual water from the washing detergent tank.
- 5. If necessary, perform the other intended procedures “After use of the wash-and-dry machine” (See the related paragraph).
- 2
- Figure 5-9
- 5.11 BATTERY CHARGE
- Battery charge for wash-and-dry machines without on board battery charger
- 1. Take the wash-and-dry machine to the area suited for recharging the batteries.
- 2. Ascertain that the wash-and-dry machine cannot move autonomously. Rotate the ignition key on “0” and extract it.
- 3. By acting of the rear side of the wash-and-dry machine, remove the left pin (1, Figure 5-10), then rotate it by half turn, and block it in the removed position.
- 4. Remove the right pin (2, Figure 5-10) and, carefully, remove completely the battery holder case (3) by the handles (4), then engage the pin (2) on the related locking hole of the extracted case.
- 5. Only for lead batteries (WET):
- 6. Check the suitability of the battery charger to be used by referring to the instructions of the battery charger itself. The nominal voltage of the battery charger must be equal to 24V.
- 7. Disconnect the connector of the batteries (5, Figure 5-10).
- 8. Connect the connector (6, Figure 5-10) to the external battery charger.
- 9. Connect the battery charger to the electrical network. The charge of the batteries has started.
- 10. At the end of the recharge, disconnect the battery charger from the electric network and the battery connector (6, Figure 5-10).
- 11. (only for lead batteries (WET)) Check the correct electrolyte level in the batteries, then close all the stoppers (8, Figure 5-10).
- 12. Connect again the connector (5, Figure 5-10) to the connector (6).
- 13. Extract the pin (2) and place the battery case into its seat, then engage the pin (2) to the battery case itself.
- 14. Unblock and engage the pin (1) to the battery case.
- 15. The charge has ended.
- Battery charge for wash-and-dry machines without on board battery charger
- 8
- Figure 5-10
- Battery charge for wash-and-dry machines with on board battery charger (optional)
- 1. Take the wash-and-dry machine to the area suited for recharging the batteries.
- 2. Ascertain that the wash-and-dry machine cannot move autonomously.
- 3. By acting on the rear side of the wash-and-dry machine, remove the left pin (1, Figure 5-12), then rotate it by half turn, and block it in the removed position.
- 4. Remove the right pin (2, Figure 5-12) and, carefully, remove completely the battery holder case (3) by the handles (4), then engage the pin (2) on the related locking hole of the removed case.
- 5. Only for lead batteries (WET):
- 6. Connect the connector (5) to the electrical network, after checking that the nominal voltage of the network is that envisaged...
- 7. The charge has ended when on the display (1, Figure 5-11) appears “100 %” and all the bars are full (2).
- 8. Disconnect the electrical connection (5, Figure 5-12) from the network.
- 9. (only for lead batteries (WET)) Check the correct electrolyte level in the batteries, then close all the stoppers (8, Figure 5-12).
- 10. Extract the pin (2, Figure 5-12) and place the battery case into its seat; then engage the pin (2) to the battery case itself.
- 11. Unblock and engage the pin (1, Figure 5-12) to the battery case.
- 12. The charge has ended.
- 1
- 2
- Figure 5-12
- 5.12 CHECKING/REPLACING THE FUSES
- 1. Ascertain that the wash-and-dry machine cannot move autonomously.
- 2. Rotate the ignition key on “0” and extract it.
- 3. Disconnect the connector from the batteries, by acting as described further down. Remove the left pin (1, Figure 5-14), then ...
- 4. Raise the cover (5, Figure 5-15), remove the panel (1) by seizing it on the hold (3) and raising it to disengage it from the retainers (4). Close the cover (5).
- 5. Check / replace the fuses:
- 6. Place the panel into its seat (1, Figure 5-15) and engage the retainers (4).
- 7. Connect the connector of the batteries (5, Figure 5- 14).
- 8. Replace the batteries case to its seat (3, Figure 5-14) and engage it to the retainer (2) and retainer (1) after unblocking it.
- 5.13 ASSEMBLY-DISASSEMBLY OF THE SUEEGEE
- Disassembly
- 1. Ascertain that the wash-and-dry machine cannot move autonomously.
- 2. Rotate the ignition key on “0” and extract it.
- 3. By acting of the left side of the wash-and-dry machine, with the squeegee in raised position, move slightly the squeegee outwards (1, Figure 5-13), then loosen its fastening knob (2).
- 4. Disconnect the suction pipe (3, Figure 5-13) from the squeegee.
- 5. Remove the squeegee (1).
- Assembly
- Disassembly
- 1
- 5
- 4
- Figure 5-15
- 5.14 ASSEMBLY-DISASSEMBLY OF THE DISC BRUSH
- Disassembly
- 1. Ascertain that the wash-and-dry machine cannot move autonomously.
- 2. Sit on the wash-and-dry machine seat and rotate the ignition key (1, Figure 5-16) on “I”, then wait for a few seconds so that on the display (3) appears caption (4) “READY” indicating that the wash-and-dry machine is ready for use.
- 3. Press the button (5, Figure 5-16) to release the brush and wait for a few seconds that the wash-and-dry machine releases the brush after activating it.
- 4. Rotate the ignition key (1, Figure 5-16) on “0” and then extract it.
- 5. Move slightly the squeegee (6, Figure 5-16) and recover the disc brush (7).
- Assembly
- 6. Ascertain that ignition key (1, Figure 5-16) is on “0”.
- 7. Ascertain that the coupling hub of the disc brush is in the raised position.
- 8. Place the disc brush (7, Figure 5-16) below the wash-and-dry machine, by centring it on the coupling hub.
- 9. Sit on the seat and rotate the ignition key (1, Figure 5-16) on “I”, and wait for a few seconds so that on the display (3) appears caption (4) “READY” indicating that the wash-and-dry machine is ready for use.
- 10. Press the brush lowering and rotation (8, Figure 5- 16) activation button.
- 11. Press slightly and only for an instant the pedal (2, Fig. R), by determining the lowering of the hub that will couple the br...
- 12. Repeat the operations described in the previous points 9, 10 and 11.
- 13. Rotate the ignition key (1, Figure 5-16) on “0” and then extract it.
- Disassembly
- 8
- Figure 5-16
- 5.15 CYLINDRICAL BRUSHES ASSEMBLY-DISASSEMBLY
- Disassembly
- 1. Ascertain that the wash-and-dry machine cannot move autonomously.
- 2. By operating on the wash-and-dry machine controls, lower the cylindrical brushes then rotate the ignition key on “0” and extract it (see the chapter Use).
- 3. By operating on the right side of the wash-and-dry machine, release the retainers and cam (1, Figure 5- 17).
- 4. Remove the cover (1, Figure 5-18) by disengaging the supports (2) from the cylindrical brushes (3).
- 5. Extract the cylindrical brushes (3, Figure 5-19).
- Disassembly
- 1
- 3
- 1
- 1
- Figure 5-20
- The wash-and-dry machine is equipped with safety functions described below.
- 6.1 EMERGENCY STOP BUTTON
- 6.2 MICROSWITCH OF DRIVER’S SEAT
- It is located inside the driver’s seat and does not allow any function of the wash-and-dry machine if the operator is not seating on his seat.
- Obstructed detergent feeding system
- For further information, contact Minuteman Service Centres, where the Service Manual is available.
- Have the machine scrapped by a qualified dismantler.
- Before scrapping the machine, remove the following components:
- (*): In particular, for scrapping electrical and electronic parts, refer to the local Minuteman Head Office.