Mallory Ignition Mallory COMP STARTER User Manual
Page 2
2
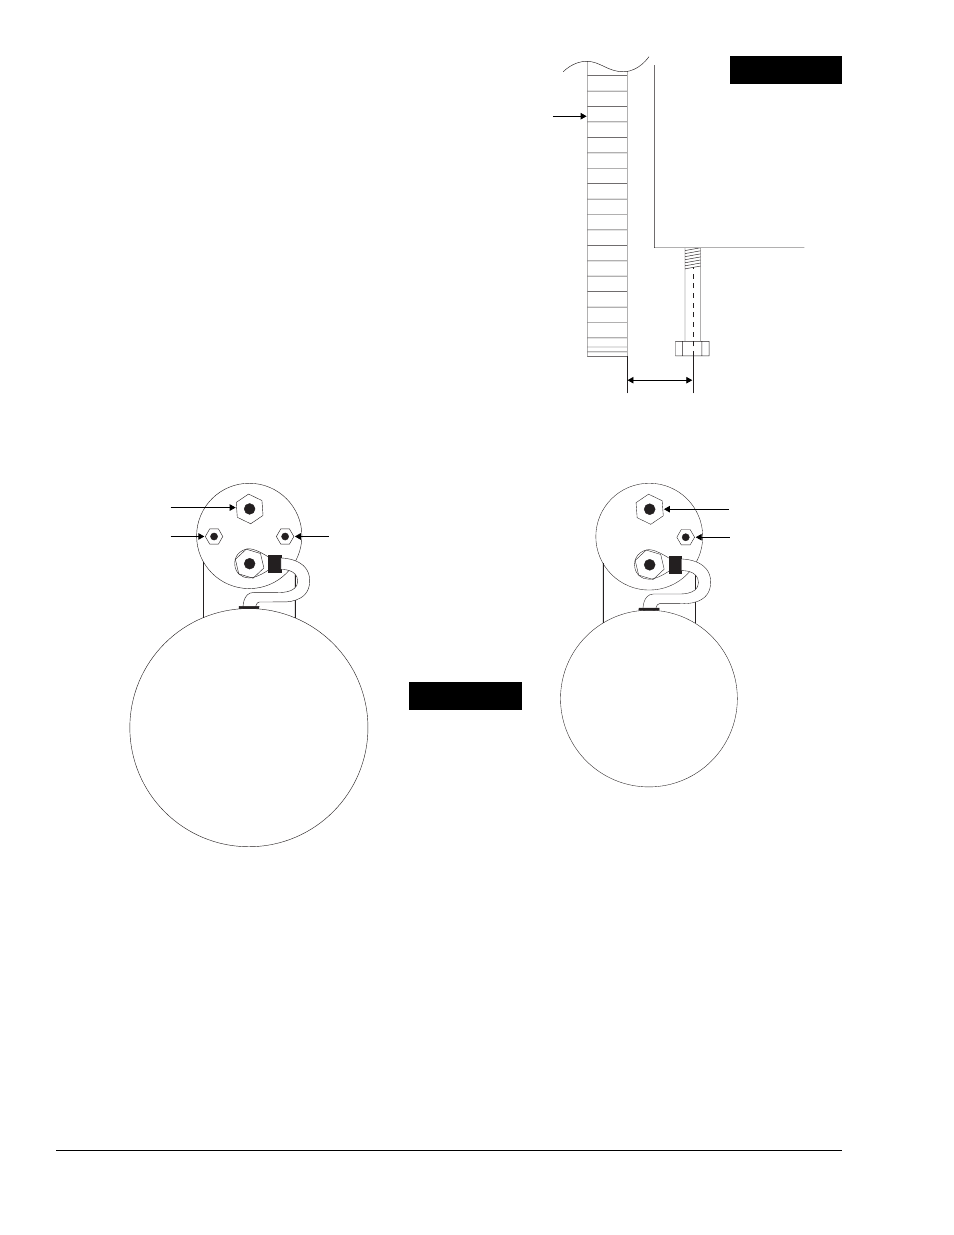
ENGINE BLOCK
CL
Block Mount Starters
If you cannot see the gap with the starter in place, remove the starter and
screw a starter bolt into the block. Measure from the center of the bolt to the
ring gear. Compare this measurement with the distance that the pinion gear
sticks out past the bolt holes on the starter. See Figure B.
Pinion "stick-out" (past bolt holes) of Mallory starters:
Part No. 3000
Chevy/Buick starter
.87"
Part No. 3004
Pontiac/Oldsmobile starter
.87"
The difference should be .06" to .21".
Step 5
Bolt the starter in place with the solenoid in the desired position. Mallory
Comp® Starters are designed to use the stock type and length starter bolts. If
you do not have the correct bolts, they are available at any auto parts store.
NOTE: GM block mount starter bolts have a knurl on the shank near the
threads. Do not use bolts without the knurl.
WIRING
Step 6
Vehicles without remote solenoid/relay, including most GM/Mopar:
"B" Terminal
Remove all wires from the large B terminal (including the battery cable) on the
stock solenoid. Connect all wires to the same terminal on the Mallory solenoid.
"S" Terminal
This is the small terminal that is connected to the starter switch/key. The wire(s)
connected here activate the starter. Remove the wire(s) from the stock
solenoid and connect them to the small terminal on the Mallory solenoid.
NOTE: This terminal may be on the opposite side of the solenoid
compared to the stock starter.
"R" Terminal
Some older cars have one or more wires connected to a second small R
terminal. These wires are not used on a Mallory starter.
FIGURE B
FIGURE C
STOCK SOLENOID
(ON STARTER)
MALLORY SOLENOID
(ON STARTER)
RING GEAR
R (Not always used)
NOTE: The position of the
S and R terminals may be
reversed on some starters.
S
B
S
B