Luminex 200 analyzer regulator adjustment – Luminex 200 Installation Guide User Manual
Page 43
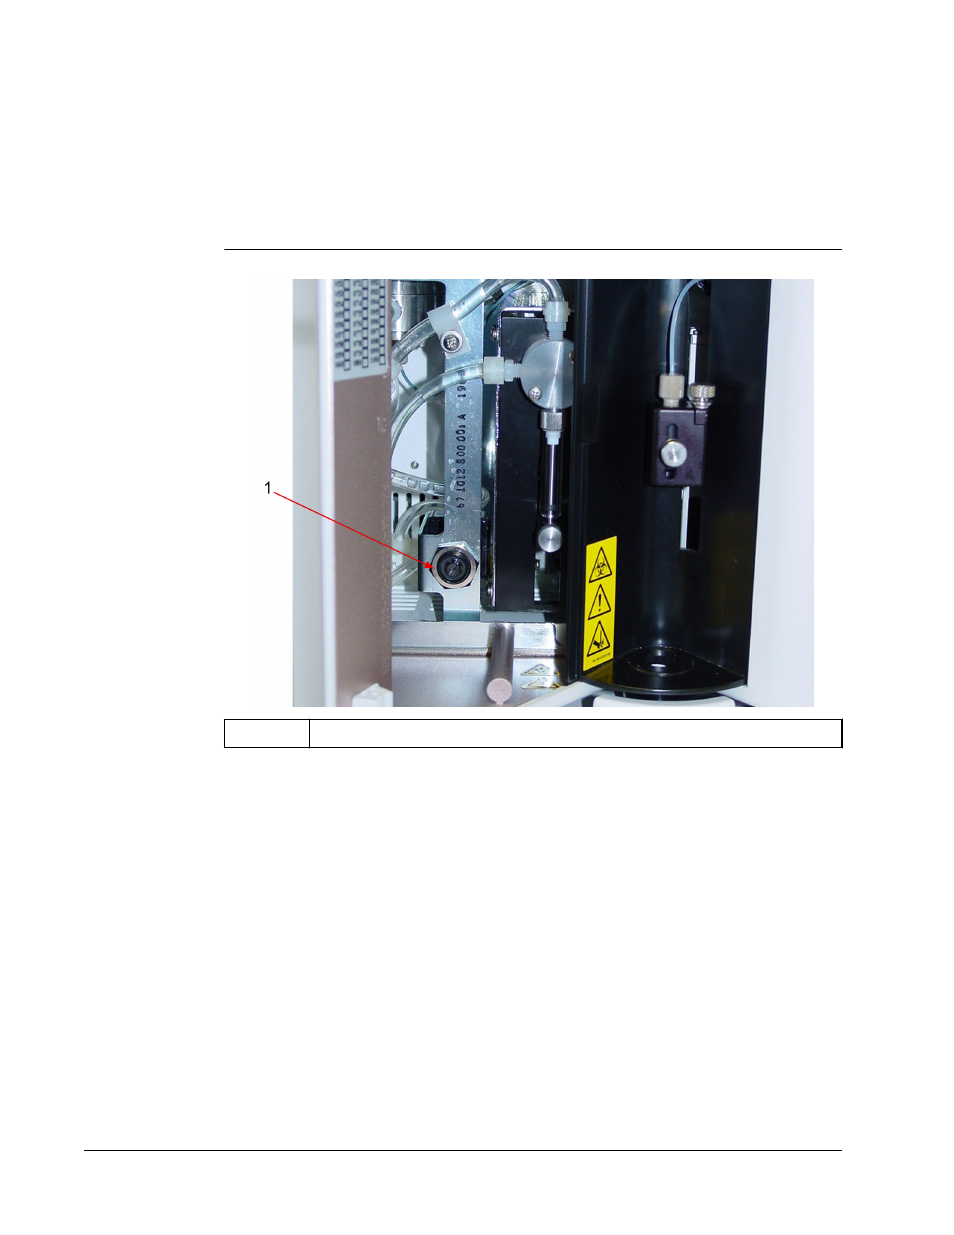
14. Open the center access door on the Luminex 200 analyzer. Use a screwdriver to turn the
regulator fully clockwise, about three to six full turns. The regulator must be fully closed to
work properly. It is important to make sure that you turn it as far as it will go. Do not force
the regulator past the fully closed position. Regulator is shown below the curved arrow in
the Luminex 200 Analyzer Regulator Adjustment image below.
FIGURE 15.
Luminex 200 Analyzer Regulator Adjustment
1
Luminex 200 Analyzer Regulator
15. Click Prime. During the prime cycle, use a screwdriver to adjust the regulator counter-
clockwise on the front of the Luminex SD system. Refer to the Luminex Sheath Delivery
Device image above. Turn it until the sheath pressure is the same as the sheath
pressure you recorded in step 1. The system should stabilize at this sheath pressure. The
air pressure should be the same as you recorded in step 1, within 0.1 psi. If the Prime
cycle ends before you have completed the adjustment, select Prime again and continue
to adjust the regulator.
16. Calibrate the system again. Observe the sheath pressure during the calibration cycle.
The pressure should be within 0.1 psi of the pressure recorded in Step 1.
NOTE: Do not reroute or lengthen the waste tubing after it has been
installed by a Luminex Certified Installer. If the waste tubing length is
extended or rerouted, the flow rate must be readjusted. The
maximum recommended waste tubing length is 12 feet, which is the
length of the tubing provided with the SD system. The waste tubing
may be shortened, if necessary.
Luminex
®
200
™
Installation Manual
32
In Vitro Diagnostic Use