Lightronics AR1202 User Manual
Page 13
Page
13
of
22
AR – 1202
RTC
ARCHITECTURAL DIMMER
Revision
1.93
OWNERS
MANUAL 06/03/2008
www.lightronics.com
Lightronics Inc.
509 Central Drive Virginia Beach, VA 23454
Tel 757 486 3588
There are three ways to create or set up a scene:
1.
Set each channel intensity manually (EDIT
SCENE)
2.
Copy another existing scene (COPY SCENE).
You can then edit the results.
3.
Record a snapshot of the current channel
intensities
(RECORD LIVE NOW)
Push
MENU (NEXT)
to select one of the 3 methods
described above. The display will show the
corresponding menu.
TO CREATE A SCENE MANUALLY
Push
ENTER
when EDIT SCENE is shown.
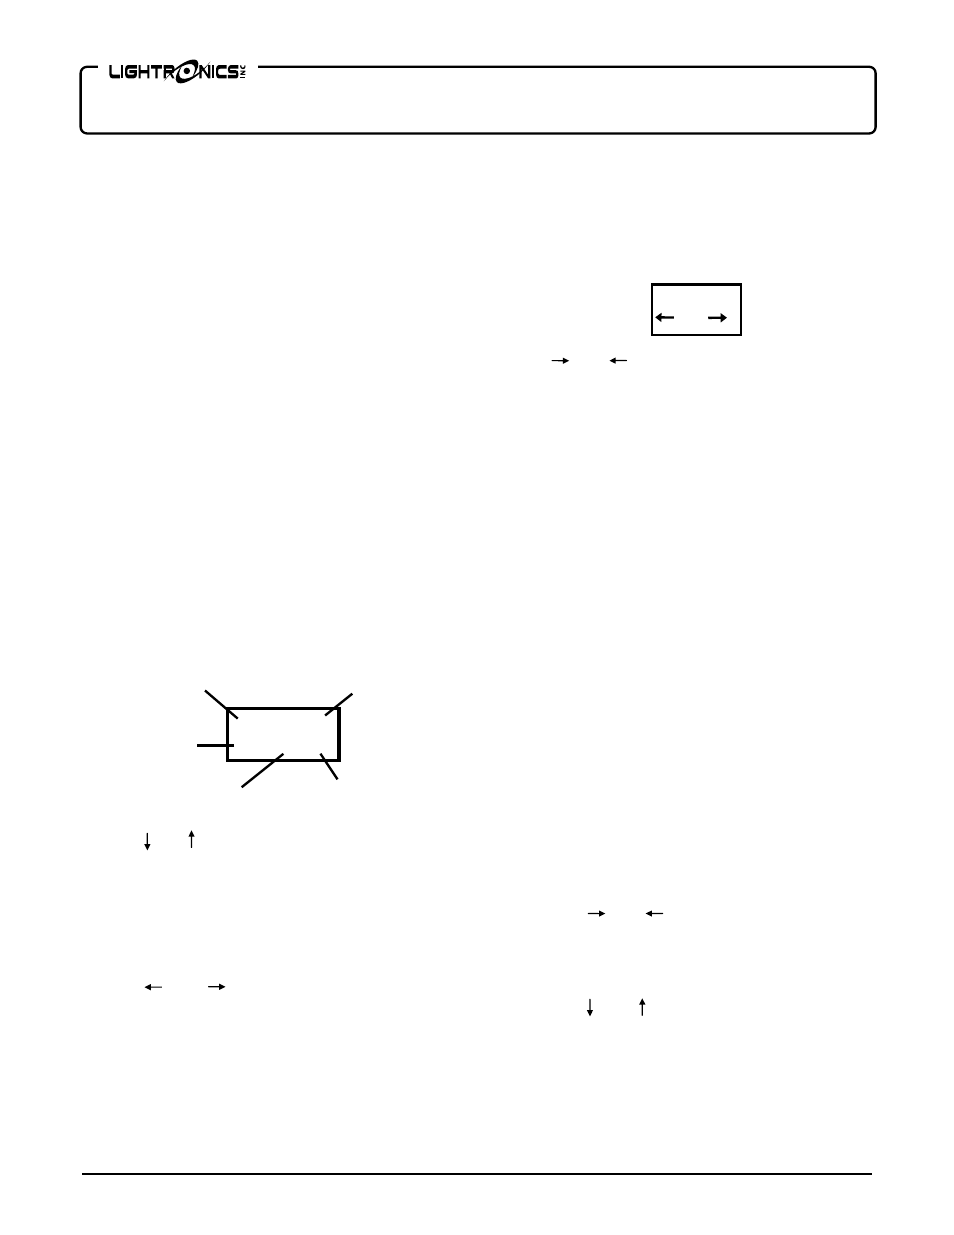
The current channel number is shown on the display
upper left. The current scene number (which was
selected in the previous step) is shown on the display
upper right. The settings for three channels are shown
on the lower display row.
The LEFT channel on the display is the Current
Channel (the channel which you will set the intensity
level for).
Use the and buttons to set the channel output
intensity. The display shows the intensity setting as a
number between
0% and 100%
. A
100%
setting is
indicated by
“FL”
. A
“XX”
setting means that the
channel will be ignored for the current scene.
Push
ENTER
after the channel level is set.
Use the and buttons to proceed to the next
channel to be set up. The lower row of the display will
shift to the left. Repeat the channel intensity selection
for that channel.
Push
CLEAR
when all the channels for the selected
scene are set. This will not clear your scene settings.
To setup another scene - repeat the process above
using a different scene selection.
TO COPY A SCENE
Push
ENTER
when COPY SCENE is shown. The
display will show a menu so you can select an existing
scene to copy from.
Use the and buttons to select a scene. Then
push
ENTER
. The scene will be copied and you will
be transferred to the EDIT SCENE menu where you
can further adjust the scene if desired.
TO RECORD A LIVE SCENE
A scene may be created by recording the current
channel intensity levels.
Push
ENTER
when RECORD LIVE NOW is shown.
The existing channel intensities will be recorded to the
scene and you will be transferred to the Edit Scene
menu where you can adjust the scene if desired.
SCENE FADE TIME
A fade time may be set individually for each scene.
This is the time elapsed between a scene fully active
and the next scene fully active. The factory default
fade time is 3 seconds.
Fade time may be set between .5 and 99.5 seconds and
is set from the
SCENE SETUP
menu (usually as you
set channel intensities for the scene).
1.
To set a scene fade time - Access the EDIT
SCENE menu for the desired scene.
2.
Use the and buttons to move BEYOND
the last channel (CHANNEL 16) for the scene.
The display will indicate the current fade time
for the scene.
3.
Use the and buttons to set the desired fade
time. Then push
ENTER
.
4. Push
CLEAR
to select another scene for fade
time set up.
Current channel
intensity
Intensity for
Current Channel + 1
Current channel number
Current scene number
C01 S001
XX XX XX
Intensity for
Current Channel + 2
CopyFrom
001