Ken Tool T601 (38601) CENTER POST TIRE CHANGING SYSTEM User Manual
Page 13
5. To mount the second bead, follow the same procedures. Place your left hand flat
agasinst the sidewall of the tire, pushing down to keep bead below the drop-center
(smallest diameter of the rim). See photo C, p. 12.
B. 5/8” and 3/4” bearing wheel types:
1. Place the rim over the center post with the valve stem facing up.
2. Install the bearing guide with recess side down to prevent bearing damage (see
diagram ). This centers the wheel on the threaded center post. Place one or both
spacer sleeves over post and secure with round nut. Hand tighten only. Caution: Do
not use machine without spacer sleeves. This will damage the threaded mounting
shaft and make it unusable.
3. Once the rim is securely held in place, apply adequate amount of Bead-Eze® (or
similar tire lubricant) to the tire bead. Do not use flammable materials when
servicing tires and wheels. Place tire on rim.
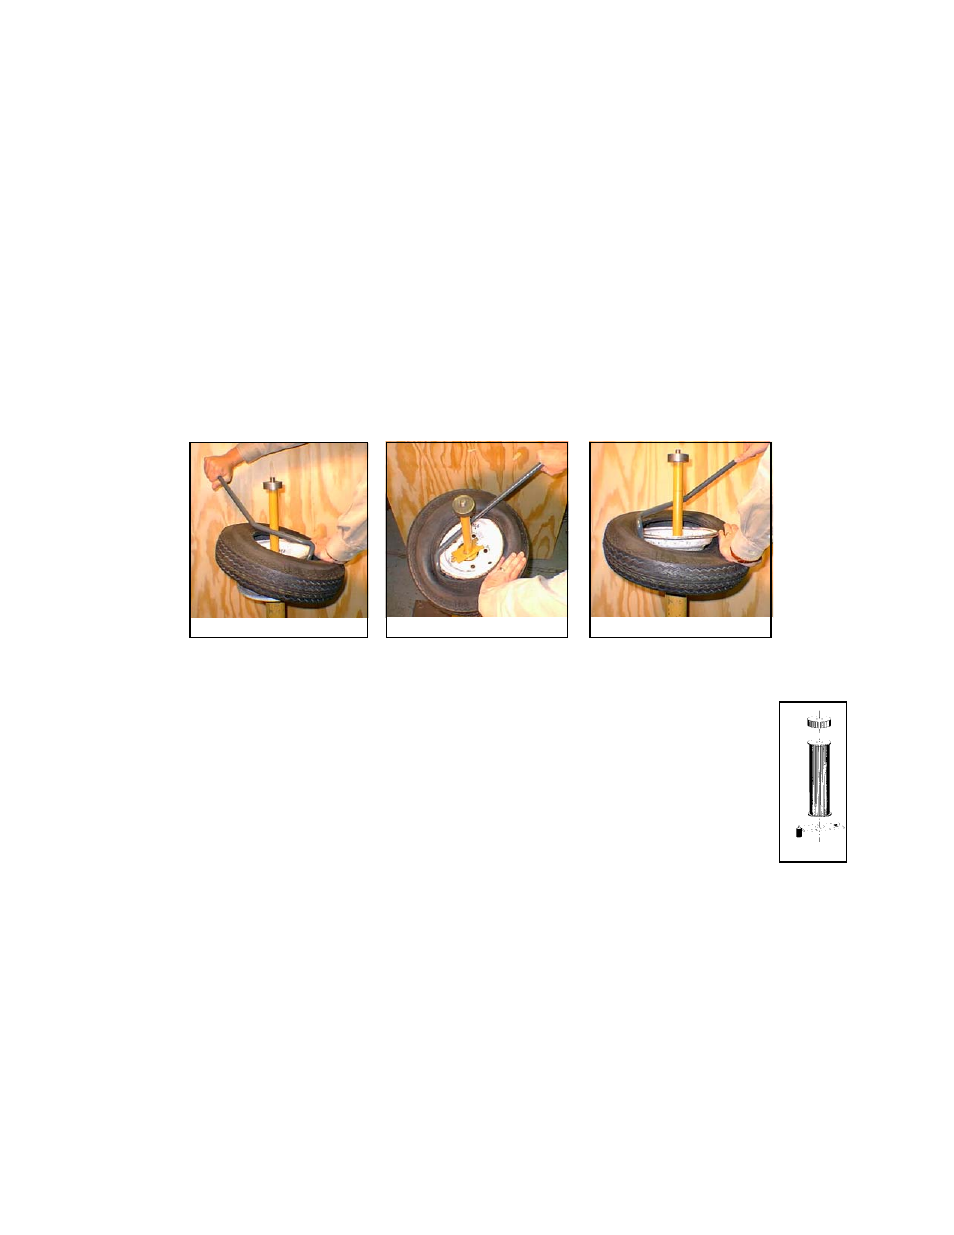
4. Cock the tire on the rim and hook the mount (curved) end of the Tire
Snake™ over the exposed edge of the rim on side nearest you. Place your
left hand flat against the sidewall of the tire to hold in place. Use caution
when mounting to keep fingers from being pinched between rim and bead
as tire is mounted to rim. Grasp the Tire Snake™ at its farthest end, keeping
it parallel with the rim. Pull the bar in a clockwise direction around the
center post until first bead is mounted. See photos below.
5. To mount the second bead, follow the same procedures. Place your left
hand flat against the sidewall of the tire, pushing down to keep bead below the drop-
center (smallest diameter of the rim). See photo C.
Photo C: Mount
Photo A: Mount
Photo B: Mount