Hydrotech 12301_12302_12303 Series ADVANCED REVERSE OSMOSIS WATER TREATMENT SYSTEMS User Manual
Page 18
14
CLEANING, SANITIZING, AND CARTRIDGE REPLACEMENT PROCEDURE
19. CAUTION: Do not remove protective plastic bag from
replacement filter/membrane cartridges until so
instructed.
Install "O" rings into filter housings. Open top of filter
bag enough to expose filter cap and "O" ring grooves.
Place a small amount of "O" ring lubricant on surface
of each "O" ring.
20. CAUTION: tighten filter housings by hand only. Do
not use tools as they will over-tighten and damage
housings. Take care not to cut or pinch o-rings.
CAUTION: Refer to Page 10, Figure 10.A., or
Page 11, Figure 10.B. for location of each cartridge.
Install filter and membrane cartridges. Hold cartridge
by its protective plastic bag and insert cartridge into
manifold turning it 1/4 turn as it enters the port. Slide
bag from cartridge and discard. Replace each filter
housing as each cartridge is installed.
21. Turn feed water valve slowly to open position.
22. Confirm system is producing water. Unit will be
sending rinse water to drain.
Optional Smartap Water Quality Monitor
TO REPLACE BATTERY: Perform Steps 23 – 29
NOTE: Replace battery with a new alkaline 9-volt battery
(P/N 31300001).
23. CAUTION: Wiring within module cover connects
monitor components. If wires, circuit board, or
connections are damaged and/or wetted, monitor will
not function.
Remove module cover (Page 12, Step 4).
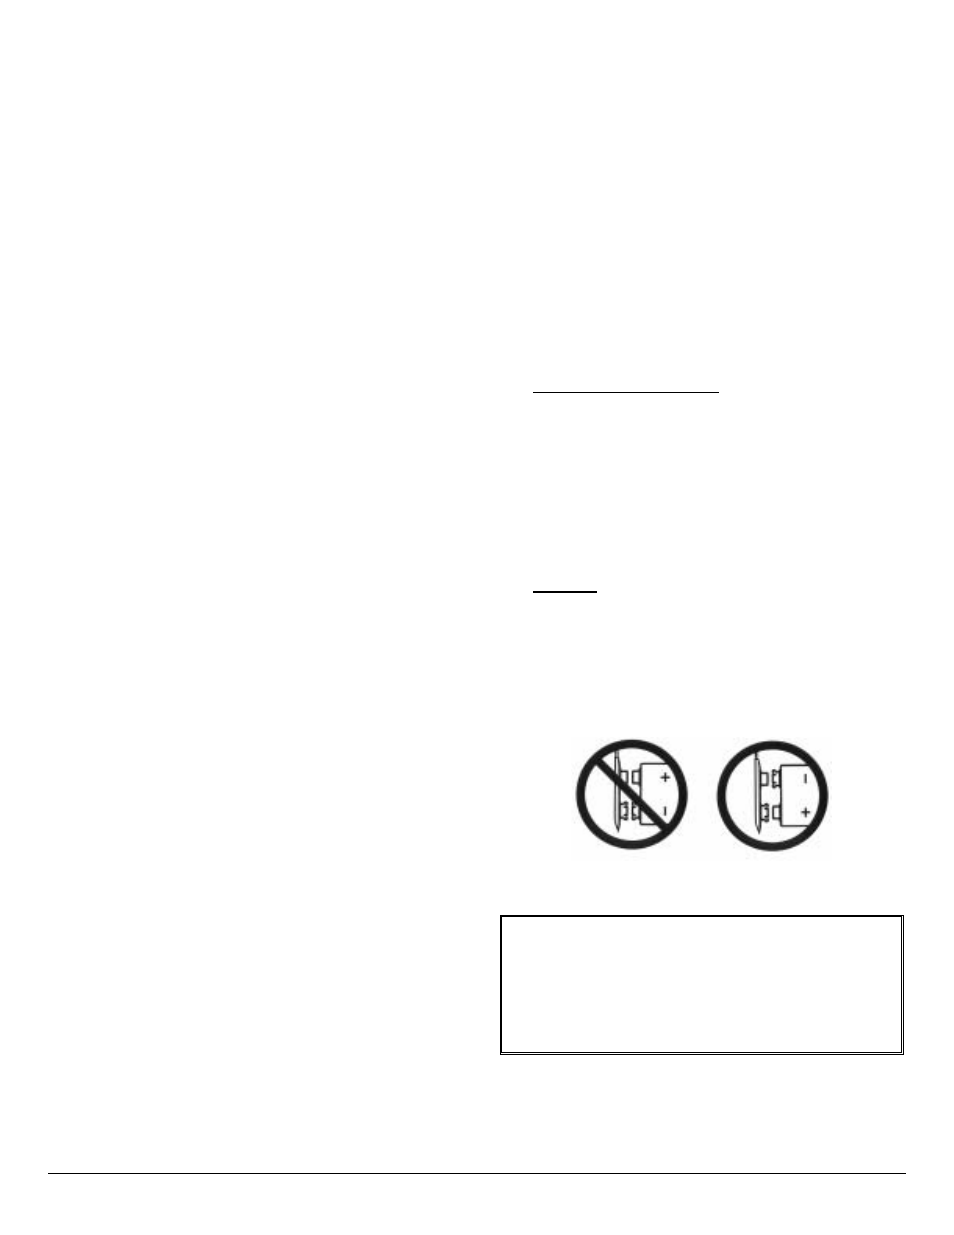
24. Disconnect battery. The battery connection is a snap
type connector (Figure 11).
25. Remove battery by sliding it out of its holder.
26. Carefully slide new battery into its holder.
27. CAUTION: Verify battery connector alignment
before making connection (Figure 11).
CAUTION: Reconnect new battery after system has
been in production mode for at least 5 minutes. This
ensures sensing switch is in proper position to record
data.
Connect battery by pressing clip onto battery terminals.
28. Test battery connection by activating monitor. Press
push button. If an indicator light illuminates,
connection is good.
NOTE:
Release button immediately after light
illuminates. Test is to confirm battery connection,
not water quality.
29. Replace manifold cover and tighten screws.
30. Open product water faucet. Let water flow until all air
has been expelled from the system.
31. Close product water faucet. Wait 30 minutes, check
connections for leaks, and correct if necessary.
Icemaker/Extra point of use: Check lines for leaks.
32. Allow storage tank to fill overnight.
33. WARNING:
DO NOT USE THE FIRST FULL
STORAGE TANK OF WATER
Discard (to drain) first full tank of water by opening
product water faucet until water flow stops, then close
faucet. This flushes sanitizing solution from
system.
Icemaker: Let tray/bin fill with ice cubes. Discard all
ice cubes to drain. This flushes sanitizing solution
from lines to icemaker. Replace delivery device filter
(if applicable).
34. System is ready to use. Should there be any
aftertaste or odor, drain storage tank and repeat
Steps 32 and 33.
Figure 11: Smartap
®
Battery Connections
DO NOT USE THE FIRST
FULL STORAGE TANK OF WATER
Allow reservoir to fill overnight.
Dispense this water to drain.
This process removes sanitizing solution from system,
sanitizes fittings and tubing, and sends solution to drain.