American Dryer Corp. MD-170 User Manual
Page 16
12
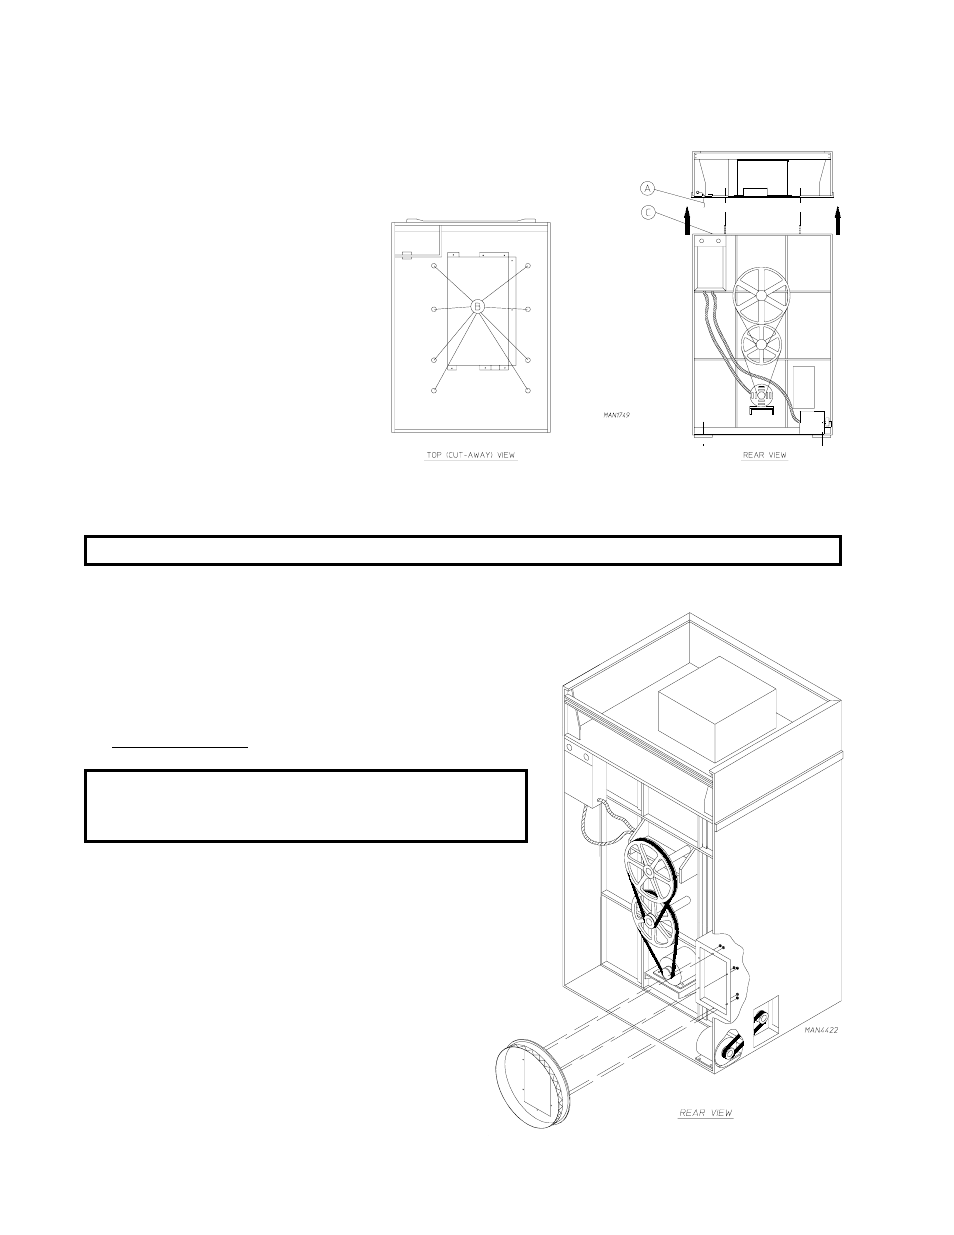
5) Lift the console (module) off of the dryer base.
IMPORTANT: The dryer must be transported and handled in an upright position at all times.
2) Remove the eight (8) set of
nuts and washers (B) holding
the console (module) to base.
3) Disconnect the white plug
connector (C) located on the top
of the rear electric service/
relay box (provides power to
the heat circuit).
4) Disconnect air connection from
the 3-way micro valve.
1) Disconnect the ground wire (A) at the Rear Upper Left Hand
Corner of Dryer.
4. Exhaust Duct Work
NOTE: A Transition Piece for the exhaust is shipped
inside the tumbler (basket). This Transition Piece
is for locations with round exhaust duct work.
a. To install the Transition Piece, align the four (4) clinch studs
into the four (4) clearance holes on the dryer.
b. Using the four (4) free spin wash nuts (included with the
Transition Piece), tighten the wash nuts on to the clinch
studs which will secure the Transition Piece to the dryer.
c. The round duct can now be connected to the dryer.
3. If more headroom is needed when moving dryer into position, the top console (module) may be removed.
a. To Remove Top Console (Module)