Cleaning, Replacing the seal, Cleaning 10.3. replacing the seal – Burkert Type 8012 User Manual
Page 41
41
Maintenanceandtroubleshooting
Type 8012
Warning
Risk of injury due to non-conforming maintenance.
• Maintenance must only be carried out by qualified and skilled
staff with the appropriate tools.
• Ensure that the restart of the installation is controlled after any
interventions.
10.2. cleaning
Depending on the nature of the fluid, regularly check for clogging of
the paddle-wheel.
note
the device may be damaged by the cleaning liquid.
• Clean the device with a cloth slightly dampened with water or a
cleaning liquid compatible with the materials the device is made
of.
10.3. Replacing the seal
O-ring for metal fitting
O-ring for plastic fitting
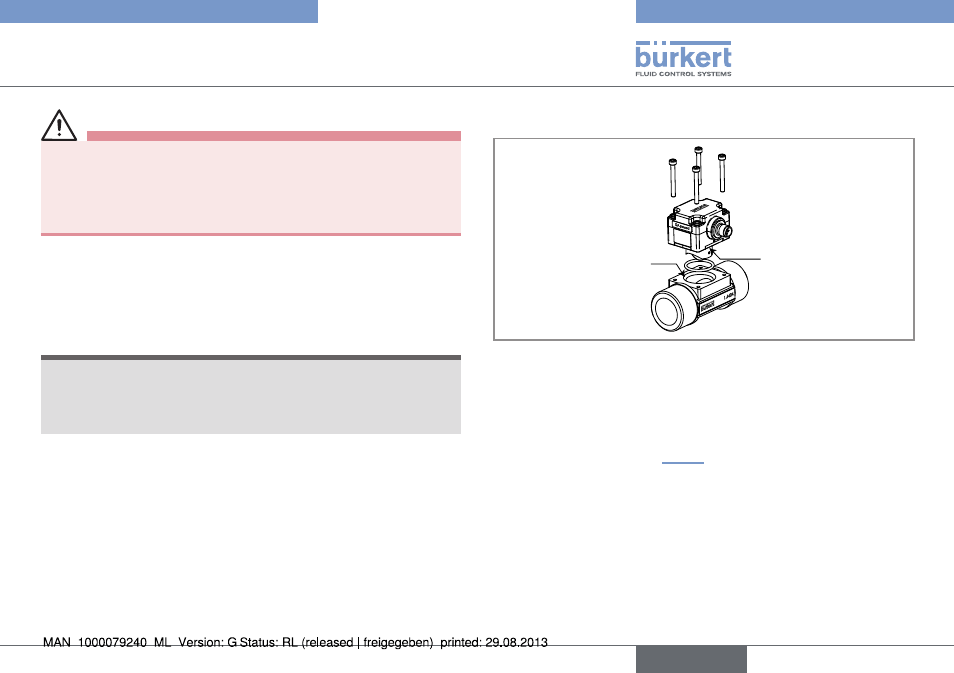
Fig. 28 : Exploded view of the 8012
→
Unscrew the 4 screws in the electronic module and remove it
from the fitting.
→
Remove the used seal.
→
Clean the surfaces on which the seal is placed.
→
Insert the new seal (see Fig. 28).
→
Position the electronic module on the fitting so that the arrow
points in the fluid direction on versions with optical sensor.
→
Insert the 4 screws into the electronic module (use the long
screws for a plastic S012, DN6 or DN8 fitting).
→
Tighten the 4 screws in an alternating pattern, to a torque of
1.5 Nm.
English