Mounting in adt-cab-3 series cabinets – ADT Security Services ADT-APS-6R User Manual
Page 11
Mounting in ADT-CAB-3 Series Cabinets
2. Installation
ADT-APS-6R Instruction PN 50935:B 7/21/00
11
Mounting in ADT-CAB-3 Series Cabinets
This section contains instructions for the installation of the Auxiliary
Power Supply into a ADT-CAB-3 Series cabinet (ADT-CAB-A3, ADT-
CAB-B3, ADT-CAB-C3 and ADT-CAB-D3).
These cabinets use a CHS-4L or CHS-4 Chassis to mount the
ADT-APS-6R.
Instructions for mounting:
CHS-4 Series Chassis Mounting
The illustration below shows an ADT-APS-6R being mounted in a CHS-
4L chassis. Mounting in a CHS-4 chassis is accomplished in the same
way.
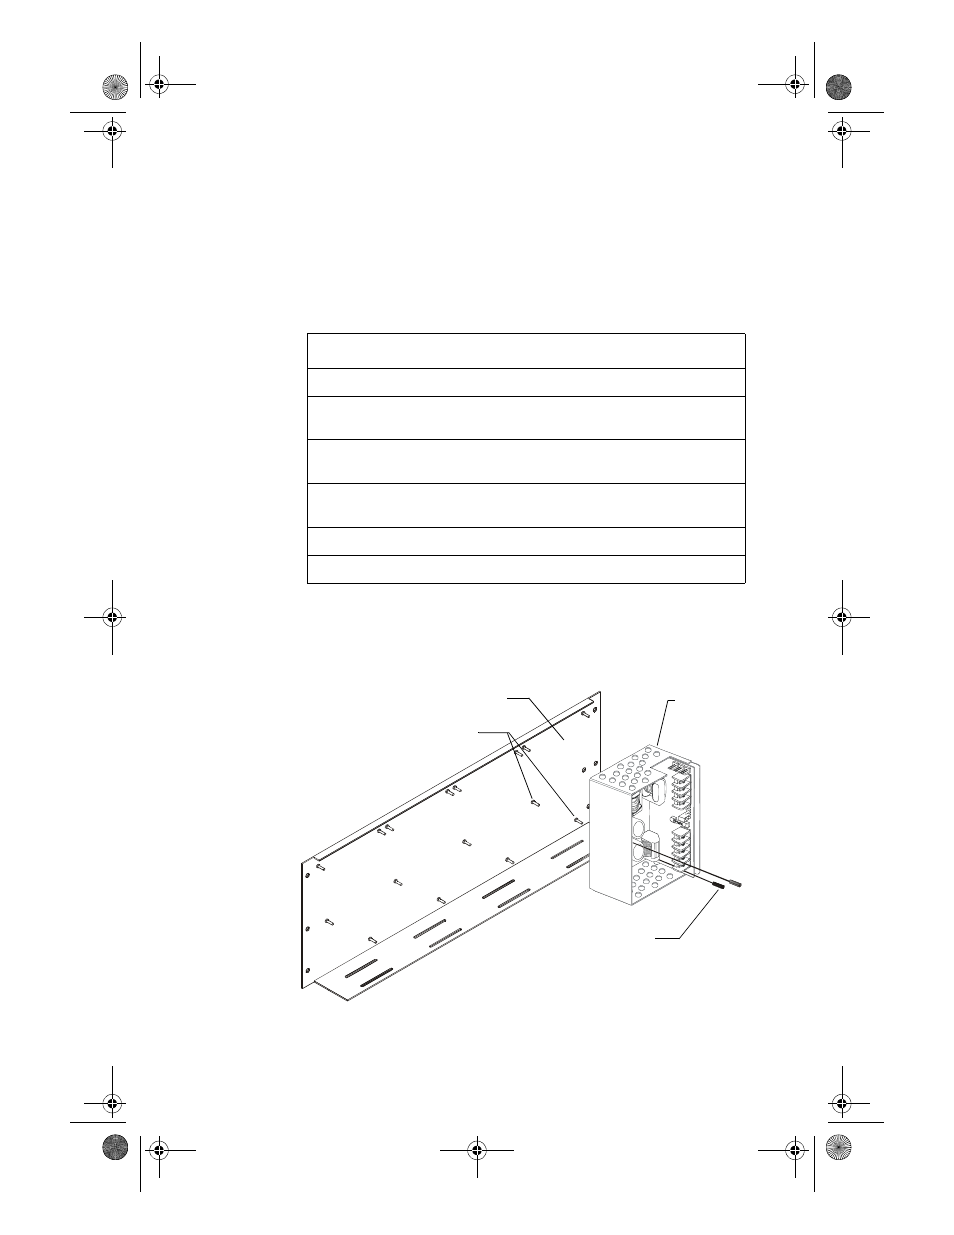
Figure 5 Mounting an ADT-APS-6R to a CHS-4L Chassis
Step
Action
1
Remove plastic cover from APS-6R.
2
If 240 VAC is to be used, cut JP1 jumper at this time. See "Configuring the
ADT-APS-6R" on page 16.
3
Place the APS-6R onto the mounting studs of the chassis (Figure 5 on page
11).
4
Insert a standoff through each of the printed circuit board mounting holes,
threading each standoff to the mounting studs on the chassis.
5
Tighten the standoffs until the APS-6R is securely fastened to the chassis.
6
Reinstall the plastic chassis cover.
Mounting Studs
CHS-4L Chassis
Standoff
(2 places)
ADT-APS-6R
Assembly
AP
S-
6
R
t
o
CHS-
4
L
.c
d
r
ADTAPS-6R__INSTENGLB0.fm Page 11 Tuesday, November 21, 2000 11:30 AM