Datamax-O'Neil E-Class Mark III 4xxxxxxx Operator’s Manual User Manual
Page 24
18
Chapter 3 – Printer Operation
3
3
3
.
.
.
5
5
5
P
P
P
r
r
r
i
i
i
n
n
n
t
t
t
e
e
e
r
r
r
C
C
C
o
o
o
n
n
n
f
f
f
i
i
i
g
g
g
u
u
u
r
r
r
a
a
a
t
t
t
i
i
i
o
o
o
n
n
n
U
U
U
t
t
t
i
i
i
l
l
l
i
i
i
t
t
t
y
y
y
(
(
(
N
N
N
E
E
E
T
T
T
i
i
i
r
r
r
a
a
a
C
C
C
T
T
T
)
)
)
NETira CT (located on the Accessories CD-ROM) is a Windows-based configuration utility that allows the user
to make changes to the existing printer setup via a direct connection to the host computer’s serial, USB,
Ethernet, or parallel ports.
NETira Features:
Allows Real-Time Control/Query of Printer Configuration
Define and Save Optimal Configurations for Applications
Saved Configurations can be Shared with other Printers and Sent via Email
Download Files, Formats and Fonts
Query Memory Modules
Be sure to use the NETira utility located on the Accessories CD-ROM that is included with your
printer. Older versions might not operate correctly with some printers. For the latest version please
visit our web site a
Be sure your printer’s firmware version is 9.04 or greater. Firmware is available from our website,
for the latest version please visit our web site a
USB and Parallel Port Connection Requirements
Using Netira CT with an USB or parallel port connection requires a Windows driver to be installed and the
driver to be set to “Print directly to the printer”. Other connections (e.g. serial and LAN) do not require the
Windows driver or this setting. Install the Windows driver as described in section 3.6. Then follow the steps
below to set the driver setting:
1) Open the list of installed printers on your PC.
Windows XP
Open Printer and Faxes by clicking the Start
button, and then Settings, and then click on Printer
and Faxes.
Windows 7
Open Devices and Printers by clicking the Start
button, and then click on Devices and Printers.
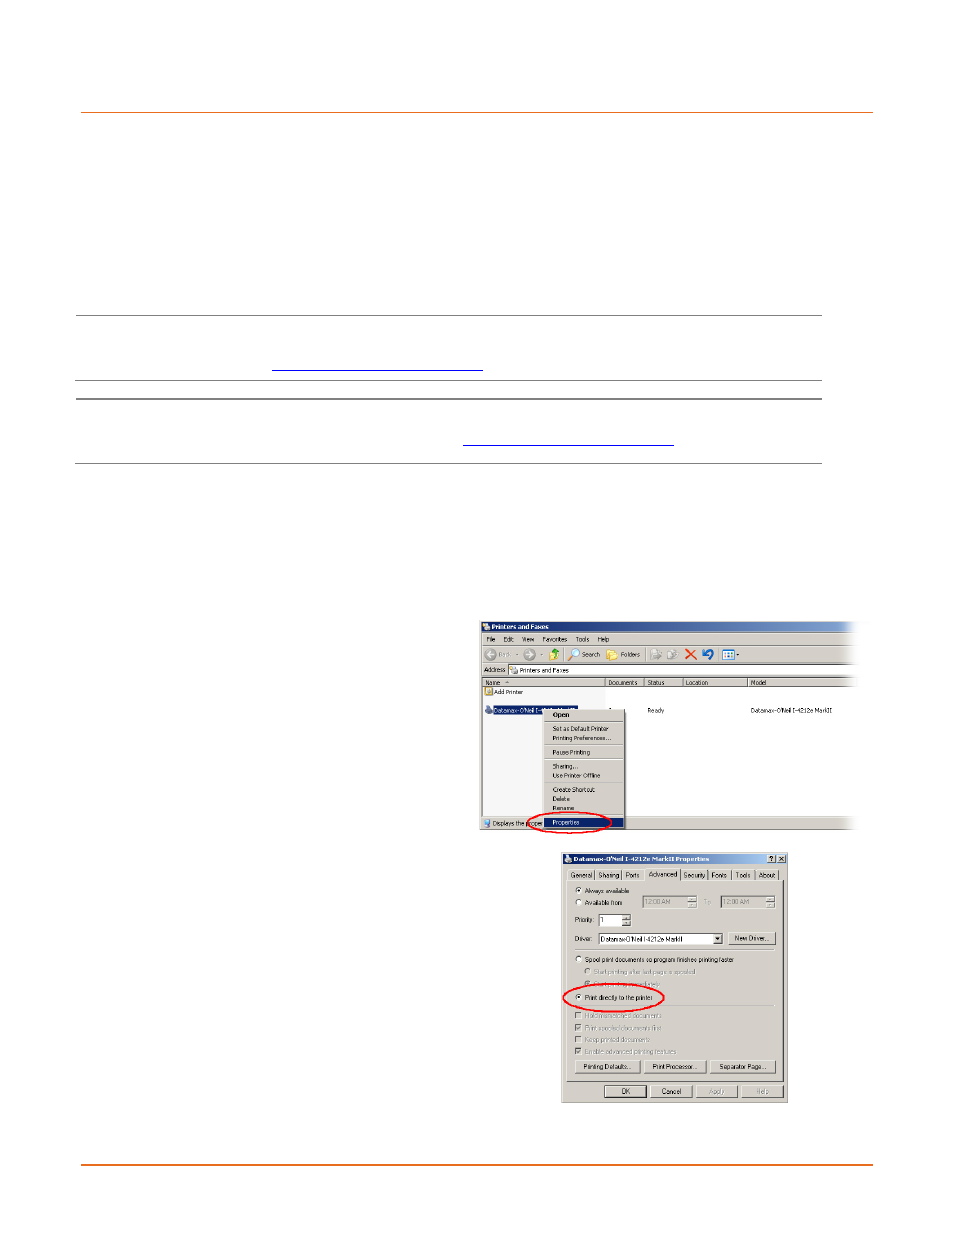
2) Right click on the printer and select Properties
from the drop down menu.
3) In the Driver Properties window, click on the
Advanced tab.
4) Click the “Print directly to the printer” radio
button. Then click OK.
USB and parallel port connections will now be
available for use with Netira CT.