Smart matrix - ref. smx200 front panel description – Analog Way Smart MatriX User Manual
Page 2
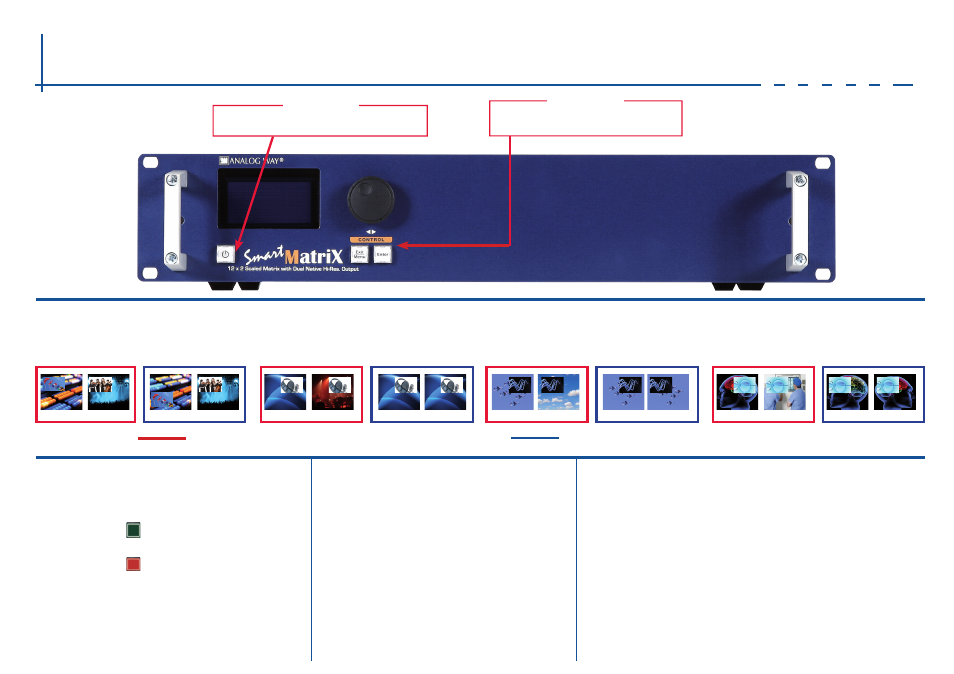
Smart MatriX - Ref. SMX200
Front Panel Description
EXIT/MENU: Home Menu or back one level
ENTER: Validates the menu or command
STAND-BY: Hold for 3 seconds for stand-by Mode
CONTROL
STAND-BY
O U T P U T S E T U P
1
-
Press the
EXIT/MENu
button from the Home menu
[all functions must be confirmed by the
ENTER
button]
2
-
Press [
Output_1] or [Output_2]
3
-
Press [
Output format]
4
-
On Format line, select the display’s native resolution
5
-
Control or adjust your display device (Monitor or Video Projector)
6
-
If necessary, select [
Test Pattern] in the Output menu
I N P U T S E T U P
1
-
Press the
EXIT/MENu
button from the Home menu [all functions must be confirmed by the
ENTER
button]
2
-
Press [
Input] and [Autoset ALL]
3
-
If the acquisition has failed, check all connections and perform a detailed setup
4
-
For a comprehensive Input Setup, please refer to user’s Manual
5
-
For a manual input setup, press the EXIT/MENu button:
a)
Press [
Input],
b)
Select the right input from Input #1 up to SDI #4, then
c)
Select [
Type].
NOTE: To adjust input Size or Pos, use the [Layer] Menus.
To adjust Blanking, use the Auto-Centering or Blanking adjustments in the Image menu.
The control of SMX200 is available by an external remote control
B U T TO N C O L O R U S A G E
Solid green:
Function available for modification
Dim red:
Stand-by button
W O R K I N G W I T H M I R R O R M O D E S
OuTPuT #1
OuTPuT #1
OuTPuT #1
OuTPuT #1
OuTPuT #1
OuTPuT #1
OuTPuT #1
OuTPuT #1
OuTPuT #2
OuTPuT #2
OuTPuT #2
OuTPuT #2
OuTPuT #2
OuTPuT #2
OuTPuT #2
OuTPuT #2
1 - No Copy: T
his mode is the standard matrix mode, output
#
1 &
#
2 are independent...
2 - Clone Mode:
The output #1 and #2 will be the same. All
changes on the output #1 will be affected to the output #2.
Layers will have the same position and size.
3 - Copy & H.pos Flip mode:
The output #2 will be exactly the
same as the output #1 except the output fact that the selected
layer will have its H position flipped (standard Mirror mode).
4 - Copy & H.Flip all modes:
The output #2 will be exactly
the same as the output #1 except the fact that the selected
layer will have its H position and data flipped.
❶
❷
❸
❹
Red case:
Mirror Mode activated only for the PIP layer
Blue case:
Mirror Mode activated for PIP layer and Background live Layer