Installation, Installing projector – CHIEF VCM Series User Manual
Page 4
VCM
Installation Instructions
4
INSTALLATION
The VCM mount is designed to be mounted to:
•
a 1-1/2" NPT or NPSM following ANSI/ASME B1.20.1
(Schedule 40, 0.154" minimum thickness aluminum-
ASTM B221) threaded extension column; or
•
a UL Listed Chief LPK-1 low profile mounting kit.
NOTE:
Proceed to Installing VCM Mount to NPT Extension
Column section or Installing VCM Mount to LPK-1
Mount Kit section, as appropriate.
Installing VCM Mount to NPT Extension Column
IMPORTANT ! : These installation instructions assume
that a 1-1/2" NPT or NPSM (Schedule 40, 0.154"
minimum thickness aluminum - ASTM B221) pipe (not
included) has been properly installed and is in place.
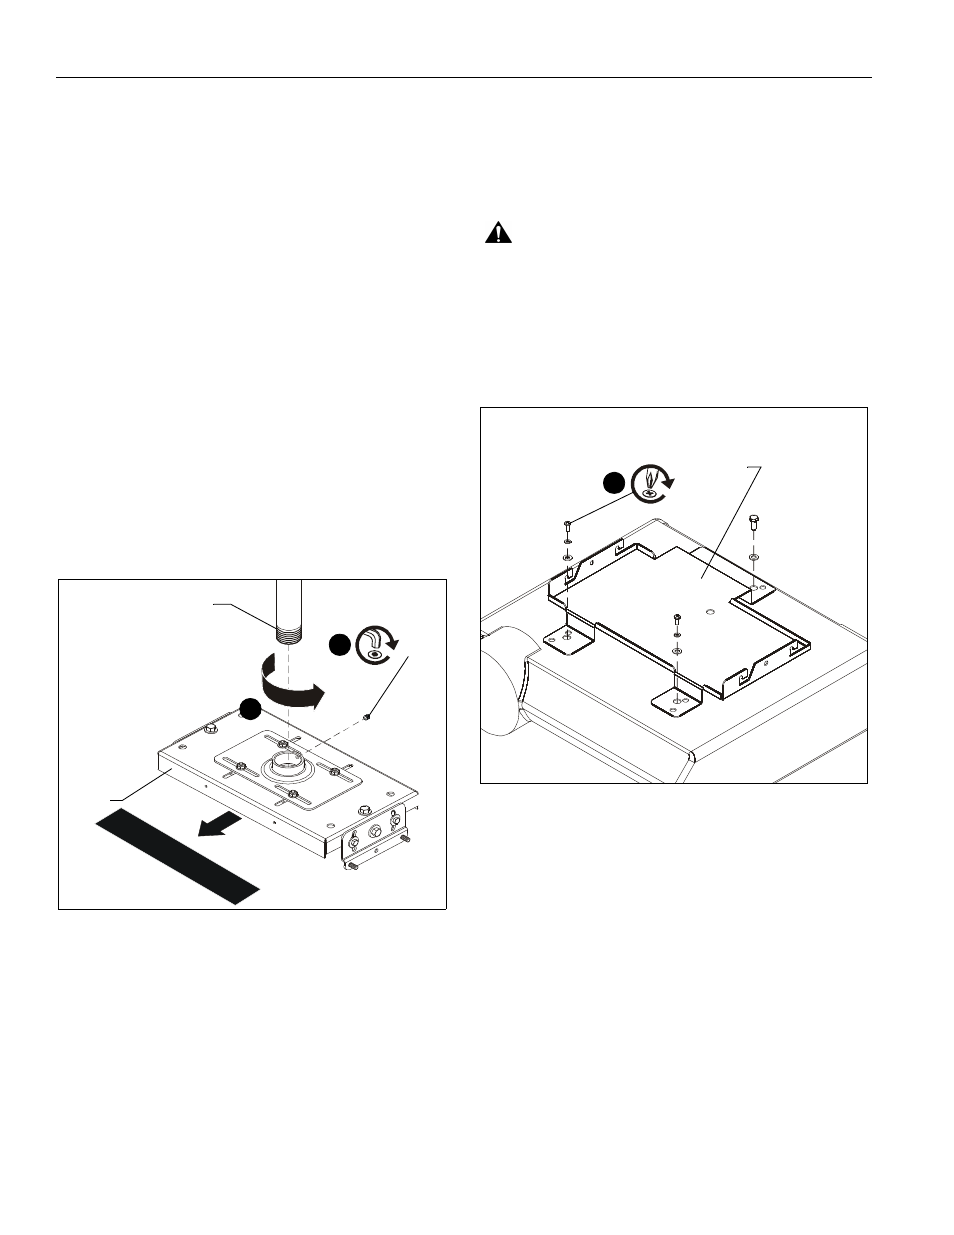
1.
Thread the VCM mount (A) onto the existing 1-1/2" NPT
pipe until tight with a minimum of four threads engaged.
((Siehe Abb. 1)
NOTE:
Ensure that long edge of VCM mount is located parallel
to the screen. ((Siehe Abb. 1)
2.
Tighten the 5/16-18 x 3/8" set screw (C) into the VCM mount
threaded collar to prevent movement of the VCM. ((Siehe
Abb. 1)
Figure 1
3.
Proceed to Projector Installation section.
Installing VCM Mount to LPK-1 Mount Kit
1.
Install VCM mount (A) to LPK-1 low profile mount kit (not
included) following instructions included with LPK-1 mount
kit.
INSTALLING PROJECTOR
IMPORTANT ! :
Model VCM uses Chief "HB" Series interface
brackets. (See Parts drawing.)
Install Interface Bracket
WARNING:
IMPROPER INSTALLATION CAN LEAD TO
PROJECTOR FALLING RESULTING IN SERIOUS
PERSONAL INJURTY OR DAMAGE TO EQUIPMENT. DO
NOT substitute hardware. Use only the hardware provided by
the manufacturer.
1.
Secure interface bracket to VCM using installation
instructions and hardware provided with interface bracket.
((Siehe Abb. 2)
Figure 2
SC
RE
EN
2
NPT
pipe
(C) x 1
(A)
1
1
Example Only
(Interface bracket varies
dependent on projector
model)