Eswitch setup, Mount the actuator, Mount the eswitch to the camco unit – DE-STA-CO eSwitch Programmable Limit Switch User Manual
Page 7: Connect the 12-pin cable
7
eSwitch Setup
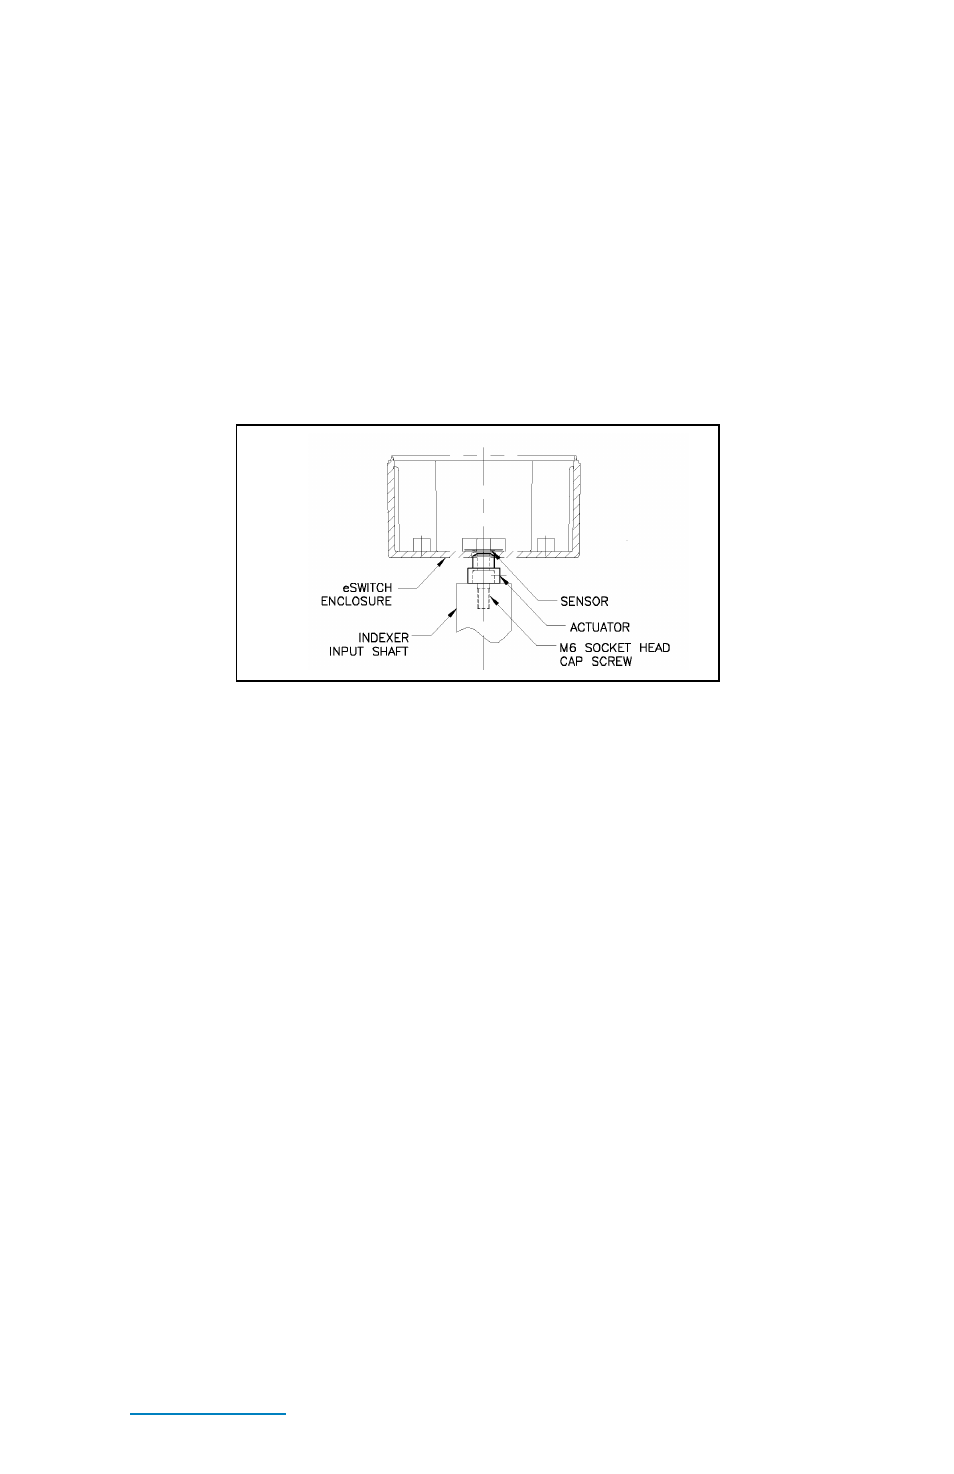
Mount the Actuator
If eSwitch is not already mounted
1. Drill and tap an M6 thread into the center of the timing shaft.
Screw an M6 socket head cap screw firmly into the tapped hole.
2. Mount the actuator to the socket head cap screw and secure
firmly with the provided set screw. DE-STA-CO recommends
using LOCTITE to secure the set screw.
Mount the eSwitch to the CAMCO unit
If eSwitch is not already mounted
1. Open the clear cover on the eSwitch. Attach the small eSwitch
bracket loosely to the back of the eSwitch with the (4) M3
screws and nuts
2. Attach the larger reducer bracket firmly to the gear reducer using
2 screws
3. Use the actuator (attached to the end of the unit input shaft) to
locate the eSwitch. Slide the eSwitch over the actuator, until it
hits the shoulder (this is a close fit), matching the slots in the
eSwitch bracket with the slots in the reducer bracket. Attach the
brackets together loosely with the screws and nuts provided.
4. Once the eSwitch is positioned properly relative to the actuator,
tighten all screws firmly.
Connect the 12-Pin Cable
1. Connect the 12-Pin Cable Connector to the eSwitch.
2. The other end of the 12-Pin Cable consists of loose wires and
can be connected to the input of the various devices signaled
from the eSwitch.