Dip switch settings – BatteryMINDer 28252-AA-Series User Manual
Page 15
Rev. I-100511
Page 15
P/N VDC28252-AA-Series-MNL
BatteryMINDer
®
Model 28252-AA-Series
When using the Temperature Sensor at any location (other then
on a battery) the ring terminal must be insulated, heat shrink
tubing is recommended. If using the A2GPU-1 or A2GPU-
2 and are unable to place the Temperature Sensor on a battery
terminal, it may be inserted into the unused cavity of the A2GPU
plug and secured with cable clamp.
A2GPU-1 Plug Instructions
Connect A2GPU
Turn on 28252
Hold down “Power Supply/Charge” for 5 seconds and release
Quickly press “Power Supply/Charge” twice to start charging cycle
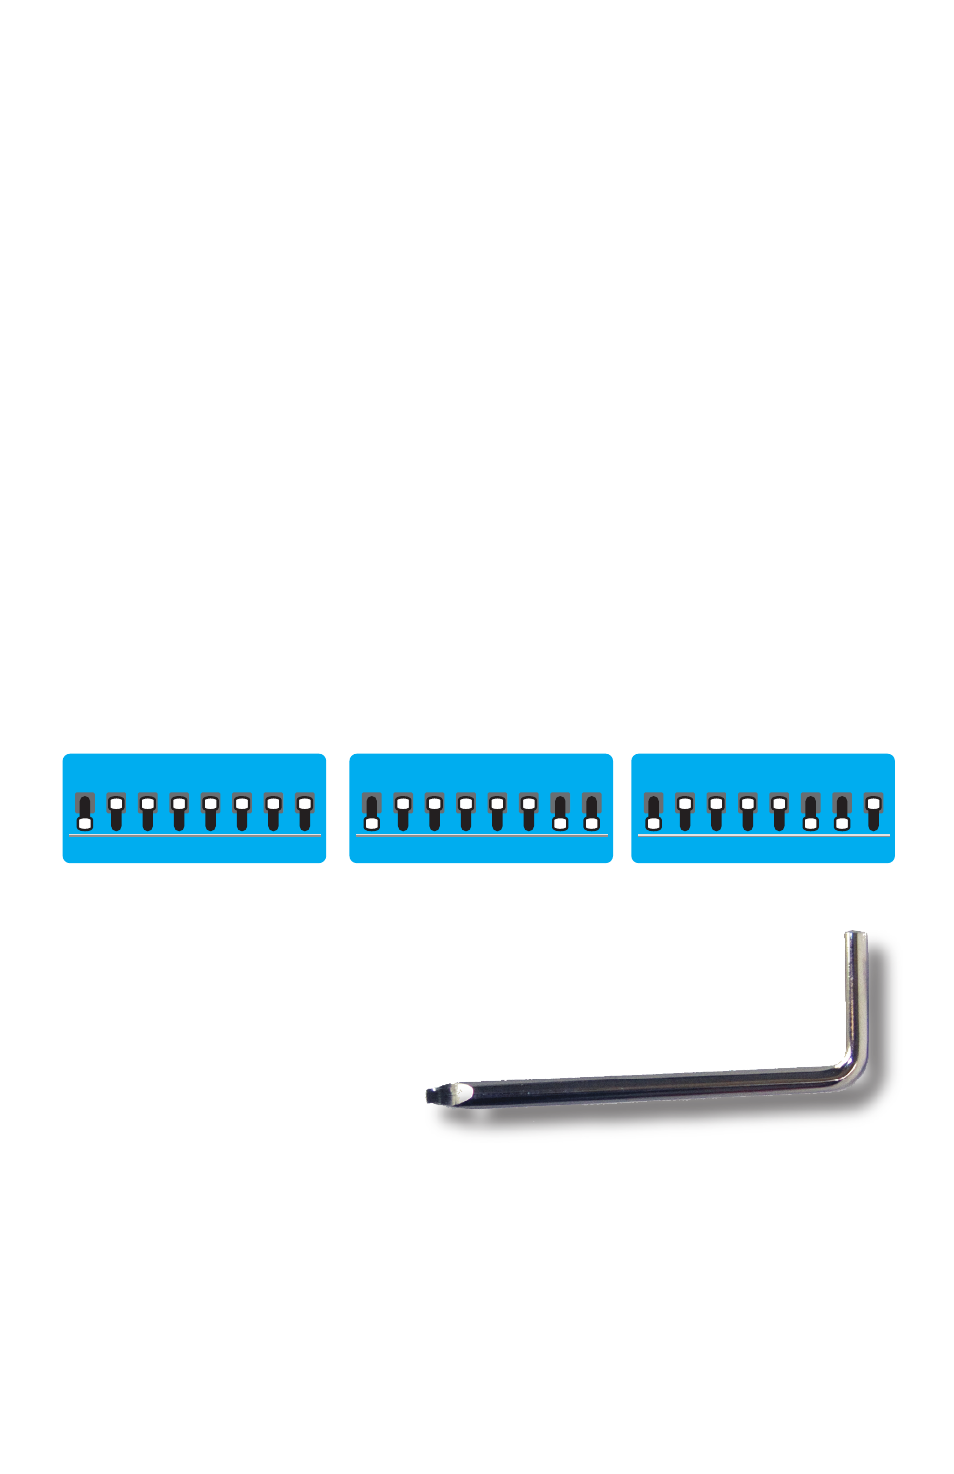
Dip Switch Instructions
Disconnect unit from Battery and AC power.
Remove Dip Switch access panel using provided Triangle Bit.
Set switches for desired battery brand setting as shown.
Replace access panel.
1.
2.
3.
4.
1.
2.
3.
4.
1
8
5
2
Gill 7000 Series, Odyssey & Hawker
1
8
5
2
Standard Aviation
1
8
5
2
Concorde Aviation
Dip Switch Settings
Important!
If you require changes to dip switch factory settings, be aware
such changes may negatively affect other battery types if not
reset according to our directions. This may cause harmful levels
of overcharge leading to “out-gassing” of the electrolyte.
If battery is in an enclosed-confined area, harmful and corrosive
hydrogen gas will be generated. In addition, dip switches are not
built to be changed frequently and should be very carefully “switched
only when needed”. Any damage occurring is NOT covered by our
warranty or guarantee.
Questions? Call our Tech Support, at (800) 379-5579 ext 206 (ET).
Triangle Bit