頁面 14 – Avlex ACT-818 Wideband Single-Channel Digital Receiver User Manual
Page 14
22
23
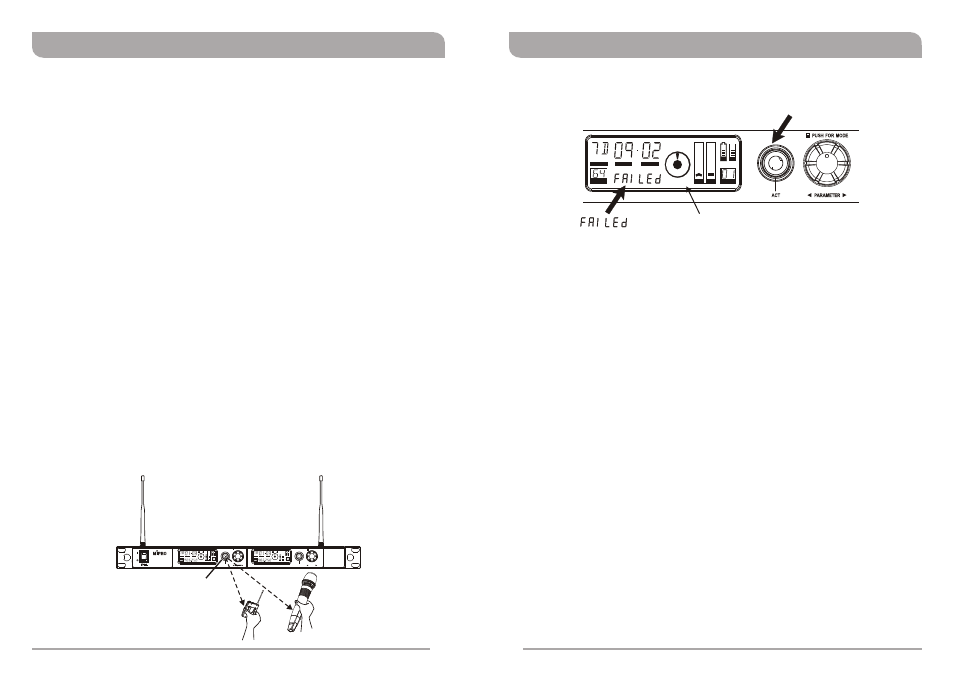
Setting ACT Transmitter Frequency
or
i
<
30
cm
(12
n
.)
GRP
CH
BAND
L
ANT
MHz ACT
RF
AF
SQ
BA
ADD
EQ
ACT
ACT
PUSH FOR MODE
PUSH FOR MODE
ACT-828
PARAMETER
DIGITAL WIRELESS RECEIVER
C H 1
CH 2
DIGITAL WIRELESS RECEIVER
GRP
CH
BAND
L
ANT
MHz ACT
RF
AF
SQ
BA
ADD
EQ
Indicates the frequencies did not sync successfully. Ensure the IR windows in both the
receiver and transmitter are lined up and can “see” each other, then press the ACT
button again.
To Activate:
Press the “ACT” button once to activate the ACT sync function. Once activated, the
words “ACT” and “Sync” on the receiver will illuminate. Flashing will stop when the IR
signal is received by the handheld or bodypack transmitter or no IR signal is received
within 10 seconds.
To Cancel:
!
When the words “ACT” and “Sync” on the receiver illuminate, press the ACT button
again.
!
When the words “ACT” and “Sync” on the receiver illuminate, do not press any
button. ACT function will stop and cancel automatically after about 10 seconds.
Instructions:
1. Ensure a receiver channel is set up (Group / Channel), the transmitter battery is
charged and the transmitter is powered ON.
2. Press the ACT button on the receiver to activate the ACT function. Once activated,
the words ACT and Sync will illuminate.
3. Bring the ACT handheld or bodypack transmitter within 30cm (12”) of the IR port on
the receiver (check your transmitter documentation to find out where the IR port is
located on the transmitter). The receiver IR port is located behind the “ACT” button
and indicated by a round dark red dot.
The transmitter/receiver frequency will sync automatically.
4. When the frequencies are successfully synchronised the words ACT and Sync will
disappear and the RF meter will immediately indicate full RF signal received.
NOTE: If encryption is turned on, the ACT function will also send a new encryption key
to the transmitter and lock it. To unlock the transmitter it is necessary to re-sync the
transmitter again using ACT with the receiver in “Encryption OFF” mode.
GRP
CH
BAND
ANT
MHz
ACT
RF
AF
SQ
BA
EQ
ADD
Press ACT button
ACT indicator illuminates
Once ACT button is pressed, it
automatically syncs the selected
receiver frequency to any MIPRO
ACT handheld or bodypack
transmitter in the same frequency
band quickly and precisely.
MIPRO'S Proprietary "ACT" Function and Operation
ACT Benefits
!
No manual frequency adjusting needed, unlike traditional transmitters.
!
Simple, fast and precise frequency setup without mechanical errors.
! Once the frequency has been set, the data is written to memory in the transmitter.
This ensures that the transmitter frequency now stays with that transmitter. That is,
of course, until a change is required. By performing the “ACT” function again, the
frequency can be re-programmed to another Group/Channel as necessary.
ACT Set-Up
!
Ensure a receiver channel is set up, the transmitter battery is charged, and the
transmitter is powered ON.
!
Press and release the ACT button on the receiver to activate the ACT sync function.
Once activated, the words “ACT” and “Sync” will illuminate.
!
Move the ACT handheld or bodypack transmitter IR window to within 30cm (12”) of
the IR port on the receiver. The IR port on the receiver is located behind the “ACT”
button itself and is indicated by a round, dark red dot. The frequency will sync
automatically.
!
When the frequencies have successfully synchronised between the receiver and
transmitter the illuminated “ACT” and “Sync” will disappear. The RF meter will now
illuminate and show full RF strength.
What is ACT?
“ACT” stands for “Automatic Channel Targeting”. MIPRO developed and patented this
innovative InfraRed (IR) technology in 2001. MIPRO was the first manufacturer in the
industry to automatically synchronise the frequency selected on the receiver to any ACT
handheld or bodypack transmitter in the same frequency band.
Wideband Digital Receivers
Wideband Digital Receivers