頁面 12 – Avlex ACT-818 Wideband Single-Channel Digital Receiver User Manual
Page 12
18
19
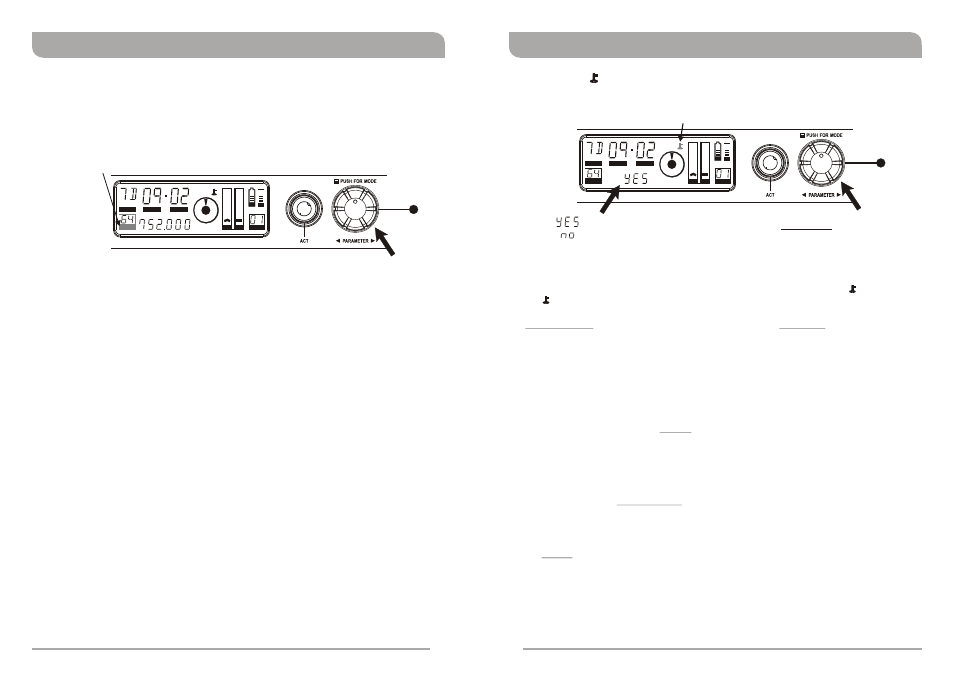
ADD: Address Setting for PC Remote Control
ADD
GRP
CH
BAND
ANT
MHz ACT
RF
AF
SQ
BA
EQ
ADD cursor starts flashing
Rotate clockwise to increase by one number (01-64)
Rotate counterclockwise to decrease by one number (64-01)
Operating Procedure:
1. Press the rotary controller to activate and move the cursor to the ADD
parameter. When the ADD cursor starts to flash, the Address is ready to be set.
2. Rotate the rotary controller clockwise to increase the Address number;
counterclockwise to decrease the Address number.
3. Press the rotary controller once to confirm and save the selected Address number.
NOTE: This receiver is equipped with an ACT-BUS interface. It allows users to use
the MIPRO-DV (interface converter) and software (sold separately with
MIPRO-DV) for remote PC monitoring. It can monitor up to a maximum of
64 channels at the same time. The receiver module address can be set
from 1 to 64. In order to monitor the system remotely, each channel must
have its own address for individual identification. If two or more channels
have been assigned the same address, it will cause confusion in the
monitoring system. If the system is not under PC monitoring/control,
identical addresses will not affect the receivers' operation.
For normal “stand-alone” use, this parameter does not need to be set. However when
multiple receivers are to be used and controlled remotely using the MIPRO optional
control software each receiver must be given a unique address. Always ensure that you
set this address before adding the receiver to the remote control network.
8
Encryption ( ): to Add or Remove Encryption
Encryption Instructions:
1. Press the rotary controller to activate and move the cursor to the icon. When
the icon starts to flash and the word “NO” appears, the encryption function is
ready to be set.
2. Press and hold the rotary controller for approximately 3 seconds until the word
changes from “NO” to “YES”.
3. Press rotary controller once to confirm and save the selected “YES” for encryption.
The transmitter now needs to be synced to the receiver using the ACT function to
apply the encryption.
NOTE:
!
Encryption is factory set by default to “NO” in the receiver (encryption OFF).
!
The transmitter can only display encryption status and cannot activate/de-
activate encryption.
!
The 128-bit encryption key is randomly generated; hence, a new, secure,
encryption key is also downloaded to a transmitter each time an ACT function is
synced successfully.
!
This means the last encrypted transmitter will work only with the encrypting
receiver. It also means that previously encrypted transmitters will not work with
the encrypting receiver even though they are on the same frequency as there
will be no audio output. This method also ensures that another similar receiver
cannot listen in to the encrypted transmitter.
Encryption icon starts flashing
indicates receiver is encrypted
indicates receiver is not encrypted
Press & hold to encrypt or decrypt
GRP
CH
BAND
ANT
MHz ACT
RF
AF
SQ
BA
EQ
ADD
" “
" "
5
Wideband Digital Receivers
Wideband Digital Receivers