Installation, Instalación – Infinity Drain WW 5 Series Installation Instructions User Manual
Page 4
4
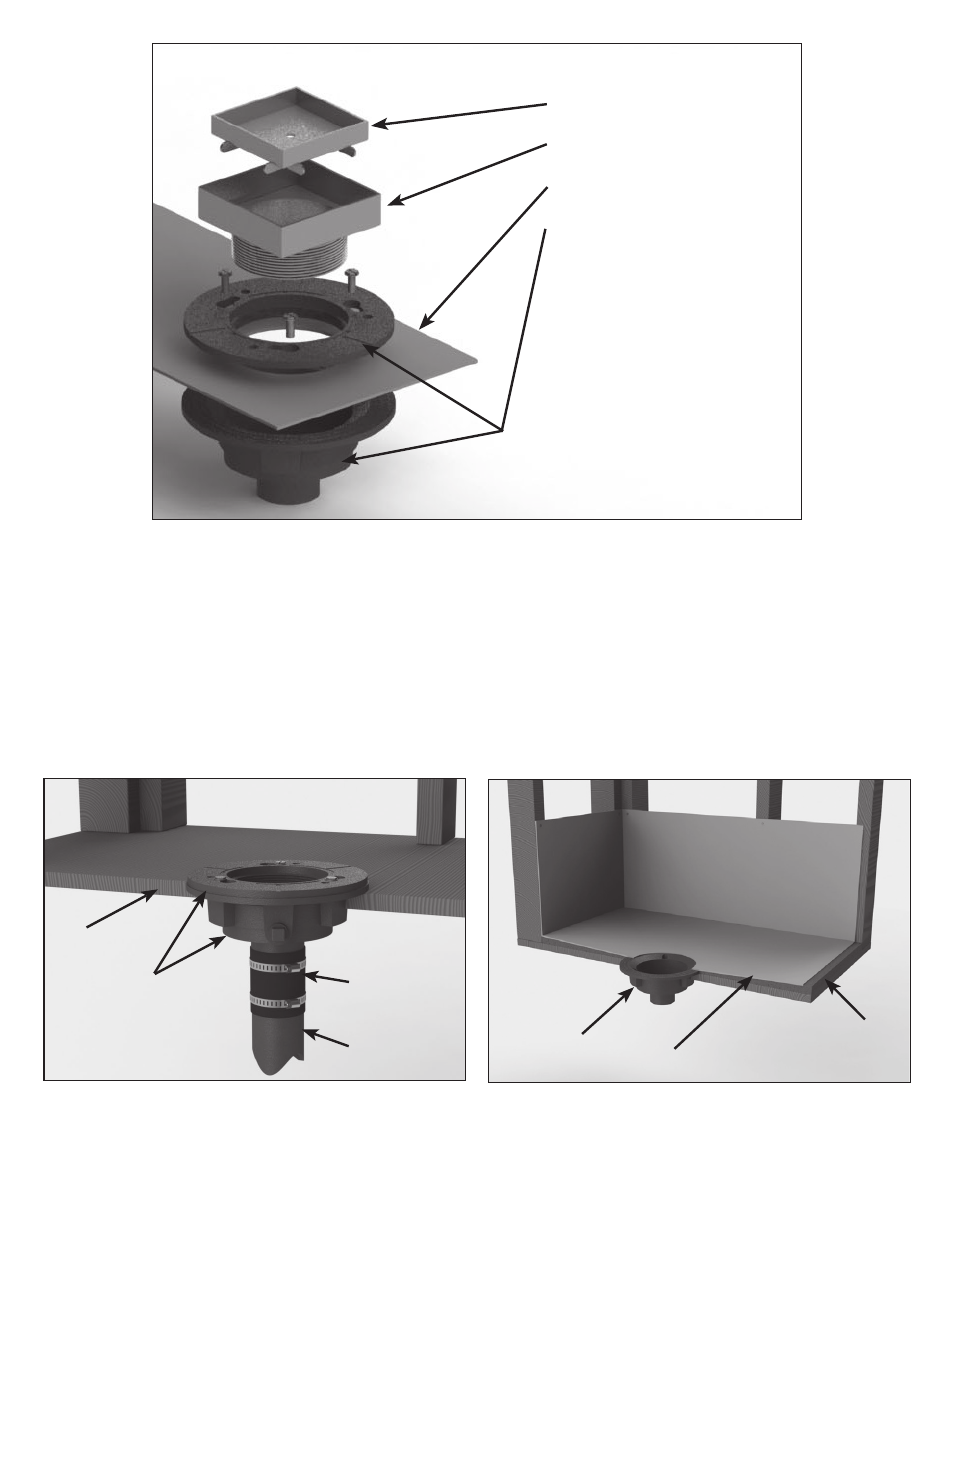
KEY
(A) Strainer
(B) Throat
Waterproofing Membrane
(C) Clamp Down Drain Assembly
CDI22/CDA22/CDP22/
CDI42/CDA42/CDP42/
CDI43/CDA43/CDP43
(C1)
(C2)
Installation
1. Connect the clamp down drain assembly
(C) to existing waste line via no-hub rubber
coupling, PVC cement, or ABS pipe cement
and allow drain body (C2) to recess into
subfloor. Ensure that drain assembly (C) is
level. Unscrew and remove top clamp down
plate (C1) from drain body (C2).
Instalación
1. Conecte la sujeción del drenaje (C) a la
existente línea de desecho a través del
acoplamiento de goma no-hub, cemento de
PVC, o tubo de ABS de cemento y permita que
la sujeción (C2) a que rebaje en el piso. Asegure
que la asamblea (C) este
anivelado. Destornillar
y remueva la placa (C1) de la sujeción (C2).
2. Spread a primary mortar bed across the
intended shower area. Pitch this bed in four
directions towards the drain body (C2).
2. Propagar una capa de mortero a través de
la zona de ducha prevista. Bree este mortero
en cuatro direcciones hacia el drenaje (C2).
3. When mortar layer is dry, perform
necessary waterproofing (PVC Liner,
Rubber Liner, Lead Pan, Copper Pan, Hot
Mop, Fiberglass) as per local code. Ensure
waterproofing layer reaches the edge of the
hole in the drain body (C2).
3. Cuando el mortero este seco, realice la
impermeabilización necesaria (PVC Liner,
Rubber Liner, Lead Pan, Cooper Pan, Hot
Mop, Fiberglass) según el código. Asegure
que la capa de impermeabilización alcance
el borde del agujero en el drenaje (C2).
(C1)
(C2)
(C) Clamp Down
Drain Assembly
Rubber
Coupling*
Waste Line
Subfloor
1
(C) Clamp Down
Drain Assembly
Waterproofing Membrane
Primary Motar Bed
3
*Not provided by Infinity Drain kits