Operation, cont’d – Extron Electronics SW AV Series User Guide User Manual
Page 30
Operation, cont’d
SW AV Series Switchers • Operation
3-10
If the +dB and -dB LED are both lit they indicate 0 dB. Otherwise, you can
determine the exact gain or attenuation using the following procedure.
1
.
If one or more input LEDs are lit AND the +dB LED is lit
, press and
release the
button repeatedly until the highest-numbered lit input
LED goes out. Count the button presses. In Example 4, assume a value
of +8 dB. It will take three presses of the
button for the Input 1 LED
to go out.
If one or more input LEDs are lit AND the -dB LED is lit
, press and
release the
button repeatedly until the highest-numbered lit input
LED goes out. Count the button presses.
If the +dB LED is lit and NO input LEDs are lit
, press and release the
button repeatedly until the +dB and -dB LED are both lit, indicating 0
dB. Count the button presses.
If the -dB LED is lit and NO input LEDs are lit
, press and release the
button repeatedly until the +dB and -dB LED are both lit, indicating 0
dB. Count the button presses.
2
.
Return to the original audio level setting by pressing and releasing the
or
button (the opposite of the button you pushed in step 1) the
same number of steps you pushed the opposite arrow button in step 1.
In Example 4
, this means pushing the
button three times.
3
.
Add the dB value indicated by the highest-numbered lit input LED (no
input LEDs lit = 0 dB) and either:
The number of button presses from 0 dB or,
The number of button presses from when the highest-numbered input
LED lit. In Example 4, Input 1 LED (6 dB) + 2 presses (2 dB) = 8 dB.
4
.
The lit +dB or -dB LED indicates the gain (+) or attenuation (-).
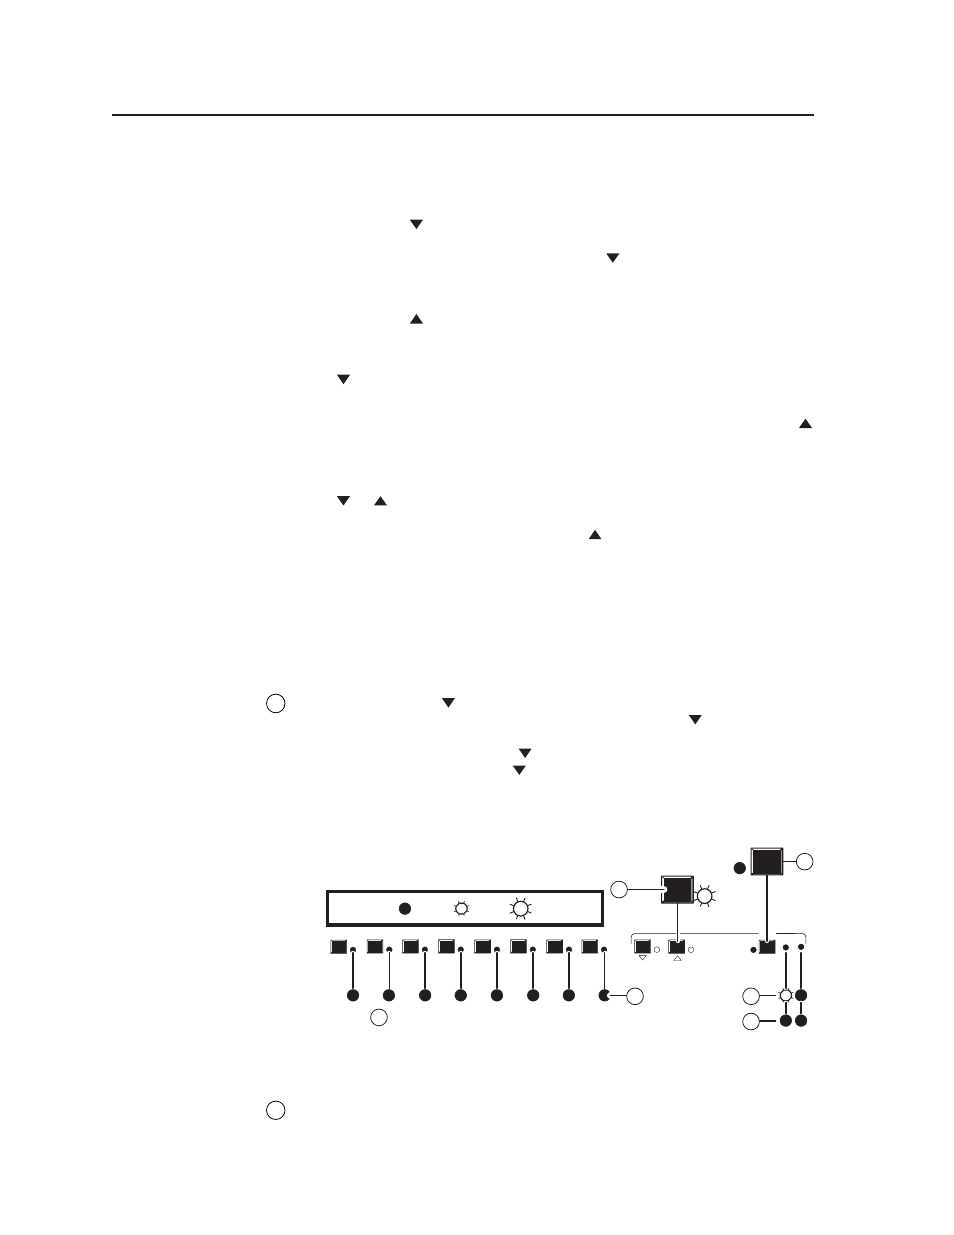
E
Press and release the
button several times to decrease the audio level
displayed in the input LEDs by 1 dB per button push. The
LED flashes
each time the button is pressed. Note the input LED, +dB LED, and -dB LED
changes that occur each time the
button is pressed and released. Figure 3-9
shows the result of pressing the
button a total of nine times to change the
value to -1 dB. Note that the +dB LED has turned off and that the -dB LED is
on to indicate a negative level.
8
7
6
5
4
3
2
1
AUDIO
CONF/SAVE
-dB
+dB
F
E
E
E
F
CONF/SAVE
LED key: = off, = on, = 1 blink
B1
B1
(9 times)
Indicates 0 dB to -6 dB range
E
Press
and hold
Press
(9 times)
Figure 3-9 — Example 4, step E: Adjusting the audio level
F
Press and hold the Audio Conf/Save button until the Audio LED goes off.
The input LEDs stop displaying the audio level range, the +dB and -dB LEDs
go off, and the selected input LED lights.