Mounting the scp to the electrical box, Installation and operation, cont’d, Scp 250 • installation and operation – Extron Electronics SCP 250 User Guide User Manual
Page 18
SCP 250 • Installation and Operation
Installation and Operation, cont’d
2-10
identically at both ends of the cable and that the
faceplate is connected to an earth ground via the wall
box or directly.
•
If power is present at the SCP, but the switcher does not
respond to the SCP’s controls, make sure the SCP’s DIP
switch settings are correct.
4
.
Call the Extron S3 Sales and Technical Support Hotline if
there is still no switcher response to changes made at the SCP.
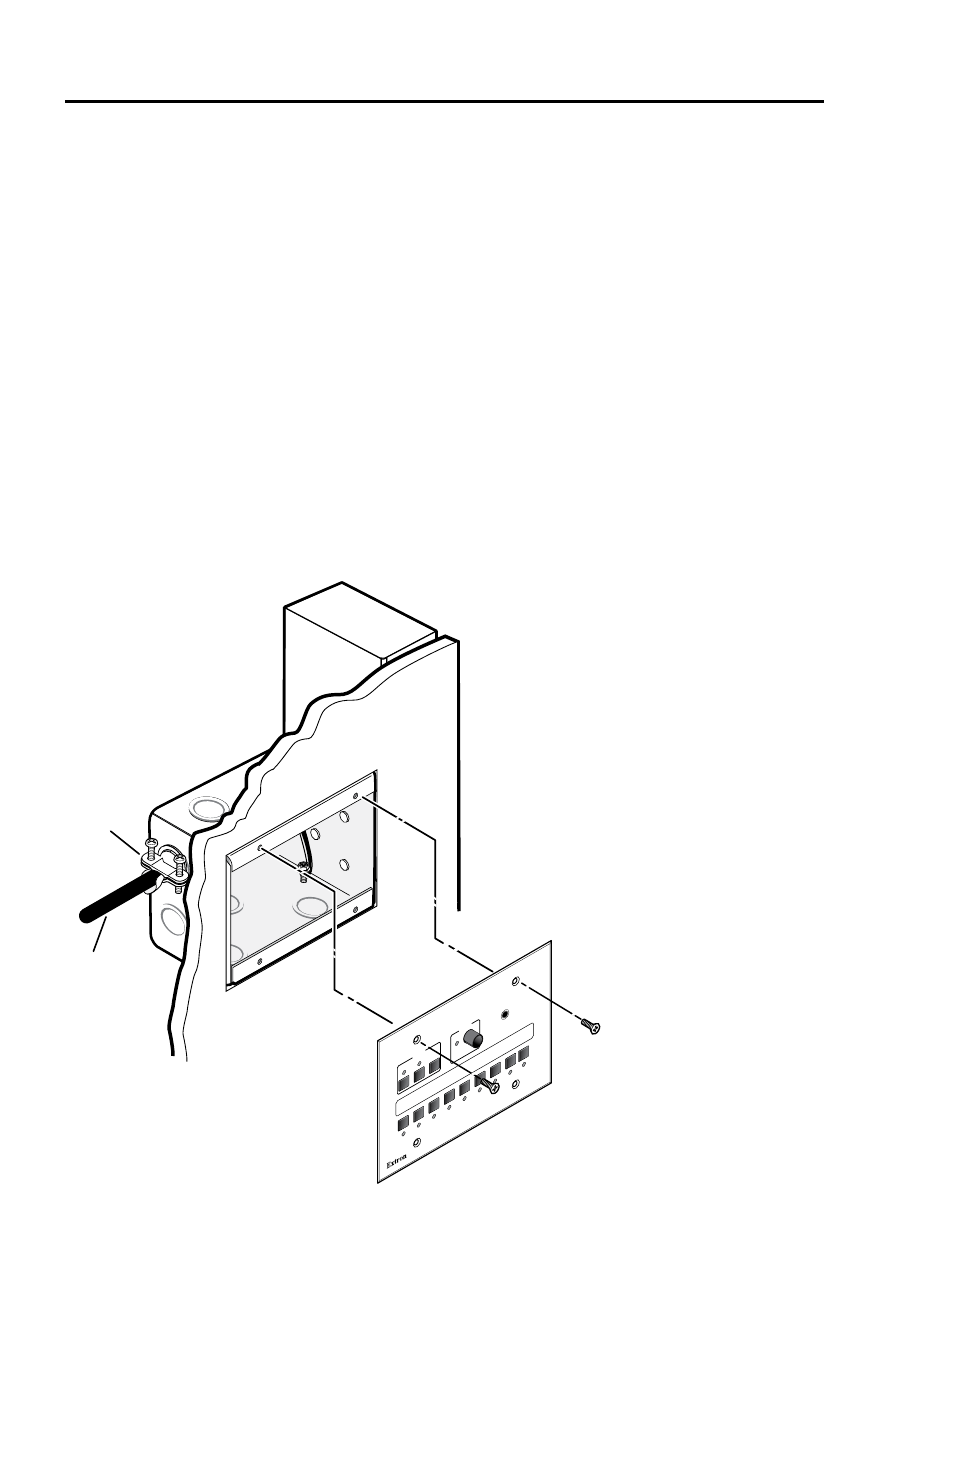
Mounting the SCP to the Electrical Box
Once the system has been cabled and tested, the control panel
can be installed in the wall or furniture.
1
.
With power removed, insert the SCP into the wall or
furniture.
2
.
Mount it to the wall box (or mounting brackets) with the
provided machine screws (as shown in the
illustration below), or attach it directly
to the furniture with wood or
metal screws.
Installation
Cable
Cable
Clamp
SCP 250
SCP 250
IR
DISPL
AY
AU
DIO
VO
LUM
E
PO
WER
MUTE
MODE
MAX/
MIN
N
If you are not
installing the SCP
into a grounded
metal wall box,
make sure that
the faceplate is
grounded to an earth
ground.
N
The SCP is shipped with a mounting bracket (mudring).
However, for an installation that meets UL standards for
safety, the SCP should be installed in a UL Listed electrical
junction box, which must be purchased separately.
3
.
Restore power to the devices.
You have completed the installation.