Extron Electronics SCP 250 User Guide User Manual
Page 11
SCP 250 • Installation and Operation
2-3
1
.
Cut out the center portion of the template. Cut up to
the dashed line if using an electrical box, or cut up to the
dotted line if an electrical box will not be used.
2
.
If wall-mounting the SCP, locate a stud to which the wall
box will be attached.
3
.
Place the wall box or mounting bracket against the
installation surface; mark the guidelines and for the
opening on the wall or furniture and cut it out;
or
...
Using the provided template, mark and cut out the
opening on the wall/furniture.
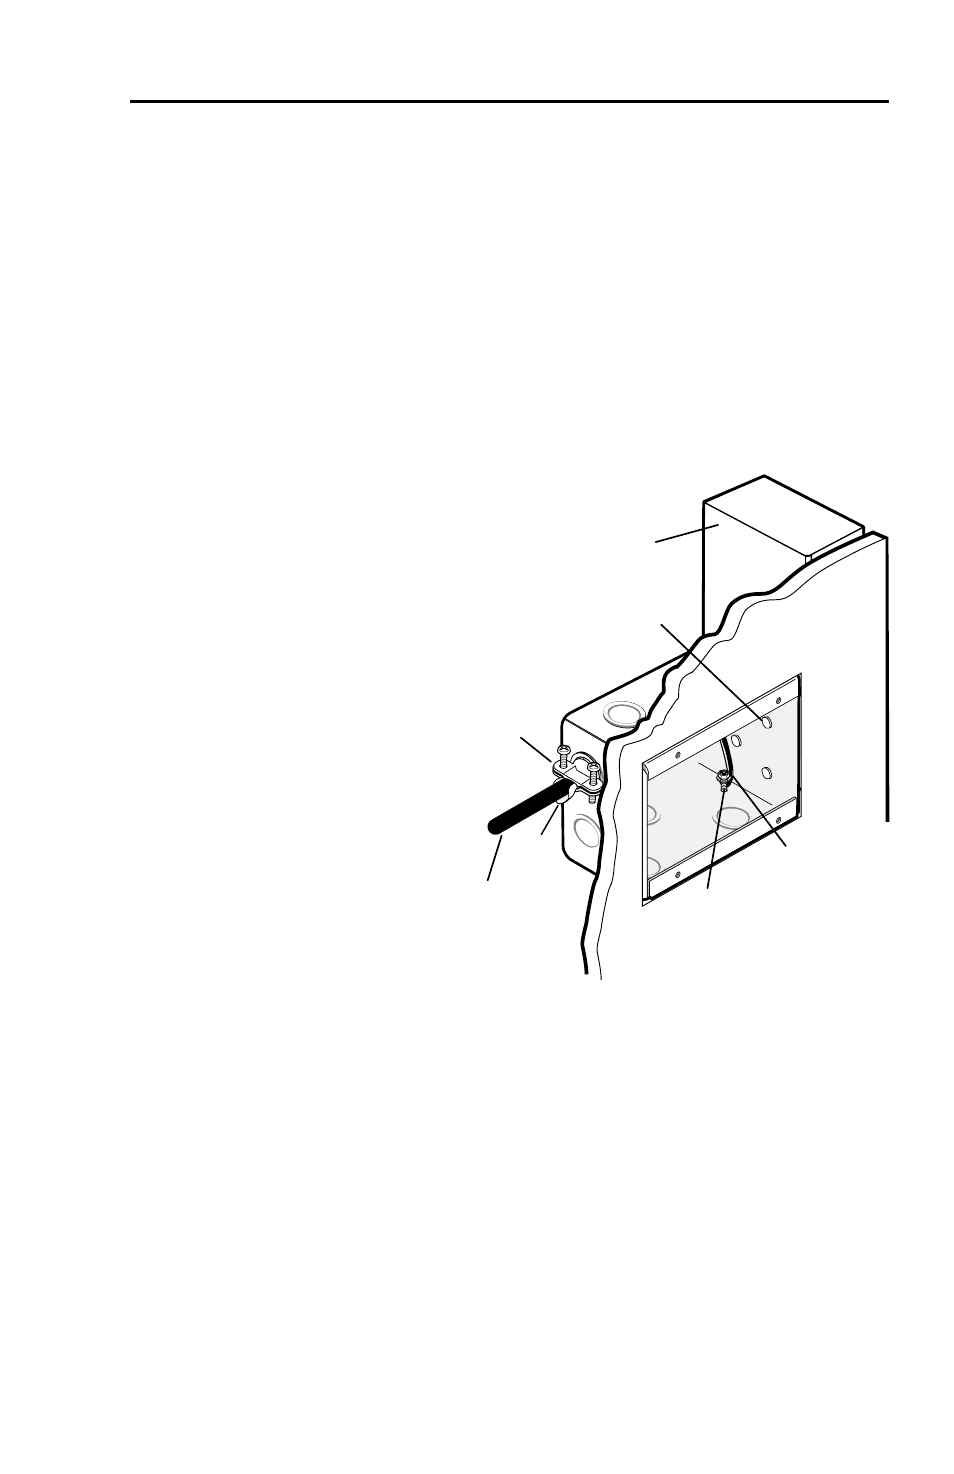
4
.
Insert the wall box (if used) into the wall, and attach the
wall box to the wall stud
(2" x 4") or furniture
with nails or
screws,
leaving the
front edge
flush with
the wall
surface, as
shown in
the
illustration
at right.
Installation
Cable
Cable
Clamp
Wall Stud
Foil
Shield
Screws or Nails
Screw
Braided
Shield
3-gang wall box grounding.eps
To attach the wall box to wood, use four #8 to #10 wood or
sheet metal screws. A minimum of
1
/
2
" (1.3 cm) of screw
threads must penetrate the wood. If the wood is a 2 x 4,
such as a wall stud, 10-penny or larger nails can be used.
To attach the electrical wall box to metal, use four #8 or
#10 sheet metal screws (self-tapping) or #8 or #10 machine
bolts with matching nuts.
If mounting brackets will be used instead of a wall box,
follow the mounting instructions that came with the
brackets.
5
.
Feed cables through the wall box’s punch-out holes, and
secure them with cable clamps to provide strain relief.