Extron Electronics IN2160 User Manual
Page 6
2
IN2160 OPERATION MANUAL VERSION 1.1 09/05/00 ©1996, 1997 - INLINE, INC.
INSTALLATION
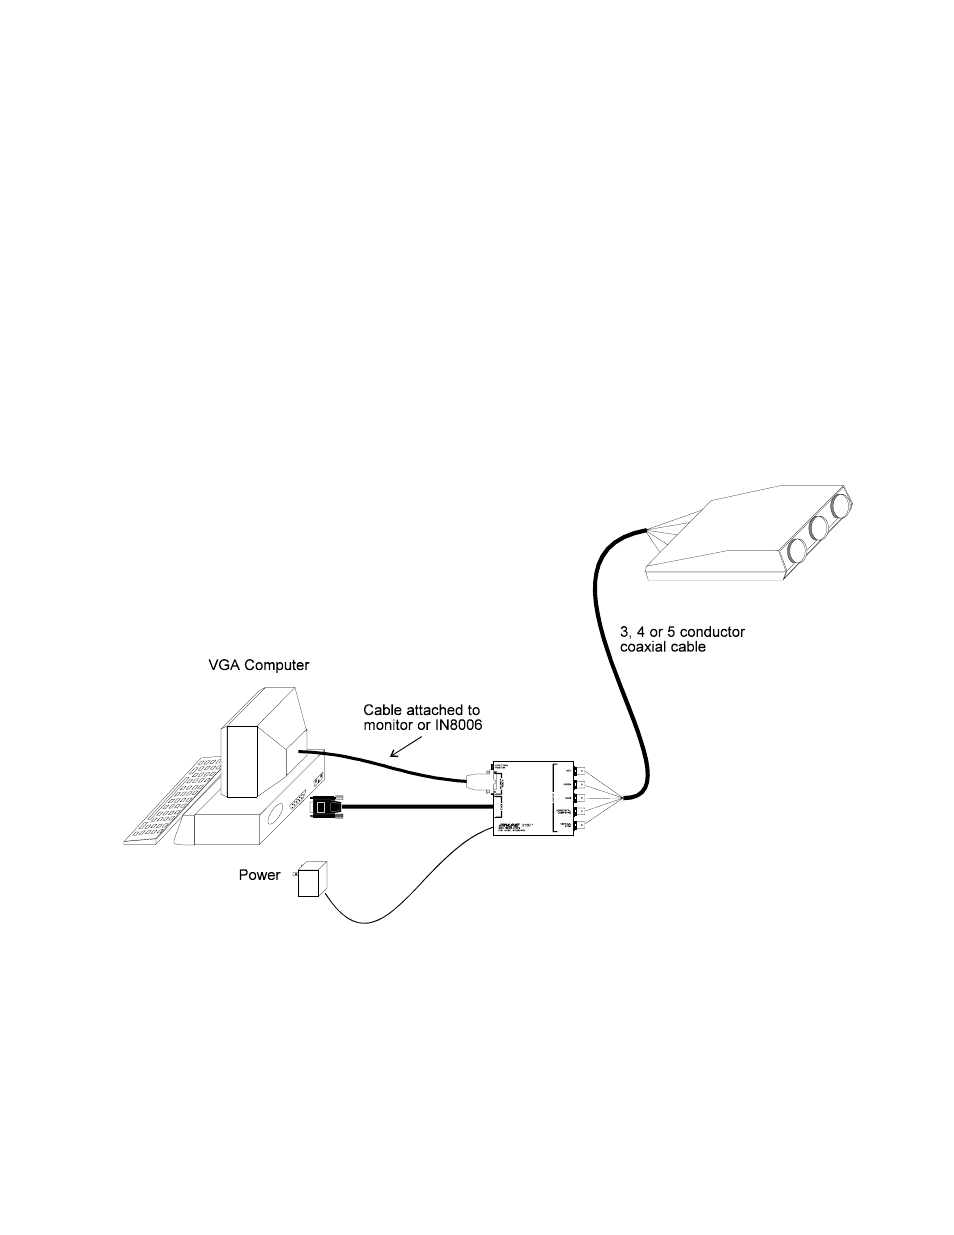
This section offers step-by-step instructions for installing the IN2160. See the diagram below.
1. Turn the computer and computer monitor off. Disconnect the computer monitor (if present) from the
video output port on the computer.
2. Connect the input cable of the IN2160 to the output of the computer.
3. Connect the local computer monitor (if present) to the local monitor output of the IN2160. If no
local monitor is used, set the monitor emulation dip switch to emulate a color VGA monitor.
4. Connect
the
IN2160 output (5 BNC connectors) to the data display device’s RGB input, using three,
four, or five high resolution BNC cables or a multi-conductor RGBHV, RGBS, or RGB "snake". The
IN7000 Series, IN7100 Series and IN7200 Series high resolution cables are well suited for this
purpose. Take care while making connections to insure that the red output is connected to the red
input, green output to the green input, etc.
5. Set the dip switches for the requirements of your installation. The IN2160 factory default output
format is RGBHV. If your display device, routing system, or cabling require a different format, use
the dip switches to change the output signal to RGBS or RGsB as desire.